Pictures made from cereals for children are easy to make, and in finished form they are well suited for most interiors. Such creativity calms the child's nervous system, develops fine motor skills and imaginative thinking.
Tools and materials
Paintings, made from cereals, for children have cardboard, board or plywood as a base - any hard and thin enough surface on which it is easy to glue cereals and other components.
If you plan to use liquid glue, such as PVA, then it is recommended to choose denser materials, such as plywood, as a base so that the base does not soften and the finished picture turns out smooth.
In addition to the base, you will need other materials for creativity.
| What is needed | Example | For what |
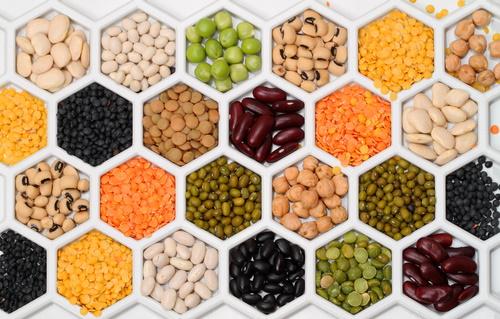
| Cereals |
| Filling the drawing and giving it different textures. |
| Additional decorations |
| They dilute the uniform layer of cereals or grains, making accents. |
| Tool for applying materials |
| Most of the work is done by hand, but small pieces may be attached to the painting using tweezers to gently push the material onto the glue. |
| Image creation tool |
| Before the gluing process, the outline of the future painting is drawn on the base. |
| Paints |
| For coloring fragments of the painting. |
| Adhesive and fixing material |
| For attaching cereals and other elements to the base, as well as for fixing finished work. |
| Frame |
| Place the finished painting in a frame to give it a finished look. |
Master classes
Before starting work, prepare all the materials for the work. Then choose a suitable base for the painting and apply the drawing to it, which will be filled in. The outline is made with a simple pencil, pen or felt-tip pen.
It is more convenient to work with a pencil so that there is an opportunity to correct unsuccessful lines. The outline should be neat and barely noticeable, therefore, for convenience, carbon paper can be used.
When the outline is finished, select the grain to work with. Pay attention to its volume and color, since different parts of the drawing should be visually different. Select the required amount of grain.
If necessary, the grain is dyed. To do this, it is sorted, removing impurities, the grains are poured into a container and dye is added, mixed until all the grain is evenly colored. The grain is poured onto paper with a bloody layer and waited for it to dry. The grains are periodically stirred so that they do not stick together.
Start filling in the sections of the picture by putting the grain on the glue. Fill in the sections in parts so as not to get dirty in the process and so that all the fragments dry completely and do not mix. To make the outline more even, use tweezers or a toothpick.
The finished drawing is completely dried and then they start covering it with varnish for shine. For this, use regular artistic varnish. It is recommended to use aerosol varnish for ease of application. If several layers are applied, then wait until each previous layer of varnish is completely dry.
Vase with flowers
A simple version of creating a picture from cereals in the form of a still life with a bouquet of flowers.
The process will require:
- cereals (peas, corn, buckwheat, rice, popcorn);
- cardboard;
- frame;
- varnish;
- simple pencil;
- ribbons or birch bark;
- glue;
- dry sprigs of greenery, or green paint for coloring the cereal.
Pictures from cereals for children are made in the following order:
- The cardboard is adjusted to the size of the frame and the inner contour is traced with a pencil so that the visible part of the future painting is clear.
- Draw the outline of the vase and flowers with a little pressure. Mark the horizontal line of the table, and use hatching to indicate the checkered tablecloth.
- Apply a layer of glue to the borders of the vase. Try not to go beyond the boundaries of the drawing. Pour buckwheat onto the layer of glue, wait for the layer to dry and shake off the excess grain.
- All the following areas that are worked with are first coated with a layer of glue and a layer of cereal is laid on top. Each time, wait for the layer to dry. The upper and lower parts of the vase are decorated with polka dots.
Using glue, draw a grid on the tablecloth and also cover it with polka dots, gluing them tightly to each other.
- Gradually fill each section of the grid, coating it with glue and filling it with rice grains.
- Fill the large empty area above the table with glue and sprinkle corn grits on top.
- Flowers are decorated with rice grains and popcorn. The bouquet is supplemented with peas in several places so that the image gets a finished look.
- To freshen up the picture, add a little green to the bouquet. This is done by coloring the grains, or using dried twigs. Leaves in the bouquet are shown with pieces of birch bark or ribbons.
- They put the finished painting into the frame.
- Cover the image with varnish.

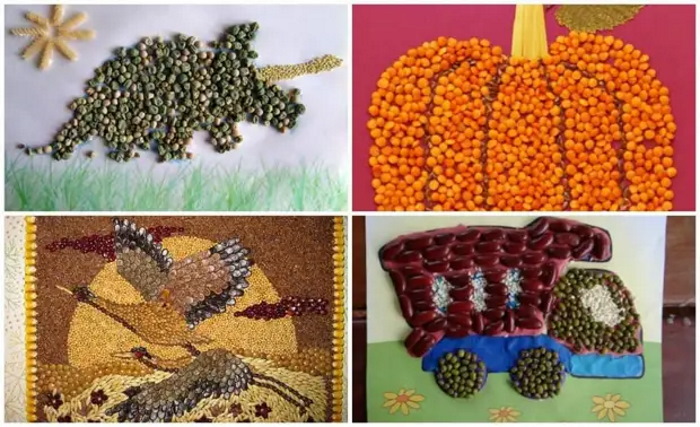
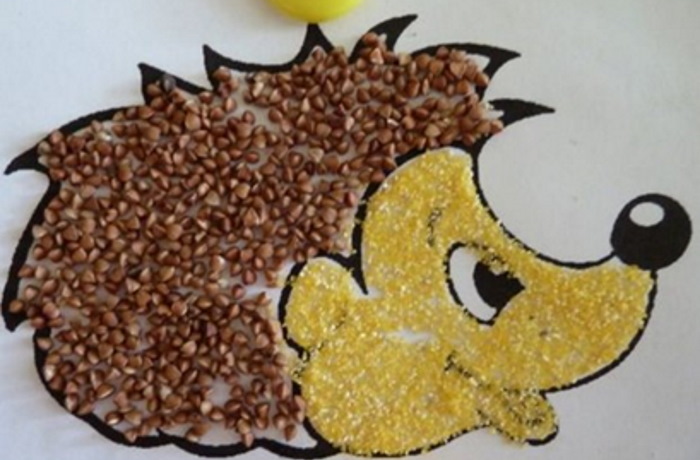
Hedgehog: Master Class for the Little Ones
Pictures from cereals for children can differ in the level of complexity. For working with children aged 3-5 years, a simpler version is required, where a ready-made drawing on paper or cardboard is used as a basis.
The drawing is prepared in advance - they draw or use a printout for coloring. So, the child does not need to waste time on creating the outline of the picture, he can immediately begin the process of application. If desired, the finished picture can be attached to cardboard and placed in a frame.
The process will require:
- glue with a brush;
- cereals (buckwheat, millet or corn);
- varnish.
The process of working on a painting includes the following steps:
- The child is given a printout with an image of a hedgehog (they can use a different base for the work) and is explained that the glue should be used with a brush, painting the zones in turn.
- Cover the hedgehog's body with glue, trying not to let the brush go beyond the outline. Sprinkle the glue with buckwheat on top and wait for the glue to dry, then blow off or shake off the excess grain.
- Cover the hedgehog's face with glue and sprinkle it with millet or ground corn.
- Wait until the glue is completely dry and cover the drawing with varnish.
- If necessary, glue the drawing to cardboard and insert it into a frame.
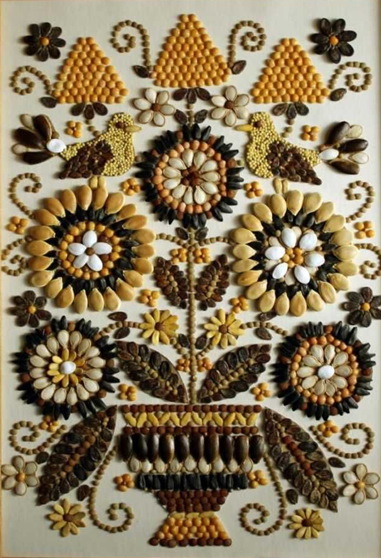
Still life in ornament
An option for making a picture from cereals for children of primary school age, since the process takes more time and requires more perseverance. Such a picture with an ornament can serve as a decor in the interior, especially, complemented by a wooden frame.
To complete this lesson, children can repeat the ornament, replace something, or introduce new elements at their discretion. You can also use this lesson as an example of work, but use a completely different ornament for the base, for example, folk patterns.
Materials required in the process:
- cardboard;
- frame;
- glue and brush;
- varnish;
- simple pencil;
- cereals (peas, chickpeas, pumpkin and watermelon seeds, millet, peeled and shelled sunflower seeds, unpopped popcorn).
The process of composing the picture is as follows:
- The cardboard is adjusted to the size of the frame and the inner borders are marked with a pencil so that the ornament is placed exactly in the center. The outline of the ornament is drawn with a pencil with light pressure.
- It is recommended to start working with large fragments, gradually moving on to the next ones. Each time, wait for the layer of glue from the previous section of the painting to dry.
- The area with the image of the vase is treated with a layer of glue using a hard brush. The rows of the vase and the stand are filled in layers, alternating cereals of different colors and sizes.
- Grease 5 circles for flowers with glue, and starting from the middle, lay out layers of a larger circle. The layers also alternate in different colors and sizes. In different layers, grains and cereals can also alternate each other. All flowers can be different or symmetrical relative to the center.
- The main stem is shown and the side flowers are connected to it. To do this, a path is laid out from pea or chickpea halves.
- On the sides of the stem, place leaves made from sunflower, pea or chickpea seeds. To make the background under the image of leaves contrast, dried plant leaves can be used as a base.
- They begin to form the figures of birds on the upper symmetrical flowers. They try to make the figures identical. The body is filled with millet, the tail is made from pumpkin and sunflower seeds, the wings from watermelon seeds. The beak and paws are made from peeled sunflower seeds, the eyes are chickpeas or peas.
- In the upper part of the composition, 3 inflorescences are filled with pea halves or corn grains. The inflorescences are supplemented with shoots and stems of chickpeas, leaves in the form of watermelon seeds.
- The composition is supplemented with images of curly shoots in different places from chickpeas, small flowers from watermelon seeds, pumpkin seeds, peeled sunflower seeds and corn seeds. They make sure that each added element is repeated in the second half of the composition.
- When the composition is ready, wait until it dries completely and cover everything with varnish.
- They put the finished painting into the frame.
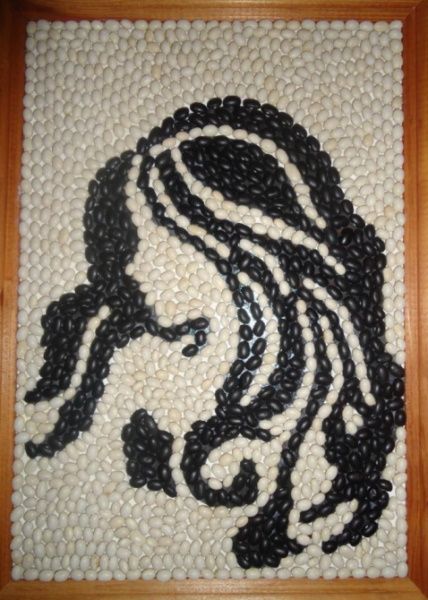
Picture "Fish"
Pictures from cereals for children can be done together with parents, so that the finished work is neater and the process more interesting. Parents can help the child with the selection and image of the outline on the cardboard, as well as evenly apply glue and cereals during the work.
The following materials are used in the process:
- cardboard;
- glue and brush;
- cereals (millet, buckwheat, peas, rice);
- varnish;
- tweezers or toothpick;
- simple pencil.
In this example, an image of a fish is used to create a picture. It can be changed at your discretion, as well as the materials for filling. Following the example of this work, the child can then independently draw the outline of the picture and repeat the applique.
They put together a picture step by step:
- Draw the outline of the fish on the cardboard with a simple pencil. Try not to press too hard with the pencil so that the outline is not visible in the finished work. Make sure that the outline is even, and correct it if necessary by erasing any imperfections with an eraser.
- The main outline is outlined with a thin layer of glue and covered with a line of buckwheat using tweezers or a toothpick. Carefully lay out grains in a row so that the outline is even.
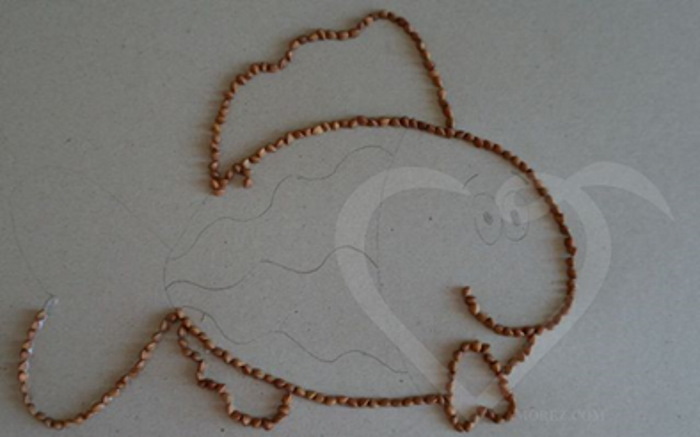
Pictures from cereals, seeds with your own hands. Fish - They begin to gradually fill each separate section with glue and cover it with grain. They try to cover adjacent sections with different types of grain, even if they are separated by a buckwheat outline, so that the drawing visually has different textures. Each section is filled only after the previous one has dried. To ensure that the grains fit tightly and neatly against each other, use tweezers or move the grains with a toothpick.
- They make sure that the grains have not only different textures, but also different colors, so that the drawing turns out more interesting. The fish's eyes are made in the form of peppercorns.

- To make the drawing look complete, air bubbles can be drawn next to the fish and filled with rice or corn grits. The background is filled last. To create an association with water, any small grains are pre-painted blue or light blue and all the remaining empty space is filled.
- The dried painting is covered with varnish. If desired, the painting is put into a frame.
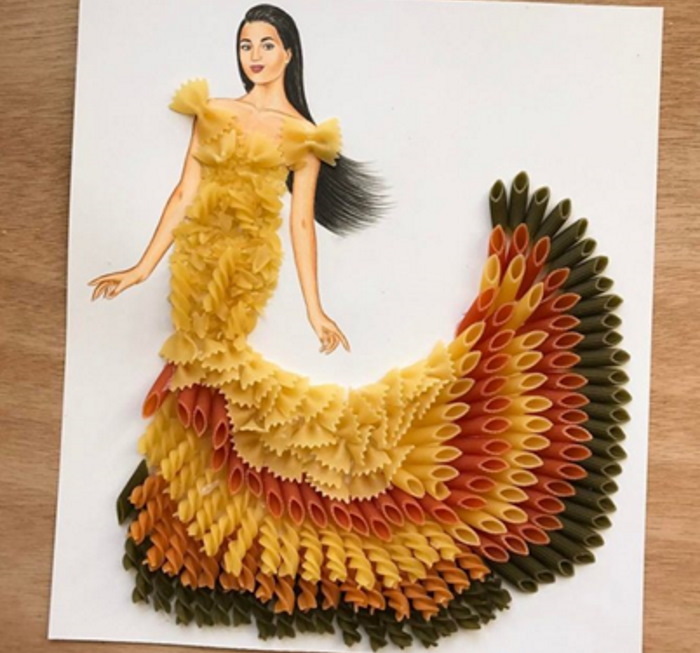
Princess Dress
Cereal pictures for children can be adapted to the interests of boys or girls. For example, girls aged 5-7 years may enjoy the process of decorating clothes for their favorite cartoon or fairy tale heroine. To do this, parents first print out an image of the desired character on paper or cardboard.
This example shows a tutorial on how to make a princess dress from different types of pasta, but if desired, these materials can be replaced with other cereals or grains.
The process will require:
- ready-made image of the princess;
- glue and brush;
- pasta of different colors and textures;
- varnish;
- cardboard and frame (for framing the painting).
The princess dress is designed in the following order:
- Apply glue to the top of the dress and cover it with pieces of regular macaroni to create the effect of a narrow flat dress. The shoulder straps are designed to look like macaroni bows.
- Start to design the fluffy skirt. Work in rows, alternating different colors of straight tube macaroni to create the effect of a multi-layered fluffy skirt with a train. Apply a layer of glue to the very bottom line of the skirt and lay out the dark macaroni. The row of macaroni can change from straight to spiral, as shown in the example.
- Apply the next layer of glue to the skirt, above the level of the dark macaroni. Apply some of the glue to half the level of the macaroni from the previous layer. Glue the red macaroni, placing them on top of the dark ones.
- Repeat the algorithm of the previous step, gluing regular pasta.
- Fill the required number of layers in this way, alternating layers at your discretion. The last layer of the skirt is covered with a layer of bow-shaped macaroni or pieces of regular macaroni, as for the base of the dress.
- The finished painting is varnished and, if desired, framed.
Scenery
Parents can offer their child to draw any subject on the picture – a landscape, a still life, and even a portrait. To make the process as creative as possible, the child can come up with an image on their own, rather than using a ready-made outline from examples.
The simplest option is considered to be a landscape. In most cases, children draw landscapes with pencils, felt-tip pens or paints - a house, the sun, a meadow, trees, clouds, etc. A similar drawing can be made using cereals.
The process will require:
- a sheet of paper or cardboard;
- frame;
- glue and brush;
- tweezers or toothpick;
- cereals (pasta of different types and colors, buckwheat, millet, oatmeal, semolina, peas);
- paints;
- pita;
- varnish.
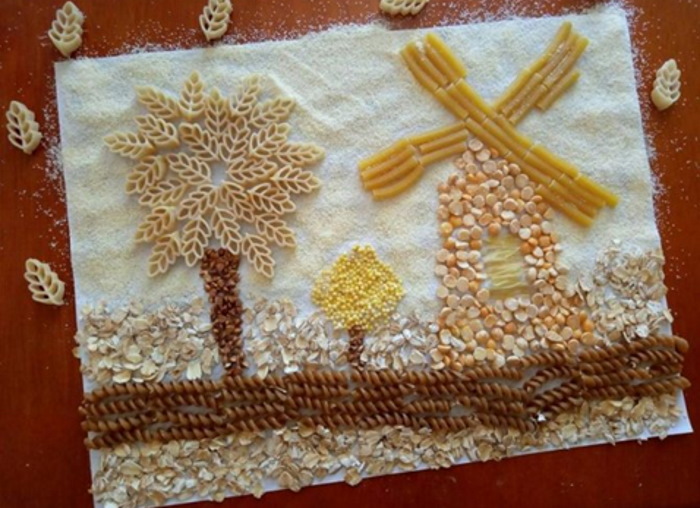
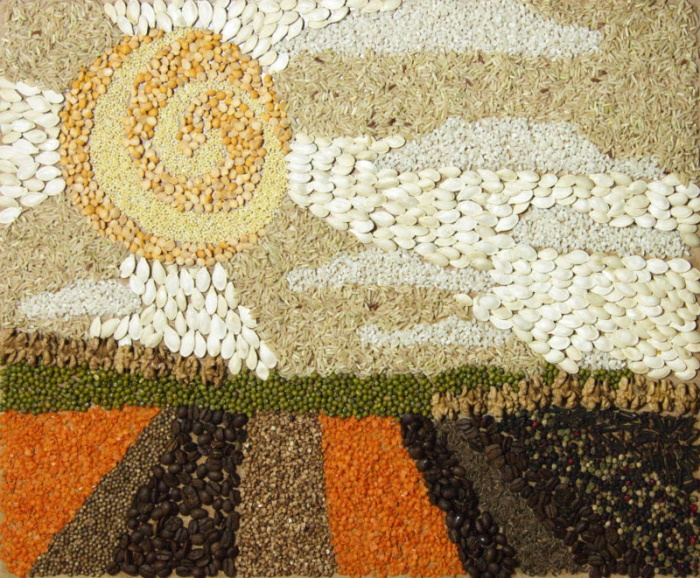
This example shows a mill in a meadow with trees. If desired, you can use this plot or supplement it with other elements.
The painting is completed step by step:
- The plot of the painting is drawn with a pencil – the horizon line, the mill, trees and bushes.
- They start to gradually glue individual fragments. The building of the mill is covered with a layer of glue and sprinkled with peas. The window is filled with a square of lavash or filled with millet. The windmills on the roof of the mill are imitated with pasta tubes.
- The soil is filled with a horizontal strip of dark-colored pasta.
- The tree trunks are filled with buckwheat, the foliage is shown with millet and fancy pasta.
- The grass around the trees and near the ground line is shown with oat flakes. If desired, the flakes can be pre-painted with green paint.
- All free space is filled with semolina, which can be pre-painted light blue or blue. To show clouds, unpainted semolina can be used.
- The finished painting is dried, varnished and, if desired, framed.
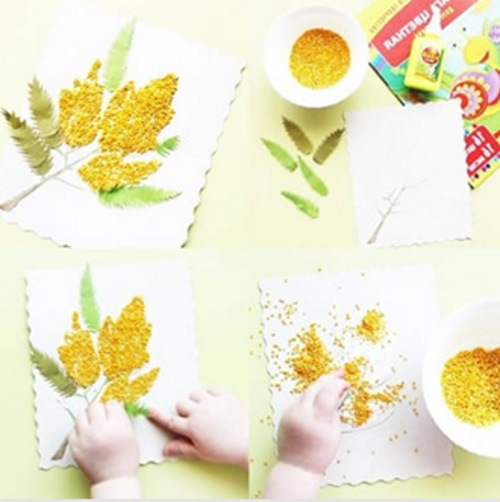
Mimosa
Children often make handicrafts in anticipation of various holidays. Therefore, a picture with a mimosa or other flowers can serve as a greeting card for March 8.
The following materials will be required during the process:
- cardboard;
- glue and brush;
- paper napkins;
- dried green leaves;
- millet, ground corn or peas;
- varnish.
A congratulatory picture made from cereals is made step by step:
- The cardboard is cut out in advance so that the postcard has shaped fields, or the sheet of cardboard is folded in half.
- Using a pencil, outline a drawing of a blooming mimosa.
- The greenery leaves are imitated with dried twigs, which are glued with a brush. To ensure that the greenery sticks evenly to the cardboard, the leaves are carefully pressed down with a paper napkin.
- Apply glue to the place where the mimosa blooms and fill this space with cereals.
- Wait until the image is completely dry and cover it with varnish. If desired, decorate the mimosa branch with ribbons, beads or other types of cereals.
- A congratulation is written on the back of the cardboard or inside the card.
It is recommended to start painting from cereals with simple drawings in the form of an ornament or a simple figure. This is especially true for children aged 4-5 years, when creative activities with a child do not take much time, so that he does not get tired and does not lose interest in the process. Gradually, the level of complexity of the drawing is complicated, or this format is immediately used for older children.
Video on how to make a picture from cereals
How to easily make a picture from cereals with your own hands.