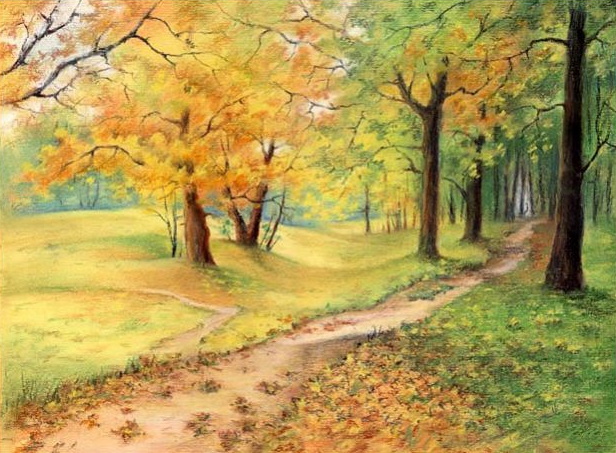
Autumn is a picturesque time of year that can be depicted on paper. You can draw not only with watercolors, but also with pencils. Even a novice artist can draw, this does not require special skills and abilities. Based on various master classes developed by teachers, you can create a beautiful image.

Drawing tools
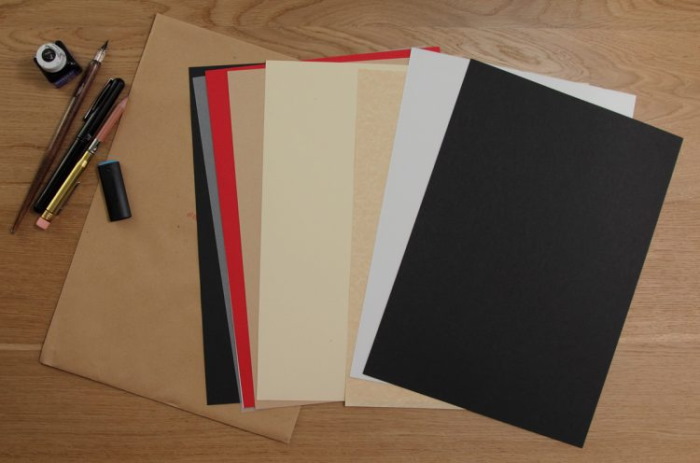
Before you start drawing, you should prepare the necessary tools for work.
Although drawing does not require any specific tools, it is recommended to purchase:
- pencils;
- sharpener;
- erasers;
- paper.
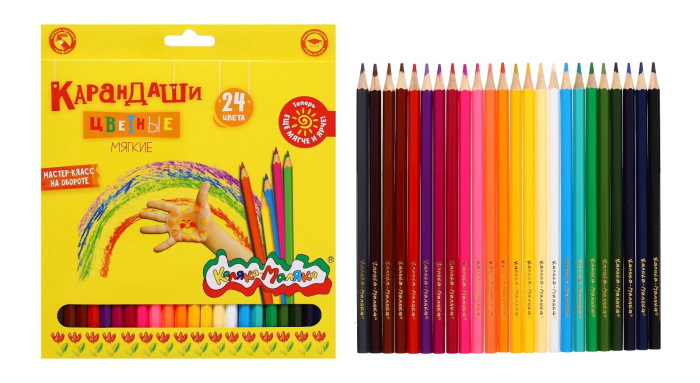
Pencils
To draw an autumn picture, you will need simple pencils. The leads of such pencils can differ in hardness: the softest is 9B, medium hardness is HB, the hardest is 9H.
By choosing pencils of different hardness, you can convey shades of gray. Charcoal pencils are purchased to give volume to the work.
The table shows the main manufacturers of colored pencils that can be used to work on autumn motifs.
| Pencil maker | Brief description, advantages |
| Brauberg | A manufacturer of watercolor pencils that is popular in Russia. Many people note the affordable price and good quality. Each pack contains 24 brightly colored pencils, which can be used to draw with or without water. The pencils can be used on any paper, are easy to sharpen, and will last a long time. |
| Staedtler Noris Club | Despite the fact that these watercolour pencils are made in Germany, their price is not that high. According to the manufacturers, the product is durable, so they almost never break.
Another advantage is that the box with pencils includes a brush, which can be used to blur the details of the painting drawn with pencils. The brush is also of high quality, it is suitable for both beginners and more experienced artists. |
| Scribble Malika | The most suitable option of watercolor pencils for schoolchildren and preschoolers. The set includes 12 or 18 colors of pencils that do not contain substances harmful to children.
They can be either washed with water or painted using a dry technique. |
| Sonnet | Dry pastel pencils produced in St. Petersburg are also popular among artists. Both children and adults can draw with them. The pencil can be easily sharpened and does not break. |
| Cretacolor | Each box contains 8 almost identical shades that go well with each other. To get a full palette, you can buy several sets of pastel pencils from this company.
The advantage of the product is that the pastel does not scratch or tear paper. They are sharpened with a stationery knife or sharpener. |
| Dervent Pastel Pencils | The main advantage is the large number of colors in one box: a wide and well-made box is divided into 3 sections, each of which contains 30 pastel pencils.
The leads of each pencil are thick, which makes them more convenient to work with. You can note the bright color and ease of application to a sheet of paper. |
| BIC Evolution Triangle | Slate pencils are designed for children because they are very durable, colorful, and have a shape that fits comfortably into a child's small hand.
The pencils do not cause allergies, are pleasant to the touch and practically do not break. |
| STABILO Trio | The product is packed in a plastic box, which can contain from 6 to 24 colors. The convenient shape allows both children and adults to use pencils.
The advantages of pencils from this manufacturer include brightness, color saturation and durability. |
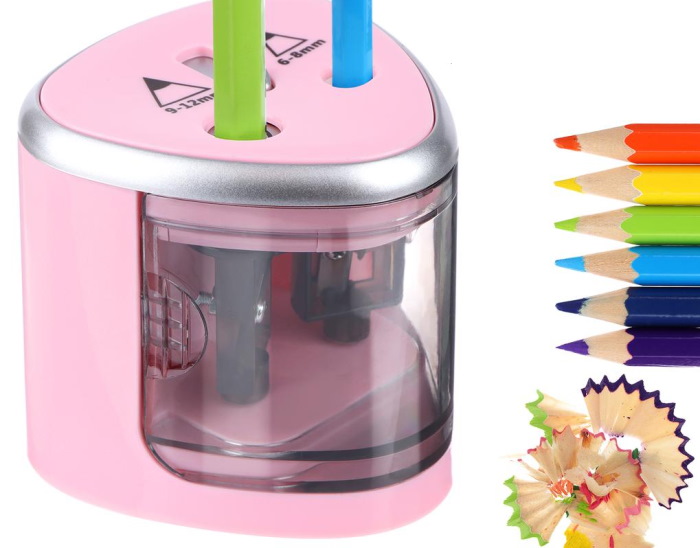
Sharpeners
When choosing a sharpener, you need to pay attention to the following features of the tool:
- Sturdy body made of metal, not plastic; steel blade.
- Strong connection of the elements that make up the sharpener.
- Convenience: the sharpener should fit well in your hand and be light.
- Safety: The blade should not protrude to avoid cutting your fingers while working.
- Price: As a rule, a low price is reflected in the quality of the sharpener, since all cheap tools can quickly break and ruin pencils.
- An electric sharpener must have more than 1 power source.
- An electric sharpener should also not slide on the table while sharpening a pencil.
Erasers
Erasers made of vinyl do not deteriorate and last longer than rubber ones. The eraser does not damage the paper and does not cause crumbs to appear on the sheet.
Rubber erasers are more natural in composition, they are quite flexible, their top layer is easily erased. For this reason, you should buy them for working with thick paper. In addition, a rubber eraser helps to remove traces of both colored and simple pencils.
The disadvantage of rubber erasers is that they can dry out and crust over. Erasers with added artificial rubber are very soft and crumble easily, but they can rub off the pencil from the same place on the paper.
The rubber eraser is universal, almost does not crumble and can be used for ordinary pencils. A significant disadvantage of such an eraser is that it can damage the paper.
In addition, it is necessary to choose erasers of dull colors so that they do not stain the paper when used.
Paper
Smooth paper is considered the most suitable for pictures drawn with graphite pencils. The paper for such pencils should be thick, since drawing on such paper may require frequent use of an eraser. The approximate density is 90 - 110 g / m2.
Writing paper can be used by beginner artists, since the eraser hardly damages it. In addition, the paper density is medium, and the sheets have a slightly yellow tint.
Graphic paper is slightly grainy and contains cotton and cellulose. The paper weight can be around 250 g/m2Drawings on writing paper can also be erased several times, and this will not affect the quality of the work and the finished work.
For drawing with colored pencils, you can purchase watercolor paper, which does not blur when exposed to water.
To make the painting last longer, it is recommended to choose acid-free paper. It will not fade, turn yellow or delaminate.
Master classes
You can draw autumn with a pencil using various master classes, which are designed not only for children, but also for adults.
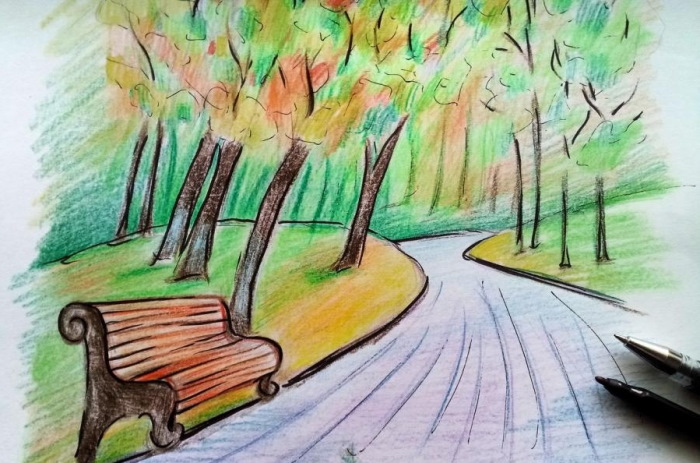
Park
To draw you will need the following tools:
- white paper;
- a simple pencil (for drawing sketches);
- eraser;
- black pen;
- black marker;
- colored pencils.
Both experienced and novice artists can draw autumn with a pencil:
- You need to start the drawing with 2 ovals connected by a horizontal line at the top.
- There will be a bench on the right, the silhouette of which needs to be drawn. On the path in front of the bench, draw vertical rounded stripes.
- Add details to the bench by drawing the railings and boards.
- Add tree trunks to the drawn ovals, tilting them slightly. If desired, you can add a few branches.
- Finish drawing the general outlines of the leaves on the branches, adding a few maple leaves to the path.
- Start drawing with colored pencils: draw the road in purple and blue. Make the contours on the side of the road purple.
- Paint the bench parts brown. Paint the boards yellow first, then use red to add an outline.
- Partially paint the leaves yellow, green, light green and orange. The background will be dark green.
- Paint the areas with trees yellow, orange and green. It is very important to make a smooth transition between shades.
- Draw the remaining details of the foliage, paint the trunks and branches dark brown.
- Draw the leaves in orange and green. Finish drawing the road in blue, adding contrast.
- Using a black pen or marker, outline the autumn design to complete the work.
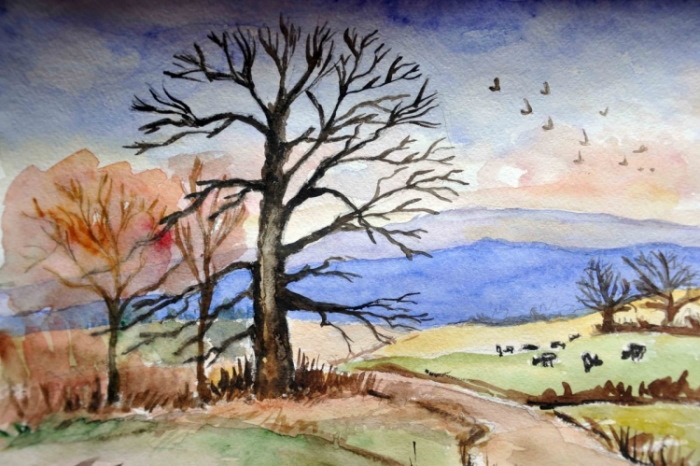
Late autumn
You can draw autumn with a pencil without using bright colors.
Using only a simple pencil and an eraser, even a novice artist can depict late autumn on a sheet of paper:
- Mark the horizon on the sheet and draw the perspective with a diagonal line.
- In the foreground, sketch the tree trunks. The trunks should be of different sizes and slightly inclined.
- To make the drawing more realistic, draw a coastline that goes into the distance. You can replace it with a path or a road.
- Add the second bank of the river or the edge of the road to the drawing.
- You can also add small details, mark the base of the trunks with wavy lines, mounds. They help create the appearance that the trees are growing in the ground.
- If desired, you can also draw small branches on the trees and blades of grass.
- Draw fallen leaves, use hatching to mark the shadows of trees at the base of the trunks.
- When shading the drawing, it is necessary to do it very carefully, since it is the shading that allows you to convey the fog that can often be seen outside in late autumn.
- You can draw gray clouds in the sky. Sketch out some flocks of birds flying low over the ground.
- Use strokes to highlight the river bank or shadows from bushes and grass.
- To highlight the tree trunks, you can make them dark.
Scenery
Draw autumn pencil drawings Schoolchildren will also be able to do this in class.
To do this, you may need the following tools:
- paper;
- colored pencils;
- black marker;
- eraser;
- medium hard pencil;
- white gel pen.
The process step by step:
- To mark the land, draw a line on a piece of paper.
- On the right, draw a tree trunk, sketch out the crown.
- Place the bushes on the left. Add fallen leaves of different sizes. You can draw them in the form of small arcs.
- Start painting the leaves on the trees and bushes with yellow and orange colors.
- Paint the sky blue and the ground light brown.
- If desired, highlight some details of the drawing with a white pen or black marker. This is where you can finish creating an autumn landscape with your children.
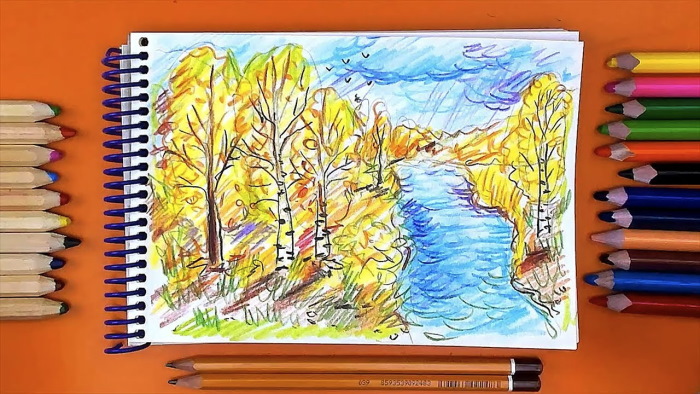
With watercolor pencils
Watercolor pencils look like regular colored pencils, but their lead is made of pressed watercolor. Therefore, if desired, a drawing made with such pencils can be washed with water.
Before you begin, you need to prepare drawing paper that can withstand exposure to water.
You can draw an autumn picture with watercolor pencils in the following way:
- You should start by marking the horizon and the path in the forest. This can be done with wavy lines.
- Then outline the silhouettes of trees with vertical lines and draw the stones.
- Draw a schematic outline of the crowns of all the trees and add bushes.
- Start drawing details: grass, leaves, bark, small bushes and rocks.
- To make the drawing more realistic, add grass near the path and bushes in the background. Since the leaves fall in autumn, you can add fallen leaves on the road to the picture.
- You can erase all unnecessary lines with an eraser. Start coloring the landscape with watercolor pencils. After coloring a fragment of the drawing, you can wash it with water and wait until it dries so as not to smear the color.
- To finish the drawing, you can highlight the outlines of the trees and leaves with a black marker or pen.

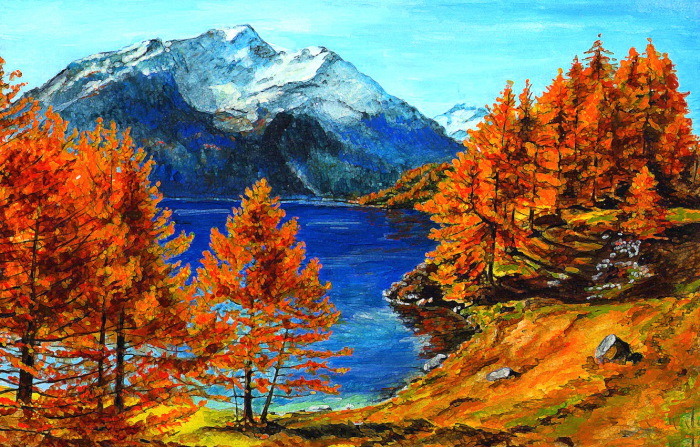
In the mountains
You can also paint a beautiful autumn landscape against the backdrop of high mountains.
To do this you will need:
- paper;
- colored pencils;
- simple pencil;
- black marker;
- eraser;
- white gel pen
As with other drawings, it is necessary to begin a mountain autumn landscape by indicating the horizon.
Then you need to follow the steps:
- Draw a line of mountains, making them high on one side.
- Finish drawing the outline of the forest trees, giving them the shape of a triangle.
- Draw the tree trunks in the foreground with straight lines.
- Add details: draw mountain slopes, rocks, grass, bushes.
- Prepare the drawing for highlighting the outline of objects: add strokes and erase the base lines with an eraser.
- Draw the outline of the landscape with a black marker.
- Add shadow by first painting the mountains with a grey pencil, then adding highlights with black and yellow.
- Use a blue pencil to color the sky and the river. You can add volume using strokes of yellow and blue pencils.
- Trees and their trunks can be painted with different shades of brown, orange and yellow.
- To finish the drawing, add shadows. Highlights can be drawn with a white gel pen.
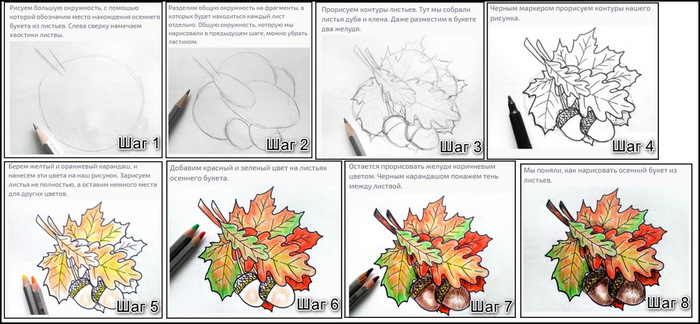
Bouquet with colored pencils
Using colored pencils, you can draw not only a landscape, but also a bouquet of autumn leaves. For this, you will need the same tools as for creating an autumn landscape.
The process of drawing an autumn bouquet of leaves:
- Draw a large circle that indicates the location of the bouquet. The top part will be occupied by the tails of the leaves.
- Divide the circle into parts and outline the contours of the leaves in each of them. The circle common to all the leaves can be carefully erased with an eraser.
- Draw the outlines of foliage, such as oak or maple. You can add acorns or any other autumn details, such as ripe chestnuts.
- You can use a marker to highlight the outline of a drawing.
- You can paint the leaves with yellow and orange, leaving room for red or green.
- Acorns and chestnuts can be painted in shades of brown.
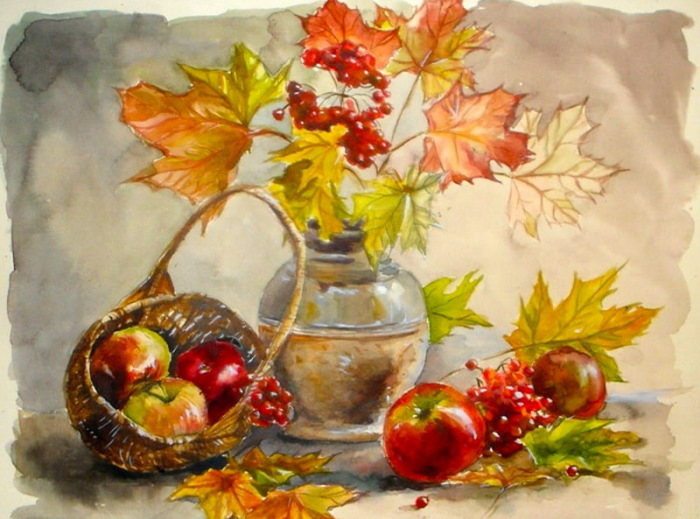
Still life with rowan
Autumn can also be conveyed in a still life by drawing an autumn still life. You can use watercolor pencils for this. They help make the picture more delicate.
Step by step drawing process:
- Make a sketch with a simple pencil, without pressing too hard on the lead.
- Use watercolor pencils to shade the background, washing it with water. You can use yellow, peach and pink shades.
- When the background is dry, you can start drawing branches and leaves. It is most convenient to draw leaves from the contours, then draw the details.
- Start drawing rowan berries. They can be painted bright red. After that, add black stamens. At this stage, you can finish drawing the autumn still life.
Drawing autumn with a pencil is not a difficult task, which even beginners can handle. Before starting work, you need to prepare high-quality materials, and during the drawing, be careful and carefully draw all the details.
Video on how to draw autumn easily
An easy way to draw autumn.