Pears, apples, other fruits and vegetables are the first stage in mastering drawing for children. It becomes much easier to depict food products if you see them for several days and study them yourself. Fruits and vegetables can also be practiced in drawing from “life”.
Pencils, paper and supplies
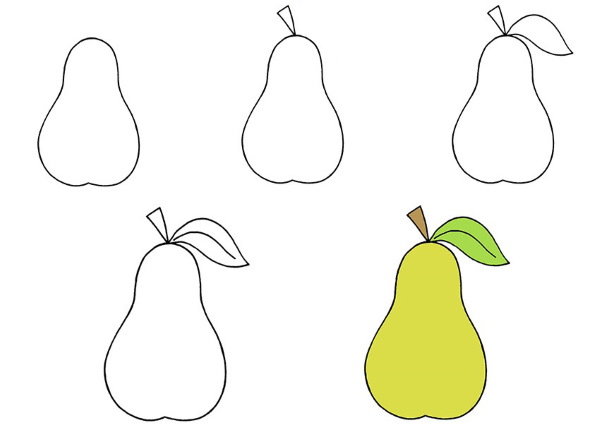
You can draw a pear using simple pencils.
For this children will need:
- ruler;
- simple pencil;
- a sheet of white paper;
- eraser and sharpener;
- compass.
It is recommended to use pencils of different hardness, as they give different effects.
Simple drawing
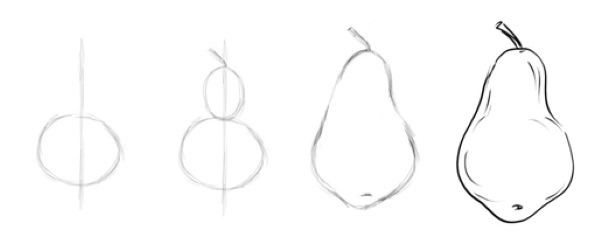
Pear (drawing for children using a compass) is a fruit that resembles a lamp in shape. You can draw it using a compass - this option is suitable for younger children, as it does not require drawing complex details by hand.
Step by step process
How to draw a pear correctly:
| Stage | Description of the stage | Image |
| 1 | Using a compass, draw a circle, which is the basis of the fruit. Leave a small distance on all sides for the placement of other elements of the drawing. | 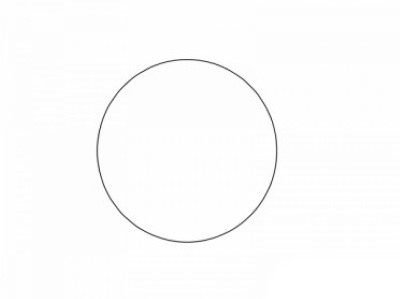 |
| 2 | Make the drawn roundness more sloppy, similar to the outline of a pear. Add part of the fruit on top, and also make a slight tilt to the left side - to draw a leaf. | 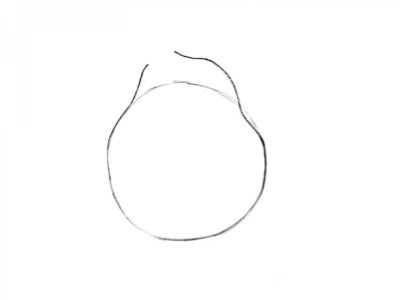 |
| 3 | Erase the outline of the previously drawn circle. Draw folds in the upper part of the drawing for a more voluminous image of the pear. In the drawn fold, depict a small branch (the shape resembles a rectangle with a small oval at the end). | 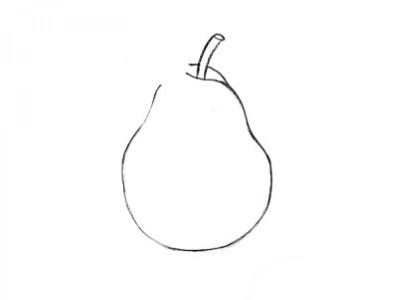 |
| 4 | Fill the empty space on the left side with a leaf. To begin with, you can draw a narrowed oval, and then add jagged edges around the entire perimeter. Duplicate the outline of the drawing with a simple pencil. | 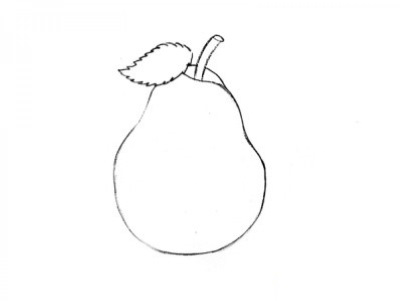 |
| 5 | On the resulting leaf, draw a central vein - a curved line, and then add small branches. Using a small piece of wood, fasten the branch and the leaf. | 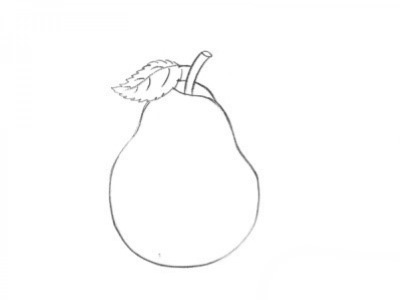 |
| 6 | The finished drawing can be colored with paints, colored pencils or felt-tip pens. The most convenient way is to use colored pencils. To get an approximate effect, you will need pencils of black, brown, orange, yellow and green colors. | 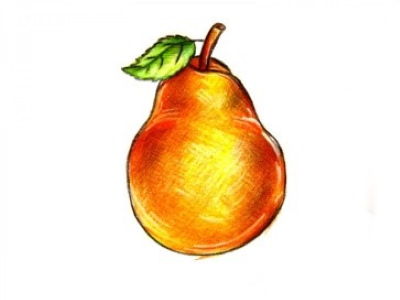 |
To get the desired effect, it is necessary to follow the step-by-step process completely.
Pear in section
You can also draw the fruit in section. This option is also suitable for use in various still lifes.
Stages of work execution:
- Draw a circle of any size on a sheet of paper. You can use a compass, improvised objects, or draw by hand.
- Draw a diagonal line by hand that intersects the last third of the drawn roundness.
- Using the drawn blanks, create the outline of a pear. Its shape is no different from the previously drawn fruits.
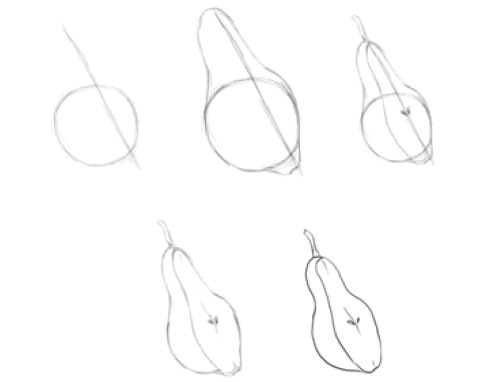
- Step back a small distance from the left edge of the pear and duplicate the outline to create volume. The outline should be smooth.
- As an extension of the previously drawn vertical line, draw a branch, slightly curved at the end.
- Having determined the thickest part of the pear, draw oval seeds, located with their sharp ends towards the middle line.
- Use an eraser to remove unnecessary elements. Instead of the middle line, draw short, barely noticeable curved segments - the fibers of the pear.
- Correct the contour of the pear.
- Using a marker or felt-tip pen, outline the outline of the image and duplicate small details.
The pear blank is ready. The resulting drawing can be left unchanged, shaded or colored with paints.
Using geometric shapes
Pear (drawing for older children) is an oval-shaped fruit. It can be formed by several geometric shapes. School-age children are able to draw the necessary shapes by hand.
Step by step process
Stages of the process:
- On a clean sheet of paper, draw 2 figures – a circle and an oval. The oval should touch the area of the circle in the area of greatest thickness. The geometric figures should not be perfectly even.
- Use a simple pencil to outline the lower figure, then connect them together, simultaneously forming the outline of the pear. Make a small depression in the upper part of the fruit. From it, draw a rectangular stalk.
- Remove excess lines with an eraser. Using light hand movements, draw the final outlines of the fruit.
- On the right side of the petiole, add an oval shape with a pointed end – a leaf. Draw the main vein and add transverse lines symmetrical to each other.
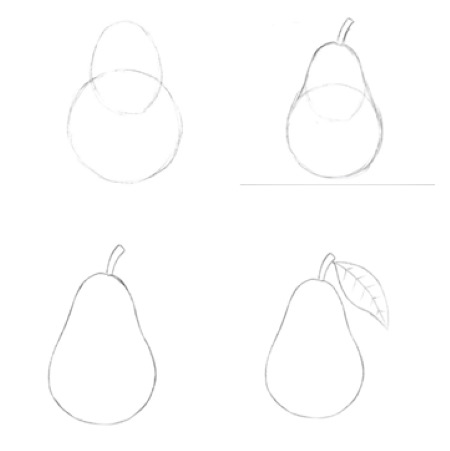
The resulting drawing can be shaded, colored with paints or pencils.
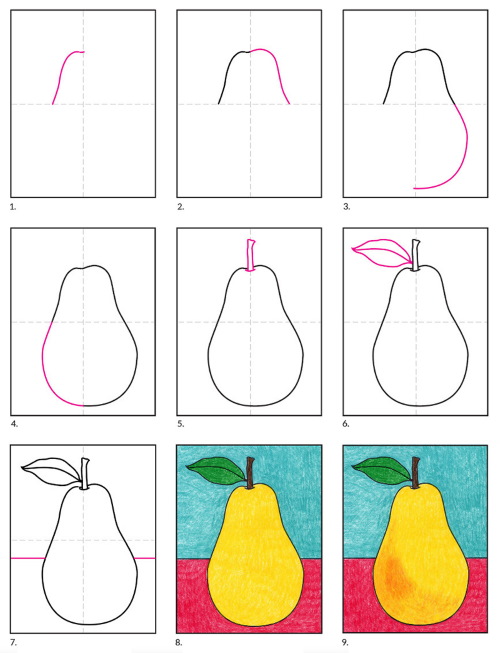
Quick drawing
You can depict a pear without any extra preparation. This option is suitable for creating quick drawings without unnecessary detailing.
Step by step process
Stages of work execution:
- Manually outline the outline of the pear. Draw a roundness with the lower straight side, and then draw a zigzag, forming the upper part of the fruit.
- Draw the twig and stamens. Shade the inside of the fruit with a yellow pencil. Stamens and twig – with brown.
- Using the same color, darken the sides, creating new strokes.
- Using green, brown and orange pencils, shade the central surface. Distribute the colors evenly along the sides of the pear to obtain a natural shadow.
- Paint the tail and branch of the pear brown.
Instead of colored pencils, you can also use simple pencils with soft and hard leads.
With shading
Pear (drawing for children with shading) is a fairly simple fruit. The fruit has a simple structure, a variety of colors and a round shape.
Step by step process
Stages of drawing a pear:
| Stage | Description of the stage | Image |
| 1 | On a clean sheet of paper, draw a roundness. In the upper right part of the roundness, draw an elongated oval, 1/3 of which touches the surface of the previously drawn figure. | 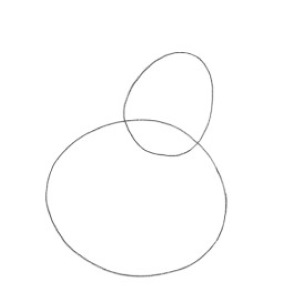 |
| 2 | Visually measure the middle of the upper oval, and also put barely noticeable points on the upper third of the lower roundness. Using arched lines, connect the figures together at the designated points. Draw the petiole in the upper part. Its shape resembles a rough rectangle with rounded corners. Draw the remains of the stamens in the lower part of the pear. Put a visual point from which to draw short, abrupt hairs. | 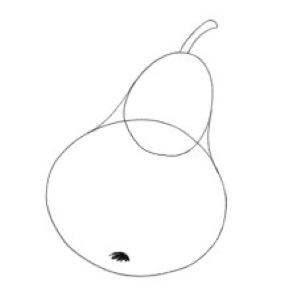 |
| 3 | Use an eraser to remove unnecessary elements of the drawing. You can additionally duplicate the outlines of the pear. Use a simple pencil to draw the area of the petiole well, and also fill in the space around the stamens. | 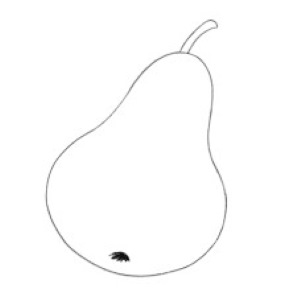 |
| 4 | Color the left side of the pear with a pencil so that the area closer to the center remains slightly darkened. Lightly color the right side with a pencil. Use your finger, paper or cotton wool to shade the pencil, without disturbing the placement of light and shadow. | 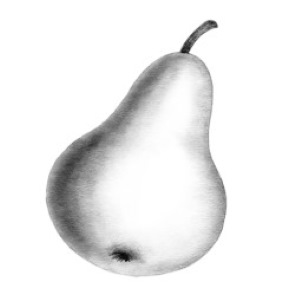 |
This technique allows you to create a more voluminous effect for the image.
When performing shading, you should follow these recommendations:
- After drawing each stroke, you need to take your hand off the paper. The stroke is applied separately;
- the strokes must be identical in shape;
- A common mistake is a stroke that starts with a dot. The line should not be in the shape of a comma;
- draw zigzag strokes;
- Crosshatching should not be perpendicular to each other. It is necessary to apply diagonal lines, reminiscent of a bunch of something;
- The stroke should imitate the shape of the object.
Hatching is an activity for experienced people. Before trying to hatch a finished drawing, you need to make a few test strokes on a separate sheet of paper.
On the branch
You can also depict a pear on a branch. This drawing is more complex, but it better conveys the real idea of the fruit.
Step by step process
Stages of work execution:
- Using any convenient method, draw the outline of the pear. From the top of the fruit, draw a long branch from which several pear leaves extend.
- Pear leaves are oval, pointed on one side.
- Draw a branch under the pear leaves on which the pear is located.
- Draw the outlines of the fruit, leaves and branches with thicker lines. Use an eraser to remove unnecessary elements of the plant.
- Draw veins on the leaf, add small venation. Draw small details of the pear.
- Add shadows to the right side of the pear and leaves, and color the entire branch with a pencil.
- Leave the middle of the fruit untouched, and lightly shade the left side to indicate the contours.
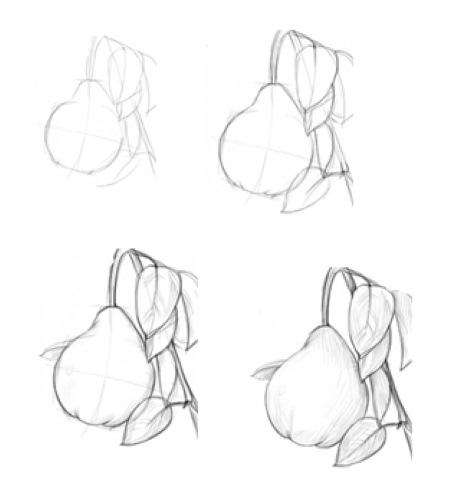
The outlines of the fruits can be drawn with a marker or a black gel pen.
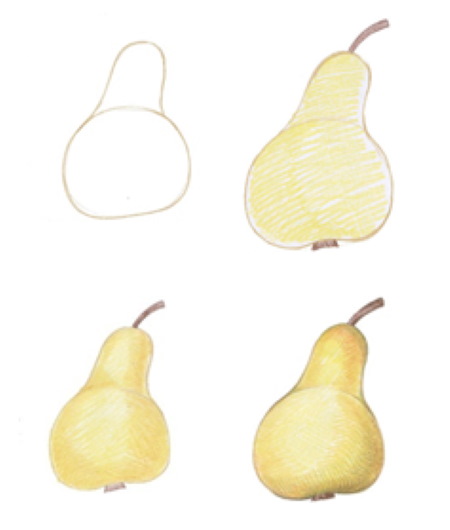
With paints
Pear (drawing for children with a simple pencil) is a healthy and tasty fruit. With just a pencil and a little paint, you can make the product very “live”.
Step by step process
Stages of work execution:
- Draw a vertical line in the center of the sheet. You can use a ruler to create it. Since the line is not the main element of the drawing, it is better to use a pencil with a soft lead.
- Draw a roundness on the lower part of the vertical line. Position the figure so that its middle is crossed by a vertical line.
- Add an oval on top, the middle of which is also crossed by a vertical line. At the top of the oval, where the line coincides with the upper border of the figure, draw a rectangular branch.
- Using arched lines, connect the figures together so that they form the outline of the fruit. At the bottom of the pear, sketch a notch in which the remains of the stamens are located.
- Use an eraser to remove excess details from the drawing.
- Duplicate the clean image using a sharp pencil with a hard lead, marker or pen.
- Draw short lines that follow the volume of the pear. This way you can convey the texture of the fruit.
The main drawing is ready. If desired, it can be painted with paints.
How to paint a pear correctly with paints:
| Stage | Description of the stage | Image |
| 1 | Paint the resulting image completely with yellow paint, including the branch. | 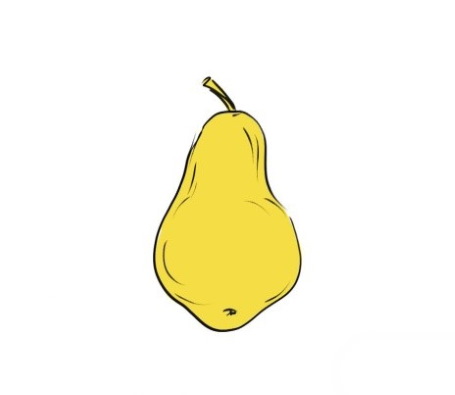 |
| 2 | Apply brownish and green shades over the base tone. You can also choose shades of orange. The middle of the pear, which receives more light, remains untouched. | 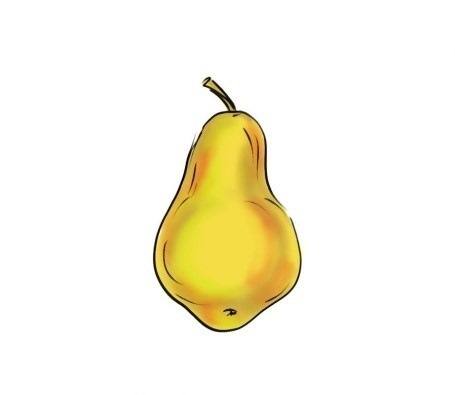 |
| 3 | Use a dark brown shade to create a shadow on the entire area of the drawing in those places where it is needed. Also darken the branch. Use white lines to indicate the texture of the fruit. To do this, use a thin brush with paint to outline the outline with broken lines. | 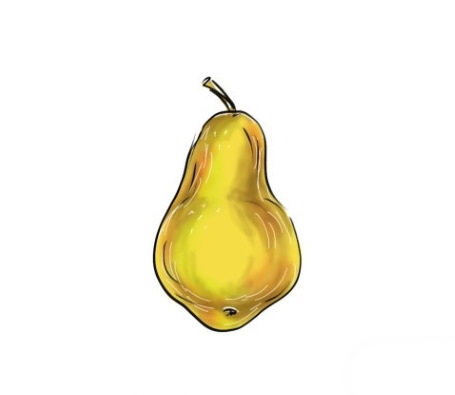 |
To paint a pear, you can also use light green and green tones, depending on the variety and ripeness of the fruit.
Two pears on a branch
To create still lifes, you can use 1-2 pears on a branch. Such an element of the drawing will be memorable due to the complexity of the drawing. This version of drawing is suitable for older children who are not trying themselves in drawing for the first time.
Step by step process
Stages of work execution:
- In the center of a clean sheet, draw 2 rounded shapes (straight at the bottom) that intersect each other. Add flattened bumps that form the tops of the fruits.
- Draw the branches located at the ends of the pear with semicircular lines. The branches should converge at one point, from which the oval leaves located on the branch depart.
- Oval leaves should have pointed ends. In the middle, draw the median venation.
- Use the eraser to remove unnecessary elements from the drawing.
- Make the branches more voluminous - duplicate the lines and also draw buds in the place where the branches connect.
- Make the lines of the fruit itself clearer in order to form the correct outlines of the pear later.
- The resulting image can be traced with a marker or gel pen to get a clearer outline. You can also smooth out some edges to get a more natural fruit.
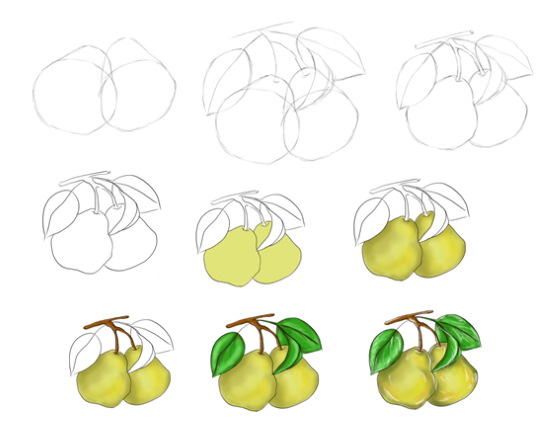
- You can color the resulting drawing with pencils or paints.
- Paint the fruit itself with green. The shade should be light, so you can mix green with yellow.
- Add yellow highlights with pure yellow. Paint the sides of the pear with a dirty green shade to indicate the location of the shadow.
- Paint the branches light brown. When the paint dries, darken the sides of the branches with a brown shade.
- Paint the entire surface of the leaves with light green. When the shade dries, paint the sides, as well as the right side of the main vein to depict a depression.
- Show highlights with white shade. To make the drawing more voluminous, highlights are placed along the entire perimeter of the fruits.
The resulting drawing can be colored with either paints or colored pencils.
Coloring pages
Coloring books are best suited for small children. Using ready-made drawings allows not only to keep the child busy, but also to develop creative potential.
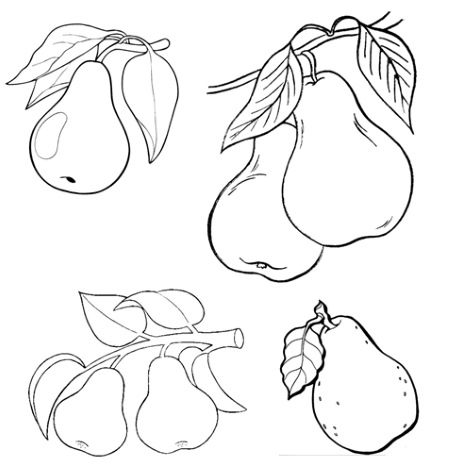
The following coloring pages are suitable for children:
- pear on a branch. The picture also shows highlights, which make the child aware of the need to identify light and shadow;
- several pears on a branch. The longer process of coloring teaches patience and also develops fine motor skills;
- pear with texture. This type of coloring allows the child to learn to determine from his own experience how to convey the necessary surface on paper;
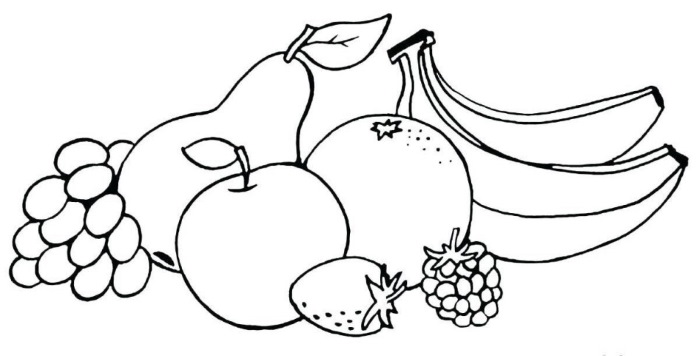
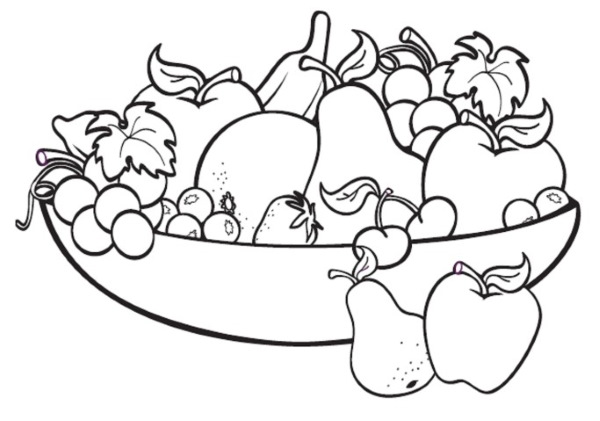
- fruits on the table - this is a great still life option that allows the child to independently determine the necessary colors, and also creates the opportunity to independently finish drawing any elements. Suitable for children of any age;
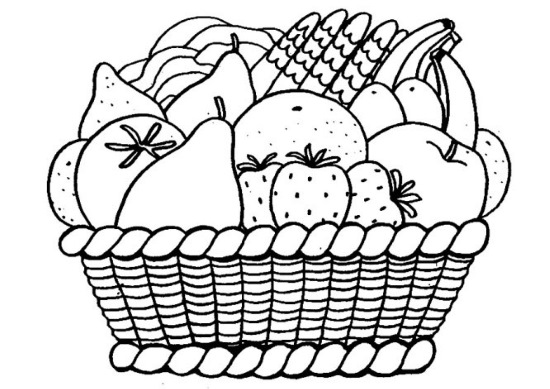
- fruit or plate basket – another version of still life, in which fruits are concentrated in one place. Develops fine motor skills, imagination and attentiveness. Fruit plates and baskets are widespread.
In order to gradually develop concentration and creativity in a child, it is necessary to use coloring pages with increasing complexity. Before coloring, it is necessary to inform the child about the possibility of using any colors in the drawing, without limiting it to certain shades.
Drawing for a child is a way of self-expression, as well as a teaching method. It is necessary to study all the nuances in a relaxed atmosphere so that the process does not become stressful. The first steps should be very small - finger painting for children, and then large coloring and independent drawing of objects.
It is recommended to start with objects that the child observes throughout life: fruits (apples, pears), vegetables, houses and cars.
Video about drawing
Pear drawing for kids: