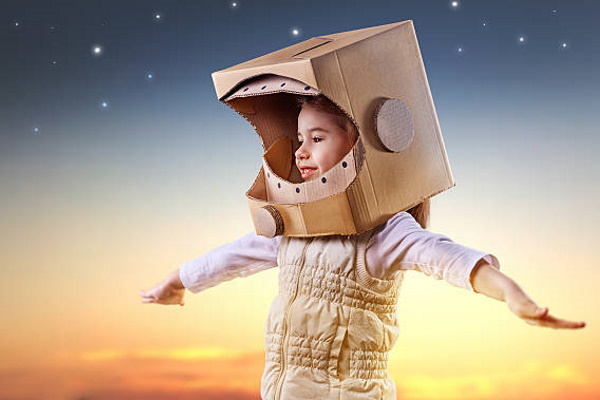
Becoming an astronaut, even if only for a few hours, is a real pleasure for any child. Often in kindergartens and elementary schools, children take part in performances, parents organize matinees and school events.
Mothers sew costumes and embody ideas and plans with their own hands. And in order to create a real outfit for space flights at home, you need to gradually prepare materials for further work.
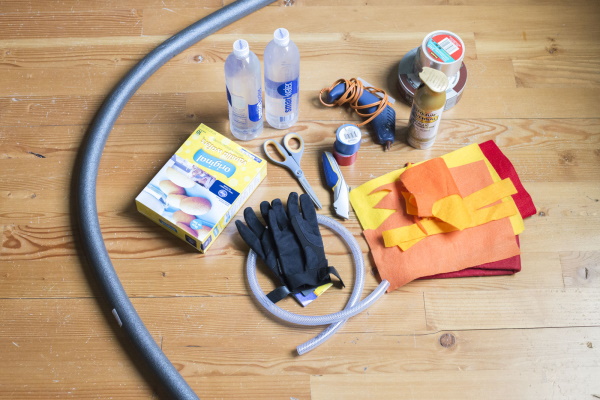
Materials and tools
You can make a DIY astronaut costume from scrap materials or buy fabric and accessories specifically for this. The entire sewing process takes about 5-6 hours.
Most of the time will be spent on creating patterns:
- Separately, you need to prepare patterns for the overalls or 2 pieces of clothing - top and bottom.
- To create a backpack, you will need sketches with dimensions. It is also worth checking the options for attaching accessories.
- Next, it is necessary to develop a pattern for creating a helmet.
- The connecting parts of the suit must be made to match the color of the outfit.
For clothing, you will need a special reflective fabric or insulating material. It is worth considering sewing sleeves and gloves separately from the overalls. In a simplified version, you can sew a one-piece suit with a zipper.
The following may be useful for sewing a helmet:
- technical tape or electrical tape;
- insulating material for upholstery;
- narrow tape for gluing materials;
- foamiran 1-2 mm;
- corrugated cardboard or corrugated paper;
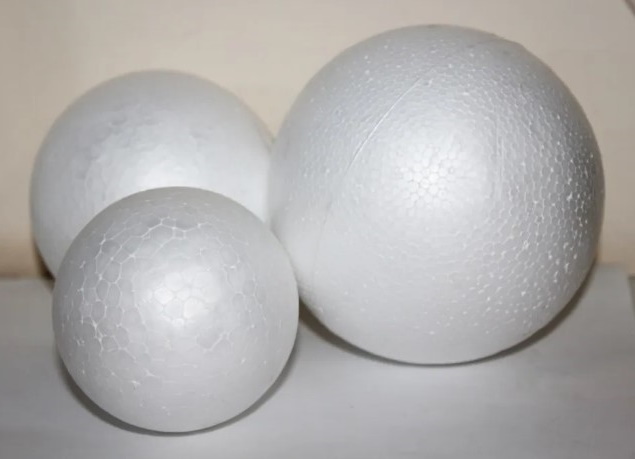
- polystyrene for decoration;
- cable.
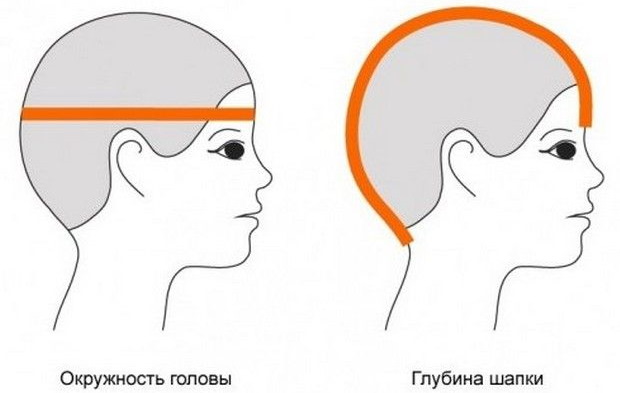
It is necessary to take into account the size of the head so that the helmet can be put on without any obstacles. For decoration, you can use special transparent films to imitate a window. But for a backpack, you need not only a frame, but also decoration in the form of cylinders and tubes.
Suitable for work:
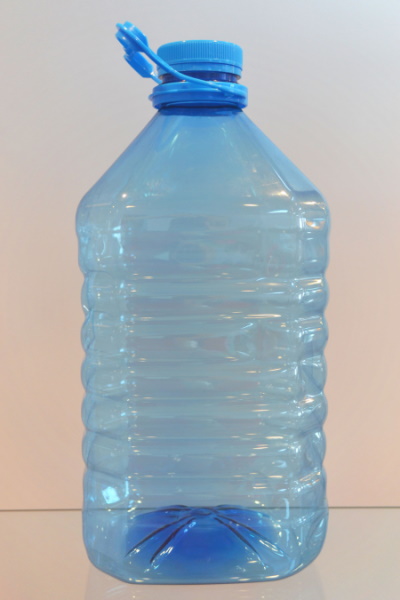
- plastic bottles;
- corrugated tubes;
- thin foam;
- cardboard flat;
- polystyrene;
- fabric for pasting;
- ribbons for decoration;
- paper cups.
The backpack has nozzles, straps, and various fasteners. To repeat all the nuances in detail, you need to use as many materials as possible. At the same time, dense materials at hand are suitable for maintaining proportions and stability of forms.
A typical space suit can be made from the following materials:
- knitted biflex with shine - 1.5 m;
- double-sided bologna - up to 2 m with a width of 1.5 m;
- black lining fabric - 1 m;
- synthetic padding - 1 m;
- decorative ribbon - 40 cm red, white and blue;
- bias tape for edging - 2 m yellow, 1 m white and 80 cm blue;
- narrow piping - 1 m white and 3 m with a metallic sheen;
- carabiner - 8 pcs.;
- tourniquet - 6 pcs.;
- cast half rings - 4 pcs., 2 cm each;
- waist tape - 2 m;
- plastic frame - 4 pcs.;
- lightning - 0.5 m;
- circular elastic band for cuffs - 6 pcs.;
- synthetic padding for lining - 30 cm.
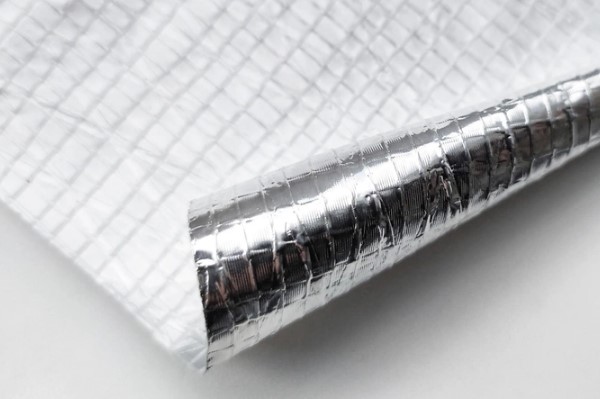
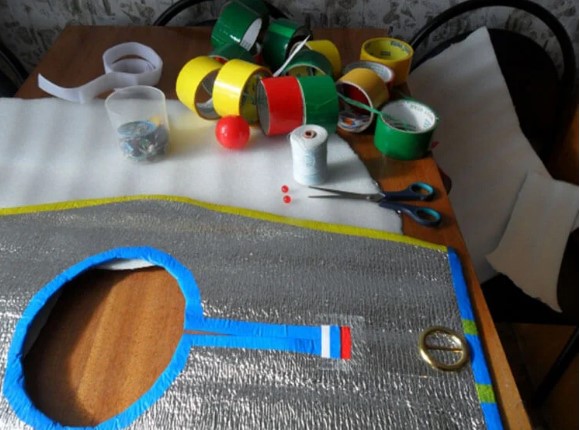
| Materials from which you can make an astronaut helmet: | |
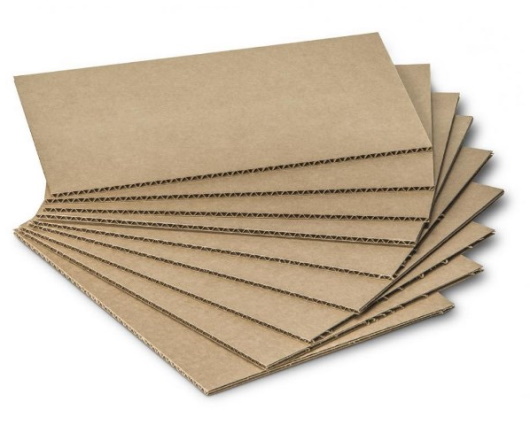 |  |
 |  |
In some cases you will need:
- white cardboard A3 - 2 pcs.;
- PVA glue;
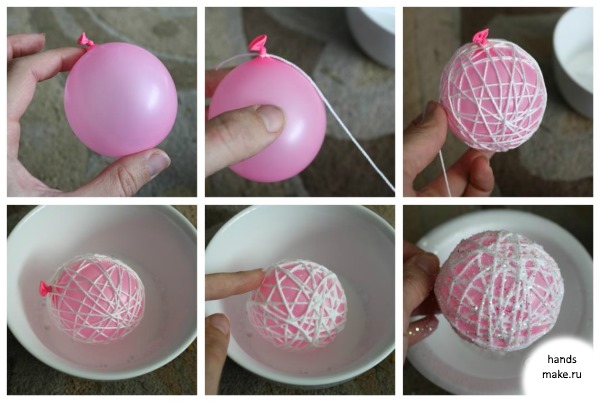
- balloon;
- threads;
- napkins;
- office paper;
- decorated foam;
- hose or corrugated tubes;
- gouache;
- plastic bottles;
- water based paint.
All materials must be prepared for work depending on the chosen method of creating a spacesuit and helmet.
Methods of making a space suit
Depending on the materials available, there are several ways to make a space suit.
| Gluing | Some materials can be replaced with fabric to make it easier to design individual parts of the suit. Fabric with a warm layer is suitable for gluing reflective material. |
| Sewing | If there is no insulating material, you can use white fabric as a base. This will make the suit look more like a space suit. You can sew on reflective strips separately for a bright effect. |
| Unlined | Using one layer of fabric, you can create a full-length jumpsuit at once. Otherwise, sewing the parts together will be more difficult due to the high density of the insulating fabric. |
| Sheathing | Finished products can be hand-lined with fabric of any color and purpose. As a rule, a frame is made that can be decorated and supplemented with various space elements. |
All materials that will be used to create the costume should be prepared in advance.
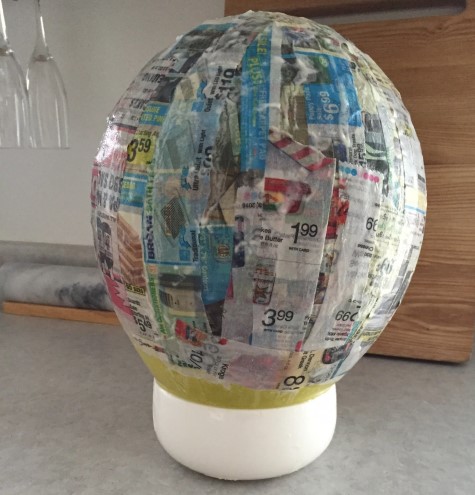
Separately, to create a helmet, you may need balloons to create a spherical spacesuit with their help. In this case, you need to inflate the balloon in advance and cover it with napkins using the papier-mâché technique.
For work you will also need soft paper with paste, plastic and paints. If such a procedure is too tedious, you can use a ready-made motorcyclist's helmet to create a spacesuit.
Spacesuit and helmet options
The astronaut costume should be made with your own hands, starting with the helmet. Its shape and size will determine what the costume will be like and how the helmet will be attached to the neck.
Step by step:
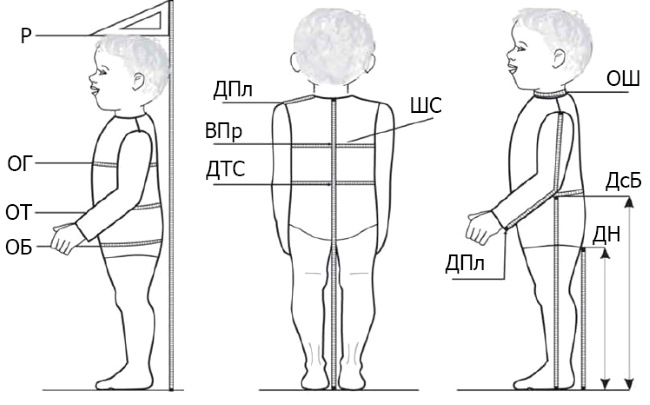
- First, you need to make a pattern - mark the size of the head, the length of the finished product, the width of the sleeves and the spare volume.
- Once the sketches have been created, you can begin cutting out the elements.
- The helmet can be made from several different materials.
- For decoration, you need to use disks and LED bulbs to imitate the lights of a spacesuit.
- When the system is completely sewn (you can use ready-made patterns for pants and jackets), you can make moon boots.
- Using glue, you need to attach all the elements after sewing all the parts.
- The backpack will be manufactured separately as a removable structure.
While the suit can be sewn from white fabric or insulation material, using a ready-made sample as a basis, the helmet and backpack require some work. Since the helmet can be made by hand, not only cardboard or balls can be used, but also blanks.
From thermofoil
The most common option for using the material is foiling. The classic suit is made of luminous fabric, which serves as insulation and a bright accent in the decor of the spacesuit.
To make the helmet, you can take foil material in the form of patches to make it easier to give it a rounded shape.
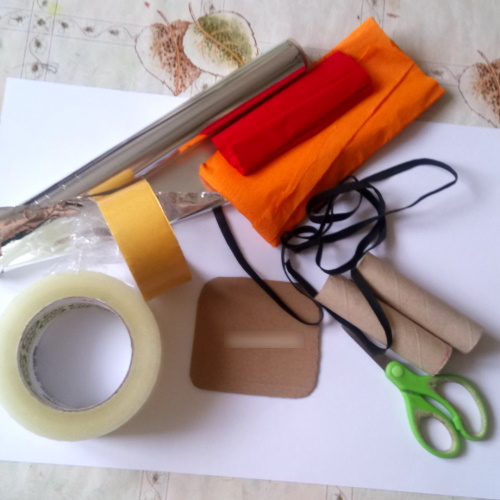
To work you will need:
- foil insulation - 3 m;
- colored or transparent tape;
- needles;
- threads;
- beads;
- scissors.
When working with a spacesuit, you will need half or ⅔ of the entire material. From the larger part, you need to create a suit according to the ready-made pattern of the jumpsuit.
It can be made from two parts:
- The fabric needs to be folded in half along the grain line and secured with pins.
- On the reverse side, you need to mark out the width of the freest area.
- For the sleeves, you need to measure the length and width.
- Darts should be made after trying on.
- The lower part of the suit should be loose - the width of the legs is equal to one and a half times the width of the sleeve.
- After all the parts are fastened together, you can start basting.
- The foil material does not crumble, so it is permissible not to process the edges of the cuts with an overlock stitch.
- For better fixation, stitch the seam on a sewing machine in the “zigzag” position.
When the suit is ready, the main part should be put aside. Next, you should create a helmet from the same material. A hemisphere will work as a frame, which will hold its shape while constructing the pattern. You can do without it.
Step by step:
- First, you need to create a pattern according to the size of the child's head.
- The sketch should be transferred onto the folded fabric from the wrong side.
- The pattern of a loose-fitting hood is suitable for creating a helmet. It can be a solid semicircle of 2 parts, or consist of 4 sections to give a more correct shape.
- The parts of the helmet need to be sewn together.
- The blank should be placed on a sphere or hemisphere to give the helmet a rounded shape.
- The lower edge of the junction of the helmet with the suit must be sewn in, making darts. To do this, do not remove the blank from the hemisphere.
- The hemispherical foil helmet can be supplemented with colored tape. Such stiffening ribs will also help to keep the shape better.

You can create signal lights from the leftover material by cutting them out and pasting them with tape. Next, you need to create armbands and decorative fasteners. Thermofoil gives a beautiful metallic shine, so the leftover material can be used for this purpose as well.
Additionally, you can use a stapler for better fixation. The staples are well hidden under the density and softness of the material, sinking inside it.
It is not difficult to create an astronaut costume with your own hands. The most labor-intensive process is fastening the two parts of the costume. It is necessary to carefully consider how the child will put on the jumpsuit and helmet.
In some cases, if there is no strong frame, the helmet can be sewn to the overalls, leaving space for inserting buttons or a zipper. As with a winter jacket, it is acceptable to use buttons and zippers.
From papier-mâché
Since the suit can be sewn using a single pattern, using different materials in the work, the pressure helmet can be made in a variety of ways.
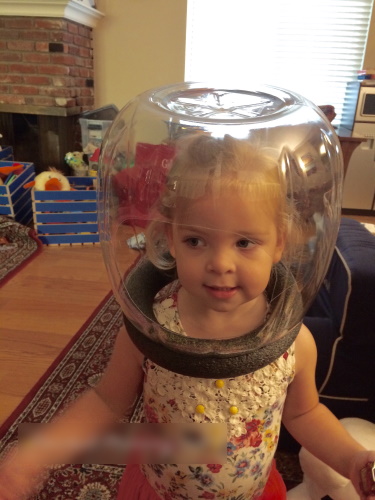
Another alternative is the papier-mâché technique. Since the volume of the finished product and its thickness exceed the original size, it is necessary to set a larger diameter relative to the size of the child's head.
Each stage of this process must be controlled:
- First you need to inflate the balloon to almost 2 times the diameter of your head.
- The ball must be placed on a bowl or vase so that it remains motionless.
- Napkins, paper or newspaper should be prepared separately. All waste paper should be torn into small pieces. It is not worth cutting with scissors, since uneven edges stick better to the surface of the ball.
- The first layer is napkins soaked in water. A thin layer will stick to the base better, and the water will allow the ball to come off more easily after drying.
- For the 2nd and 3rd layers, you need to use napkins soaked in an adhesive solution (PVA glue and water in a 1:1 ratio). At this stage, you can use toilet paper, which has distinct veins of pressed waste paper.
- When the layer reaches 2-3 mm, you can begin to completely cover the previous layers. It is advisable to wait until all layers dry. This way, the glue will better adhere to the uneven surface and soak the subsequent pieces of paper.
- If the helmet is too big, you can use gauze soaked in PVA glue as a pad. A medical bandage will also work.
- Next, you need to use torn pieces of paper with a density of up to 80-120 mg/m2, gluing them with glue.
- The last layer is the final one. PVA glue should be diluted with water again so that the drying process is fast from the top layer to the bottom.
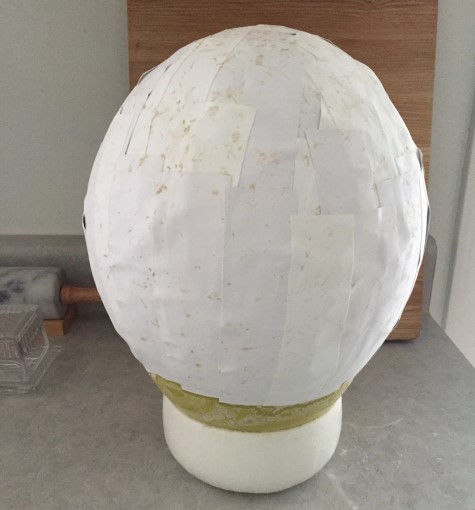
After finishing, you need to leave the ball for a few days to dry. Usually it takes up to 4 days. After drying, the ball needs to be pierced with a needle and removed.
The spherical frame should not be deformed, otherwise it indicates that the product is not completely dry. The edge of the cut should be processed, cutting off all the unevenness.
Next you need to give the helmet a finished look:
- The ball should be placed on a stable base to create a window for the face.
- The correct parameters will allow for a comfortable view in the suit. To do this, you need to consider the width of the window relative to the location of the ears, the height relative to the body axis from the eyebrows to the chin.
- Use a pencil to mark all the points, connecting them for subsequent cutting of the part.
- All cut edges must be treated with adhesive solution to prevent the child from getting hurt.
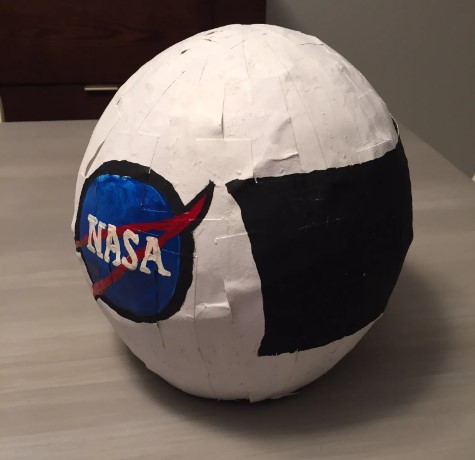
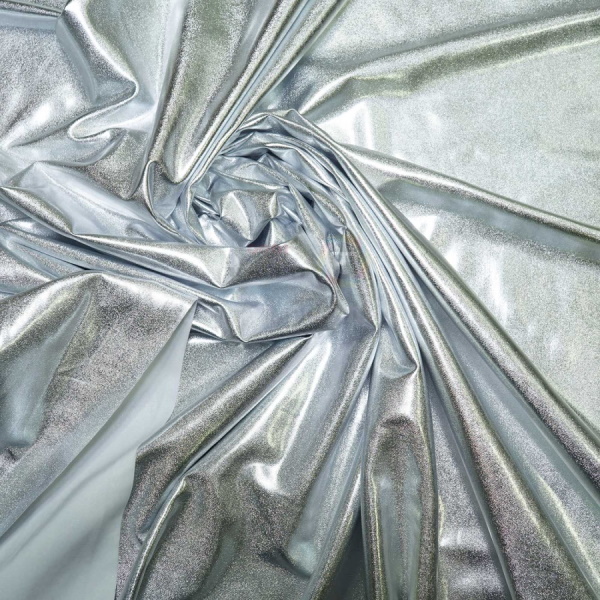
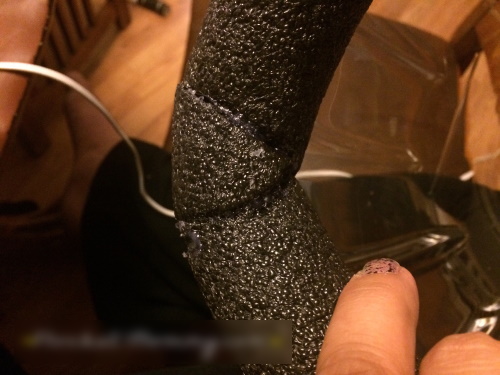
Since all helmets have a silver tint to reflect sunlight, you need to wrap the helmet with a silver colored knitted fabric.
The fabric called wax has a metallic sheen. It is suitable for decoration and for embellishing individual elements of a costume. If desired, you can put a thin layer of synthetic padding under the fabric.
Separately, you need to cut two circles with a diameter of 14-15 cm from foam plastic and cover them with the same fabric. The inside of the helmet needs to be covered with black fabric. Next, you need to create 4 blanks 3 cm wide from white cardboard.
Their length should be equal to the length of the arcs along the lower edge of the front cutout. You should also make blanks for the end part in the form of two semicircles. They need to be glued to the helmet near the semicircles.
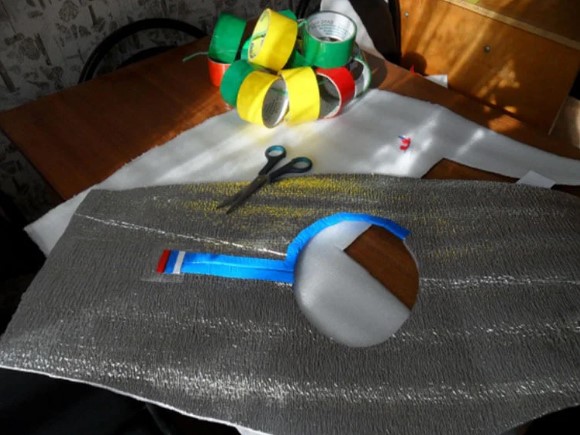
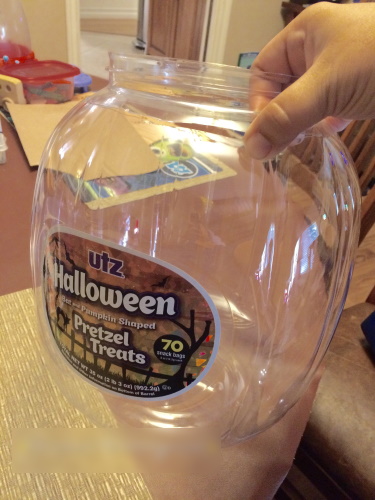
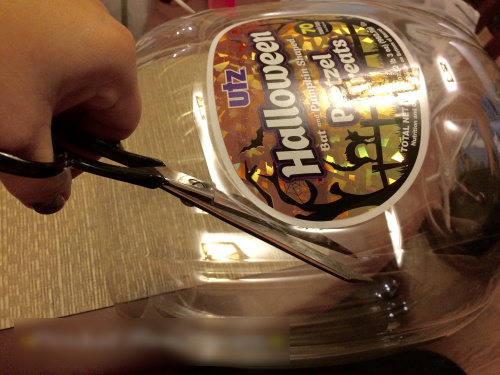
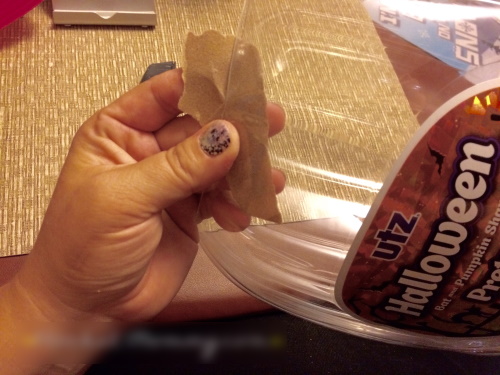
From a plastic bucket
The plastic bucket already has the required shape, from which it is easy to modify the helmet. A small bucket measuring 15*20 cm will do.

Step by step:
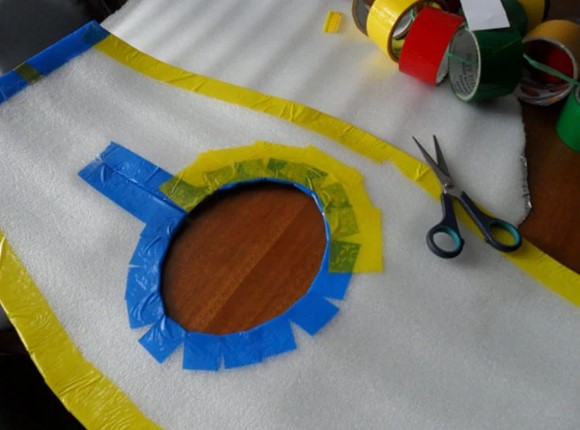
- The bucket should be wrapped in foil or fabric with a metallic sheen.
- The inside of the helmet needs to be painted black or white.
- In the front, you need to cut out a window in the same way as in the previous master class.
- All cuts need to be filed with sandpaper.
- To imitate a round body, you can use newspaper by inserting it under the fabric or foil.
- The finished product can be supplemented with a collar by gluing it on with glue so that the collar serves as an extension of the suit.
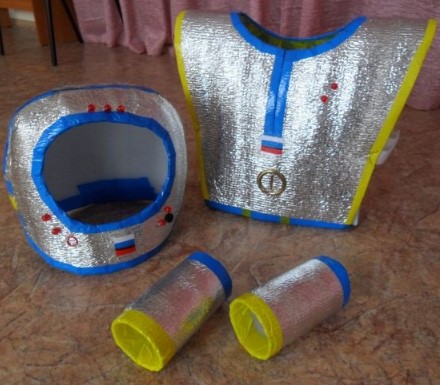
 |  |
 |  |
 |  |
 |  |
 |  |
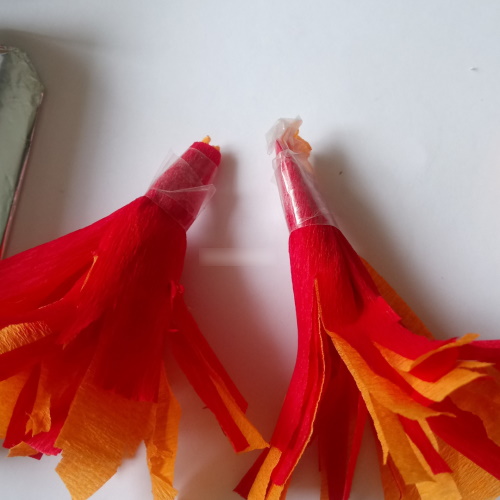
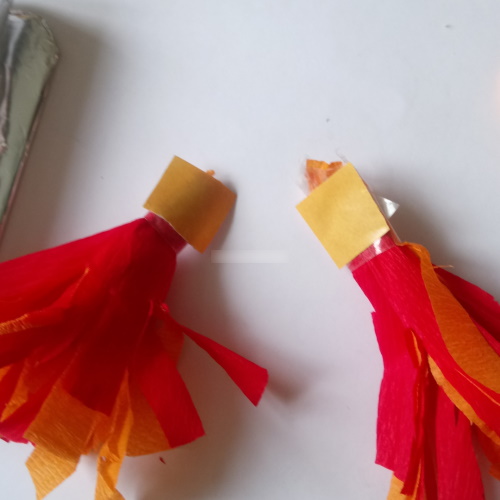
Ribbons and country flags can be used as decoration.
From cardboard
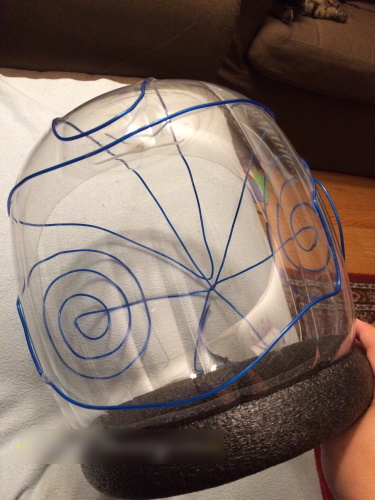
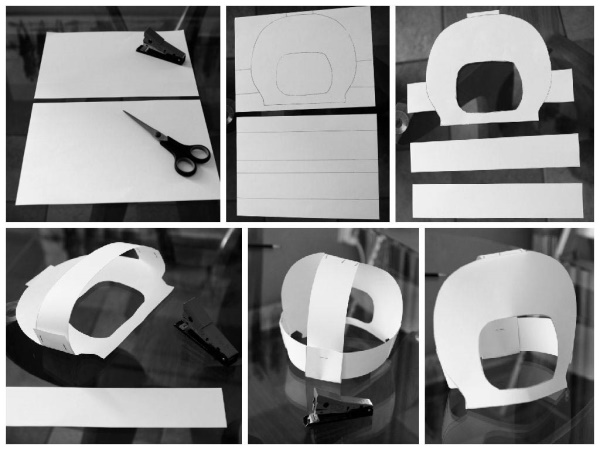
If you don't have time to create a papier-mâché helmet, you can use regular cardboard as a basis. In this case, you won't need either thermofoil or waxed fabric. The cardboard blank needs to be crumpled along the edges. This will make it easier to bend. Next, you need to cut out the porthole window.
Step by step:
- The helmet is made in parts from diamond-shaped blanks.
- The widest parallel will be connected to the adjacent part.
- When glued together, you get a lantern that looks very similar to a paper Christmas toy.
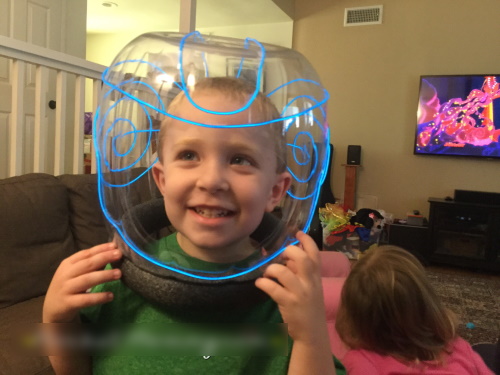
- Next, you need to decorate the helmet. You can use paper tape, self-hardening clay and decorative paste.
- After drying, the helmet needs to be sanded. If there is no time for this, it is enough to paint it silver or white.
- Stickers will serve as decoration, and pencils, markers and foil will also be suitable for decorating individual elements of the helmet.
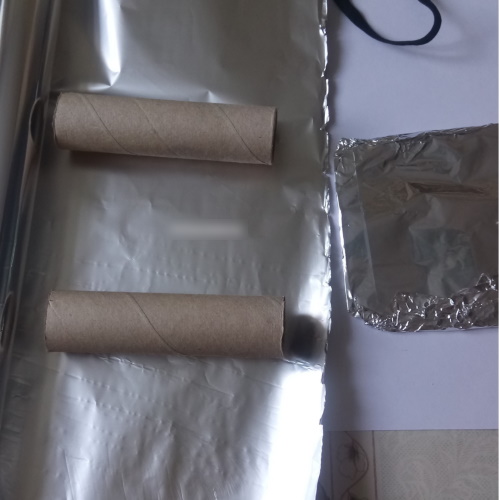
Since the helmet is part of the spacesuit, it must be fully connected to the suit. For this, you can use imitation wires, corrugated tubes and plastic bottles.
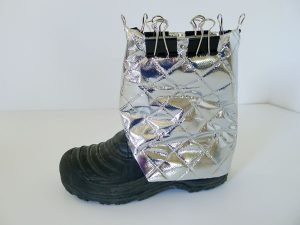
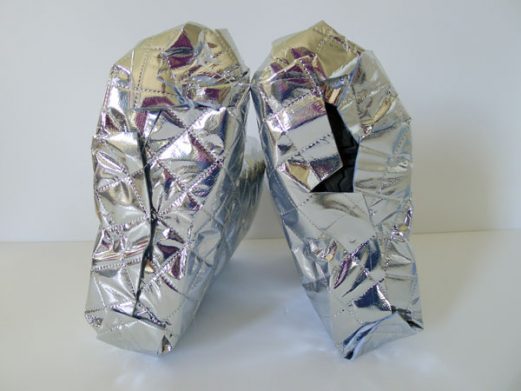
Space shoes
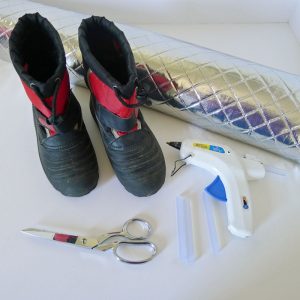
The costume for Cosmonautics Day also involves making shoes. To implement this idea with your own hands, you will need suitable boots, which will need to be covered with materials.
You also need to make sure that the shoes are boot-shaped, white in color, and have a tread along the edge of the sole.
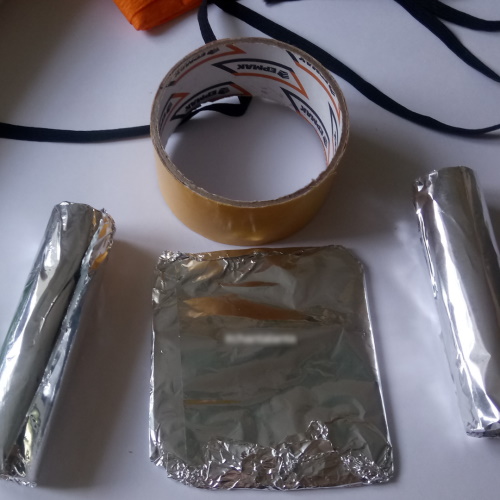
To work you will need:
- rubber boots;
- synthetic padding;
- white tape;
- paper;
- double sided tape.
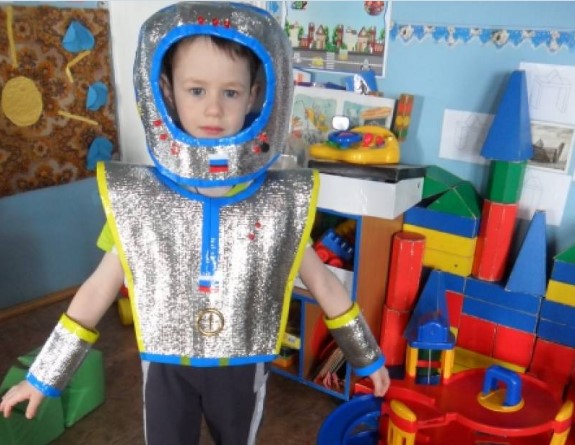
 |  |
 |  |
 |  |
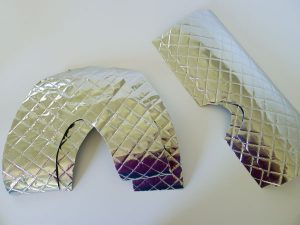
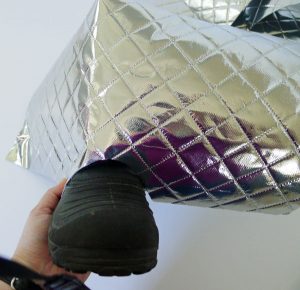
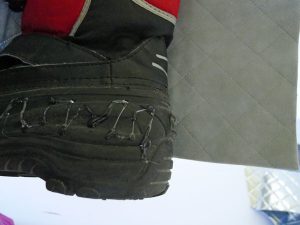
First, you need to clean the rubber boots from dust and treat them with a cleaning solution:
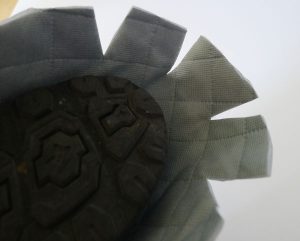
- Several strips of double-sided tape should be glued over the entire surface of the boots.
- After removing the protective layer, you should lay out the synthetic padding in parts so that it covers the entire surface of the boots, taking into account the bends.
- On top of the layer of padding polyester, you need to glue strips of white paper tape. This can be done in parts: first, place the tape horizontally on the boot, then glue it vertically.
- A strip of double-sided tape should be placed along the contour of the boot.
- Then you need to alternate narrow strips of padding polyester, gluing them to the outline so that a relief is formed. The gaps can be up to 1-2 cm.
- You also need to glue a strip of white tape on top of the synthetic padding.
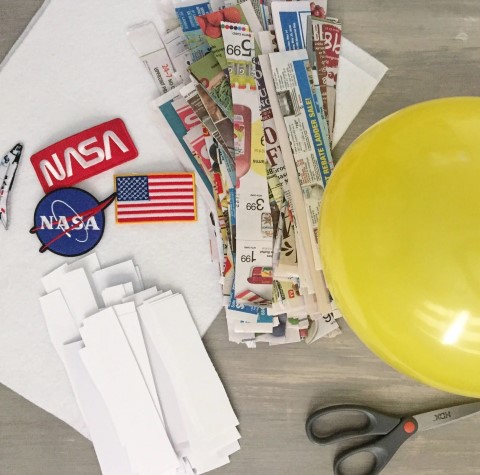
 |  |
 |  |
 | 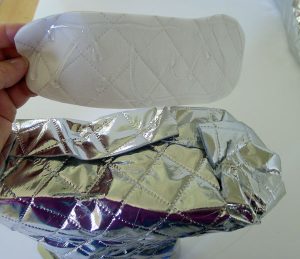 |
For decoration, you can use decorative ribbons or scrapbooking tape.
Complementing the costume with accessories
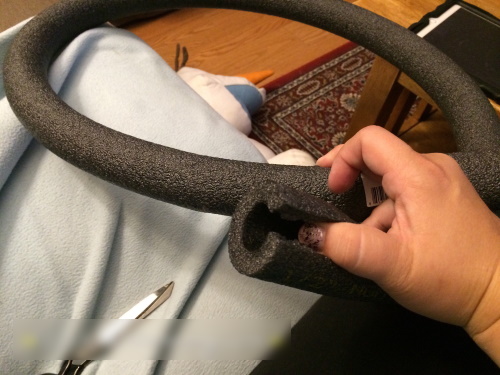
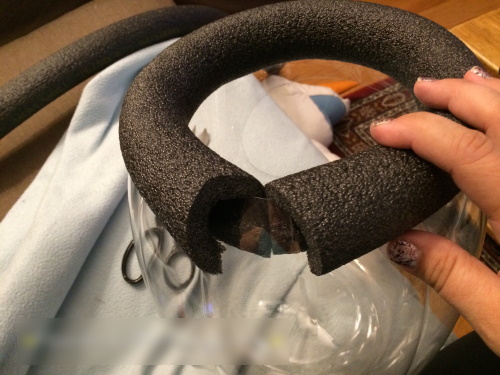
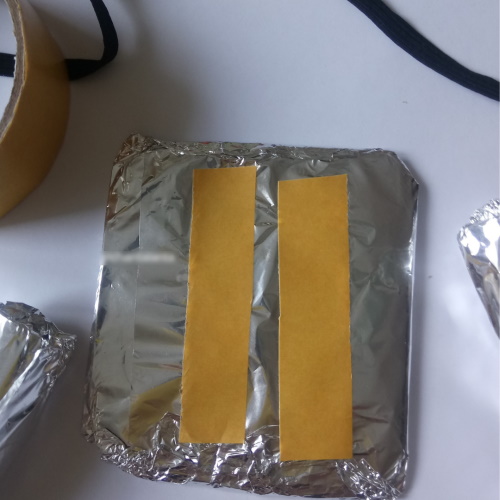
In addition to the main suit and helmet, the astronaut has a backpack support system. Since this is a suit for a child, it is necessary to select lightweight materials for making the backpack. The ideal solution would be shaped foam. The one left over from household appliances will also do.
Step by step:
- The foam plastic needs to be cleaned of unnecessary parts using a stationery knife.
- In the main part, you should cut out slots for future straps.
- It is easier to make holes for the hoses with regular scissors.
- Next, you need to create straps from the waist tape with plastic frames.
- The frames need to be glued to the backpack. Then you need to thread the tape into the grooves of the frames and tighten it.
- To prevent the slots from deforming and the foam from crumbling, you need to coat all the cuts with PVA glue.
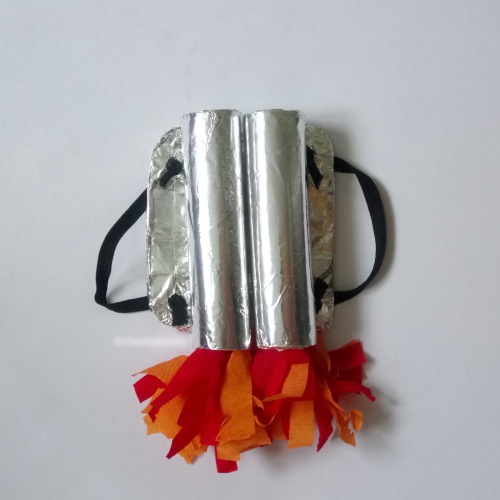
- After the backpack has completely dried, it needs to be decorated.
- Gouache of the desired color should be mixed with water-based paint so that there are no streaks left on the backpack. This will also protect the clothes from being stained with pigment.
- Various buttons, levers and switches can be drawn by hand using felt-tip pens.
- You can also add decoration to the helmet by gluing foam circles on both sides at ear level.
- The half rings should be located in front and behind.
- The carabiner can be placed on the edges and around the circumference of the suit at waist level.
- Black cords should also be sewn to the neck to connect the suit to the helmet.
- The ribbons can be glued to the sides of the backpack.
- Bias binding in different colors will look good on the astronaut's back.
You can decorate your DIY astronaut costume with small metal rivets and laces. It should look as much like a real costume as possible.
If desired, a diamond shape can be created from flexible plastic without straight corners so that the space helmet has a closing window. The costume can be transformed by the presence of small details that will serve as an addition.
The suit can be made with your own hands from improvised means. The space helmet can be made in several ways.
Depending on the child's wishes, parents can complement the image of the astronaut with metal inserts and plastic bottles to imitate a real young conqueror of space.
Video about the costume
DIY astronaut costume: