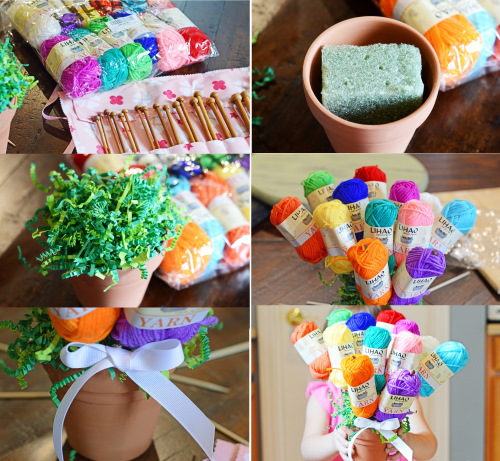
Making bouquets from colored balls of yarn is a new trend in the field of handicrafts. Beginner craftsmen need to learn what such bouquets are for, how to make them and what materials may be required for work.
The purpose of bouquets made from balls of knitting threads
A bouquet of yarn balls is an unusual gift that can be given to a friend, mother or grandmother in honor of a holiday. The main feature of such bouquets is their versatility. Flowers made of yarn balls can be used to decorate a room or for photo shoots.
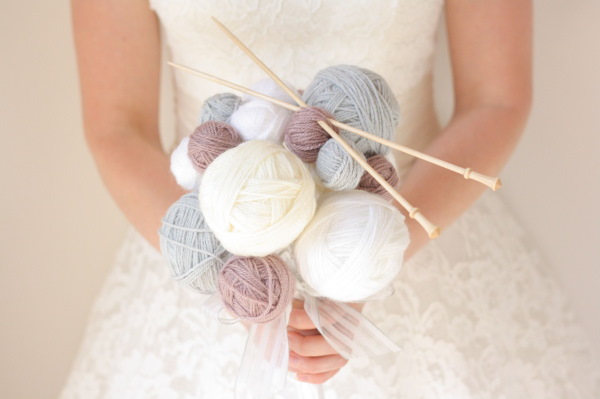
You can also disassemble the bouquet and use the threads for handicrafts, for example, for knitting, making pom-poms, weaving unusual laces and decorating various crafts.
Features of thread application
What features should be taken into account when creating a bouquet from balls of yarn:
- To get voluminous balls, you need to use fluffy or thick yarn. Plush, mohair, angara or wool will do.
- When creating a composition with fresh flowers, it is necessary to select yarn that will repel water. Due to excess moisture, the balls can acquire an unpleasant smell, which will be difficult to get rid of.
- When threading the balls onto knitting needles or skewers, never use glue. The threads will become unsuitable for needlework. It is better to use knitting needles with plastic stoppers, or glue a foam or foil ball to the tip of a wooden skewer in advance so that the balls hold better.
If the appearance of the ball does not harmonize with the rest of the composition, then the threads must be unwound and the skein must be twisted again, giving it the desired shape. You cannot crush or stretch the wound yarn. The threads may break and become deformed.
Master classes on making bouquets from yarn
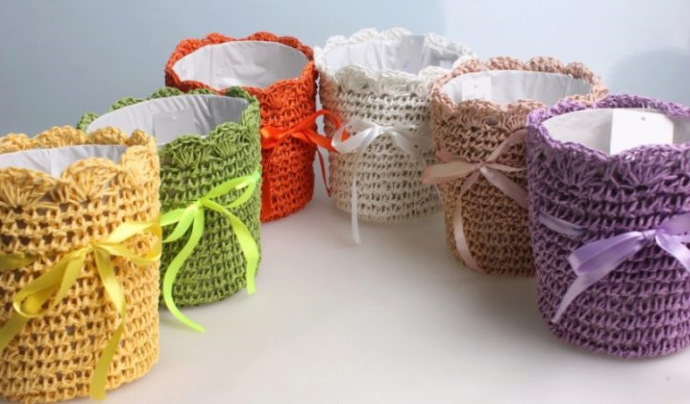
You can create large and small bouquets from yarn cups. By choosing the right shades of threads, you can create a composition that will look like real flowers. To make the bouquets look festive, they need to be decorated with beads, colored paper and dried flowers. It is equally important to beautifully design the packaging.
Further in the article you can look at instructions for making various bouquets from skeins of thread.
"Mimosa"
A bouquet of yarn balls in the form of a mimosa branch can be made with your own hands in 1.5 hours.
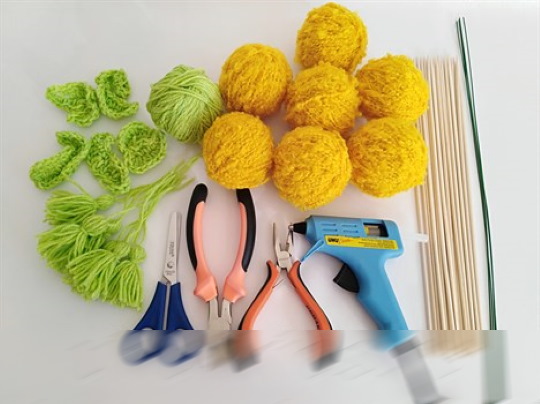
What you will need for work:
- acrylic yarn yellow;
- thick green floral wire (No. 20, diameter 1.1 mm);
- green corrugated paper;
- PVA glue;
- small foam balls;
- green floral tape;
- satin ribbon;
- nippers.
First, the wire needs to be cut into pieces using wire cutters. The table lists the number of pieces and their length.
| Number of segments | Length, cm |
| 3 | 30 |
| 2 | 25 |
| 6 | 18 |
| 2 | 15 |
| 2 | 10 |
Procedure:
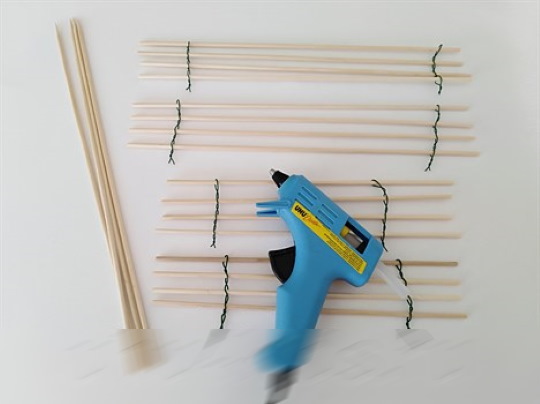
- First, you need to assemble the branch on which the inflorescences will be located. Place a 30 cm piece of wire vertically in front of you.
- Attach 2 pieces of 25 cm long to it. Bend their edges to the sides. Fix the stems with pieces of floral tape at the top and bottom. The lower ends of the wire should be at 1 level.
- By analogy, attach 2 pieces of 18 cm each with tape.
- Secure 2 wires, 15 cm long.
- Attach the last 10 cm pieces.
- Wrap the resulting stem tightly with floral tape.
- Bend back the branches.
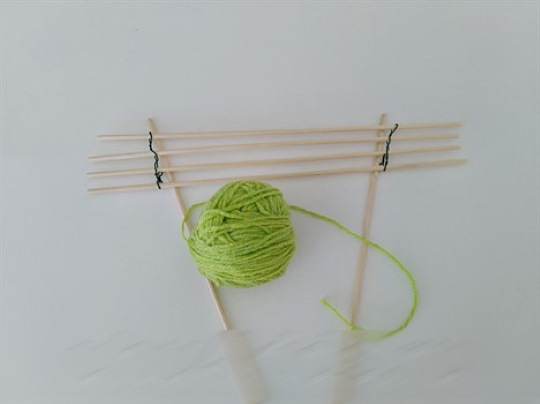
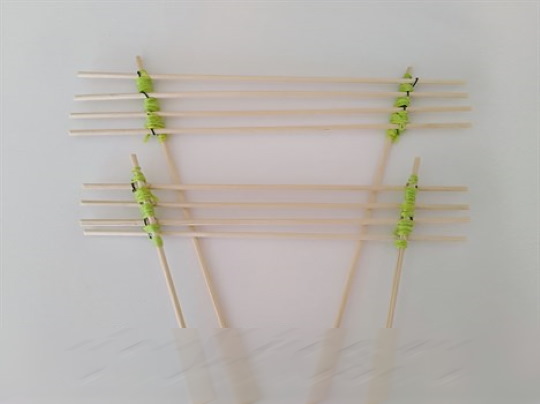
- Set this stem aside for now. Now you need to make 2 branches of leaves. Connect a 30 cm piece of wire with 2 pieces of 18 cm. Wrap the lower part of the stem with tape. Make the 2nd branch in the same way.
- Cut the corrugated paper into strips 5 cm wide. It is important to cut it along the grain, not across it.
- Make a fringe on each ribbon by making transverse cuts. The width of the uncut edge is 1 cm, and the width of the small strips is 0.5 cm.
- Coat the uncut edges of the paper strips with PVA glue.
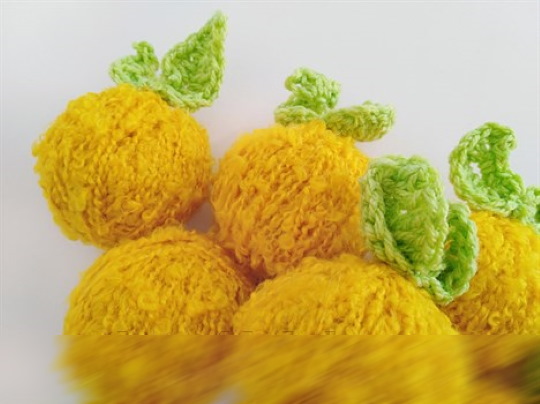
- Wrap them around branches to imitate leaves.
- Straighten out all the “needles”. Dry the product.
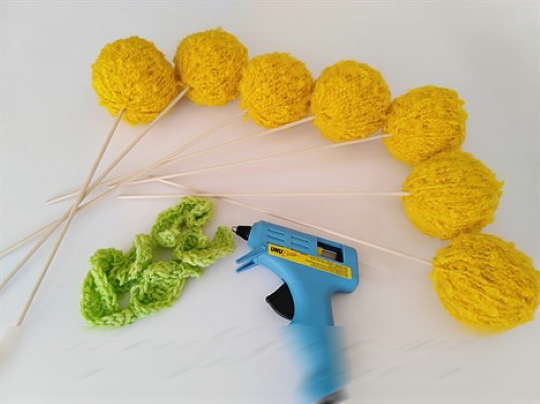
- Take the stem intended for the inflorescences. Grease the tip of each branch with PVA glue.
- Place 1 foam ball on each branch.
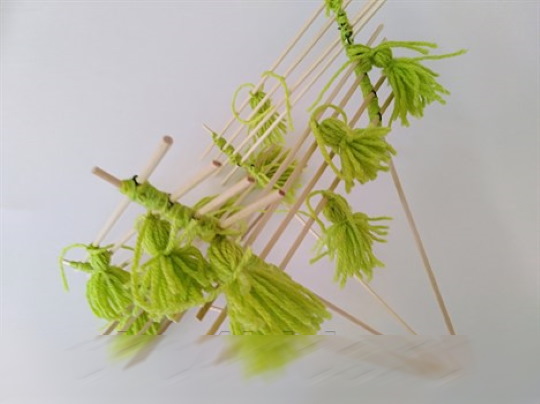

- Unravel a skein of yellow yarn and twist it into 9 small balls, 5 cm in diameter. Do not tighten the threads. The skeins should be light and soft.
- Tuck the loose ends of the threads into the balls.
- Place the balls on the branches.
Gather leaves and inflorescences into a bouquet, tie the stems with a satin ribbon. Tie a lush bow. Cut off excess ribbon and singe its ends with a lighter so that they do not unravel.
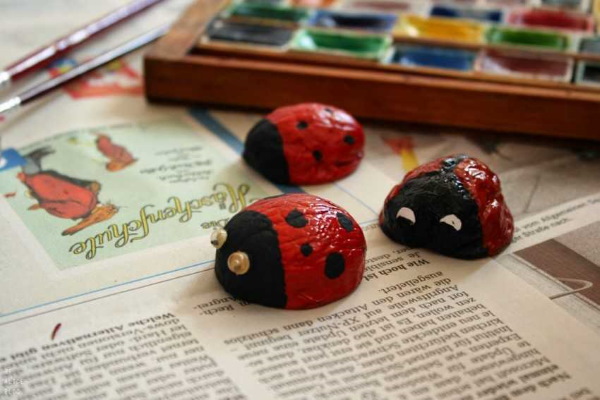
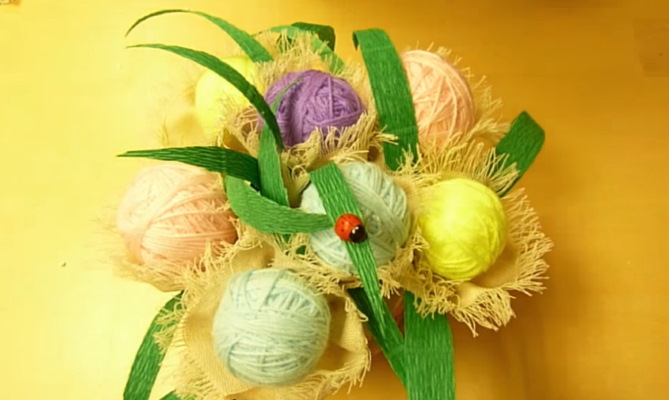
"Ladybug"
A bouquet of balls of yarn called "Ladybug" will turn out colorful and bright.
To work you will need:
- 7 multi-colored balls of linen yarn;
- 7 plastic tubes for attaching helium balloons (with cups);
- green acrylic paint in a spray can;
- simple pencil;
- sackcloth;
- brown sewing thread;
- needle;
- scissors;
- transparent glue "Moment";
- half a pistachio shell;
- acrylic paints;
- thin art brush;
- green corrugated paper.
Procedure:
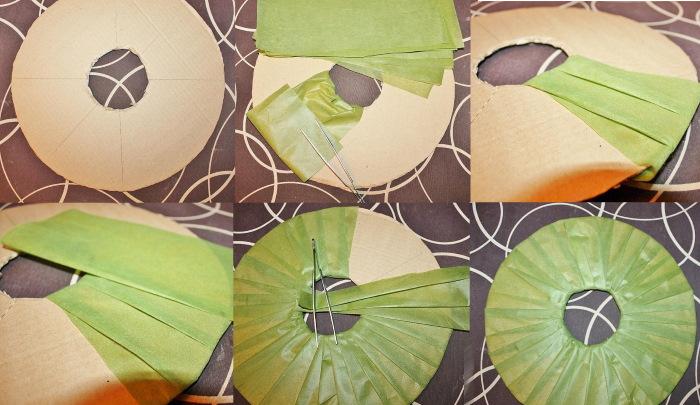
- Cut the burlap into strips 20 cm long and 5 cm wide.
- Using a needle, thread each ribbon and pull the fabric into a ring. Straighten out the wavy edges. You can pull out a few top threads to create fluffy edges.
- Paint the plastic tubes with cups with spray paint and dry.
- Place the balls of yarn on the cups. Secure them by wrapping the base of the cup with the end of the thread that needs to be pulled out of each ball.
- Apply a drop of glue to the stem under the tied knot.
- Place a fabric ring on the stem from below, with the fluffy side facing up. Press with your fingers until the material sticks to the tube.
- Collect the remaining flowers in the same way.
- Fold the corrugated paper like an accordion. You should get a 10x5 cm rectangle consisting of 10 layers.
- Draw the shape of leaves on one side of the paper. Cut them out.
- Straighten out the leaves.
- Assemble a bouquet and add paper leaves to it.
- Wrap the flowers in burlap. Wrap with sewing thread and tie a knot.
- Paint the pistachio shell with red acrylic paint. Dry it.
- Using a thin brush, draw the head and spots like a ladybug.
Glue the shell to the edge of the package using Moment glue.
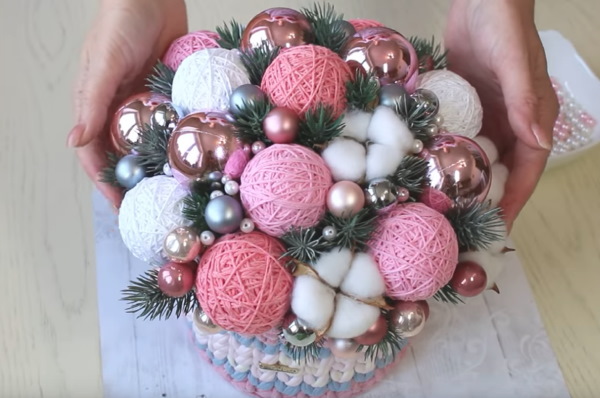
"New Year's boom" with Christmas tree balls
A bouquet of balls of yarn can be a good gift for New Year or Christmas.
What you will need to create such a bouquet:
- 5 large red balls of acrylic yarn;
- 6 medium sized white balls;
- 6 small green balls;
- foil;
- thick floral wire;
- nippers;
- stationery knife;
- measuring tape;
- felt-tip pen;
- spruce branches;
- small gold-colored balls for decorating the Christmas tree (9 pcs.);
- a piece of foam;
- green tinsel without shine;
- small basket.
Procedure:
- Cut the wire into 26 pieces, 25 cm long.
- Roll 26 small balls from foil and place them on the end of each wire.
- Place all the balls on the wire.
- Place the balls on the remaining pieces of wire, having first removed the fasteners from them.
- Cut spruce branches. Long branches should be chosen. 7 pieces are enough.
- Use a tape measure to measure the circumference of the bottom of the basket and its diameter.
- On the foam, using a felt-tip pen, draw a figure of the desired shape and size. Cut out the blank with a stationery knife.
- Place a piece of foam inside the basket.
- Roll up the tinsel and place it on the foam.
- Stick the flower stems into the foam. There should be red balls in the center. White and green ones should be placed at the edges in a checkerboard pattern.
- Insert the wire with gold balls between the balls in a random order.
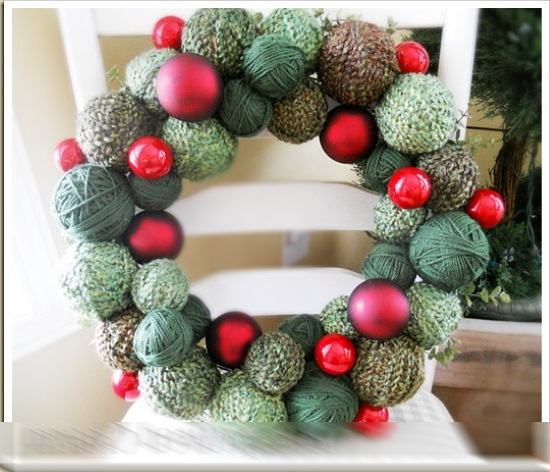
Carefully insert spruce branches between the green and white “flowers”.
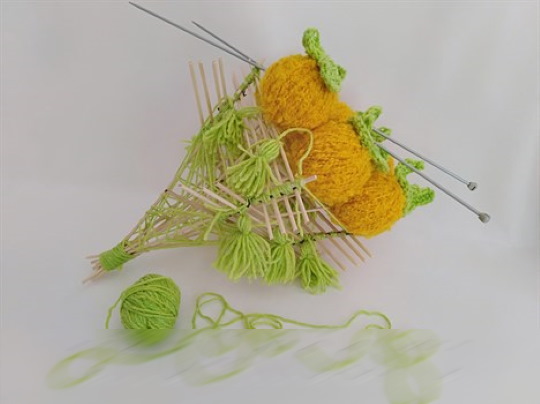
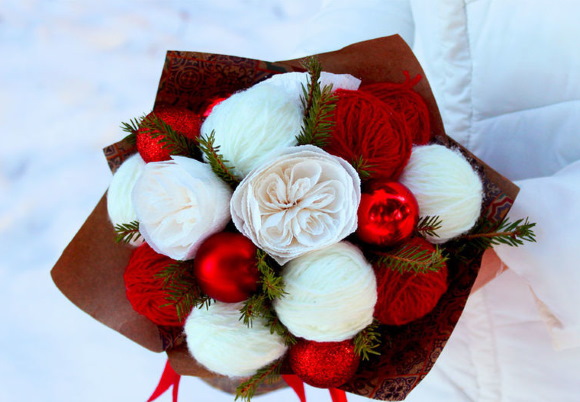
Bouquet of roses on skewers
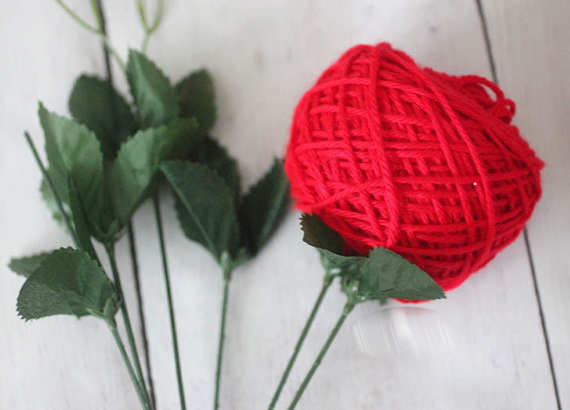
To create such a bouquet, you will need skeins of yarn in which the thread is laid crosswise. Such skeins have 2 ends: on the side and in the middle. They are soft and light.
What you will need to create a bouquet of roses from skeins of yarn:
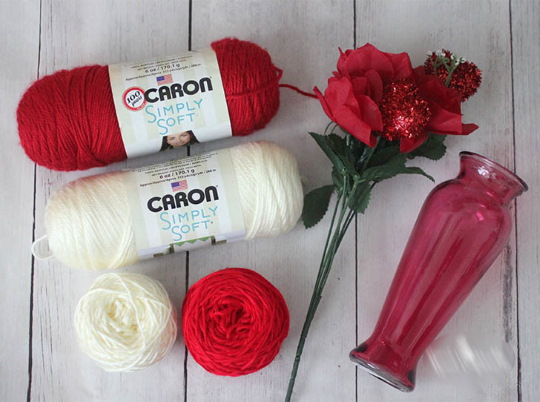
- 3 large skeins of white acrylic yarn;
- 3 large skeins of red yarn;
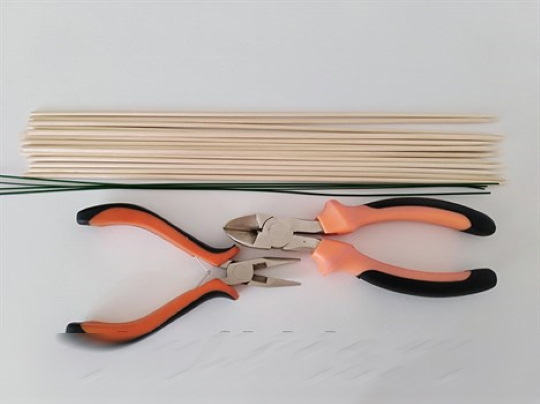
- 6 long wooden skewers;
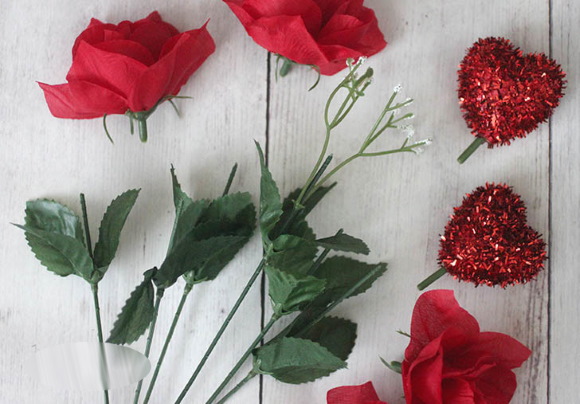
- 6 artificial roses with realistic stems and leaves;
- nippers;
- green acrylic paint;
- medium sized artist brush;

- foil;
- satin ribbon.
Procedure:
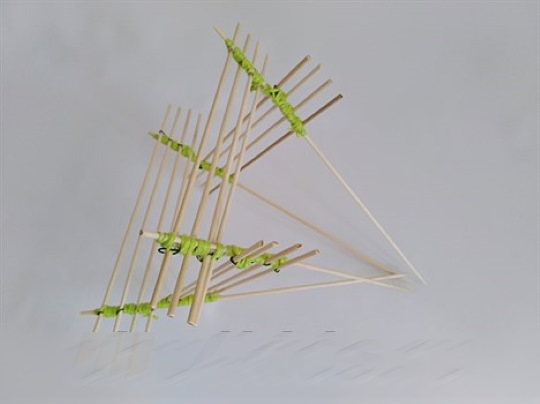
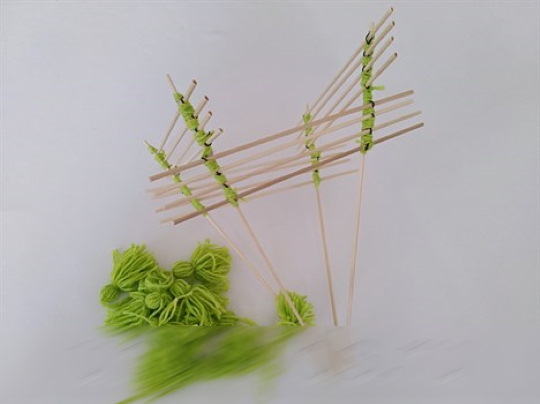
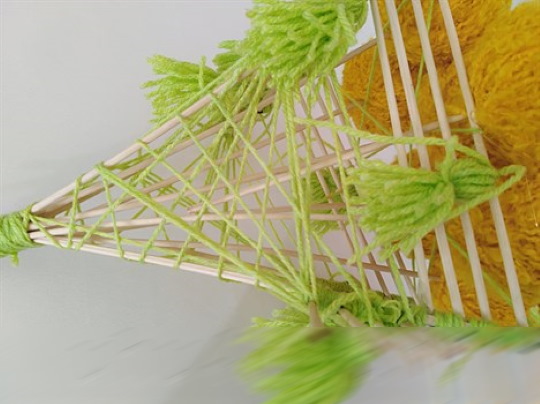
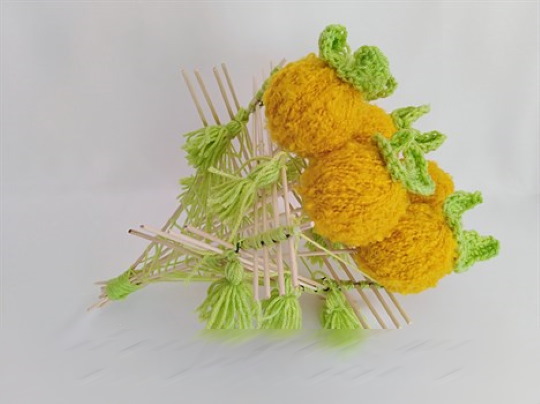
- Paint all the skewers green. Dry them.
- Roll 6 tight balls from the foil and place them on the end of each skewer.
- Carefully thread the balls onto the skewers, threading the foil balls through the center of the balls to their middle. The cross winding should be on the sides.
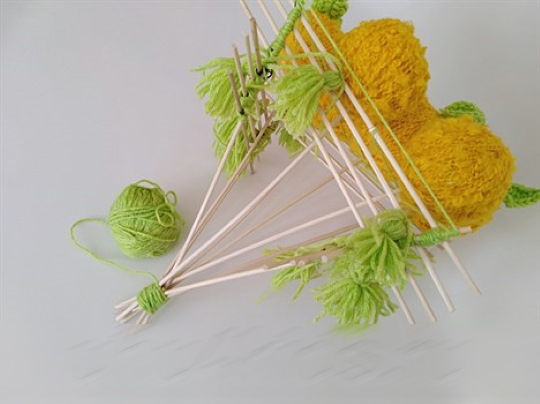
- Use nippers to separate the artificial rose buds from the stems. They are not needed. Only the stems with leaves should remain.
Assemble the bouquet and fasten it with a satin ribbon. Tie a lush bow.
How to make packaging for a bouquet
Bouquet packaging can be made from different materials.
Popular options:
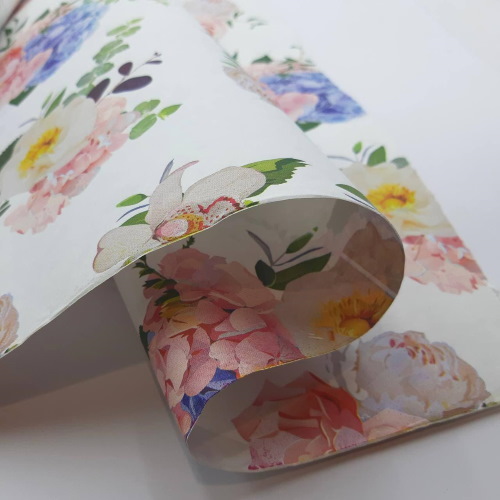
- Colored corrugated paper. The shades of the material should be selected to match the main color scheme of the bouquet. Pastel colors will look good.
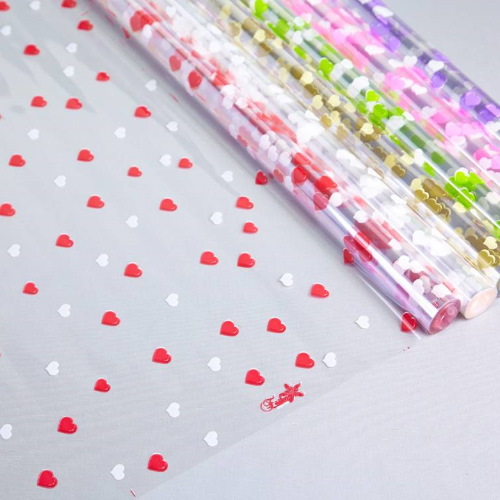
- Polyethylene film with lace pattern. Suitable for decorating delicate and romantic bouquets.
- Floral mesh. In specialized stores you can buy a net of any color. It holds its shape well and makes the composition more elegant.
- Kraft paper. Suitable for decorating strict and laconic bouquets.
- Semi-transparent organza. Pairs well with large, fluffy bouquets.
The packaging can be decorated with satin ribbons. They are usually tied around the stems and stapled along the edges of the wrapper, creating voluminous flounces. The ribbon can be tied into a lush bow or twisted into lush "curls". To give the composition an exotic look, you can decorate the packaging with sisal, placing it between the flowers and wrapping paper.
Kraft paper packaging is often tied with twine or thick rope in several turns. Shiny gift paper and wicker baskets can also be used as wrapping. Further in the article you can read master classes on making such packaging with your own hands.
From paper
Experienced craftsmen advise beginner needlewomen to use corrugated or thin shiny paper to create packaging. It is more difficult to work with denser materials. You can combine 2 types of paper in 1 composition. It is recommended to place the film between the flowers and the paper layer. Such packaging will give the bouquet additional volume.
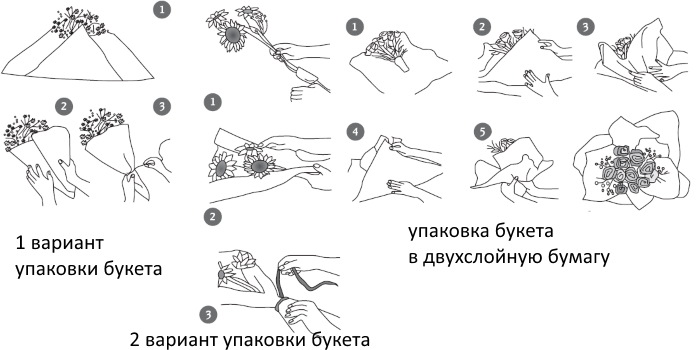
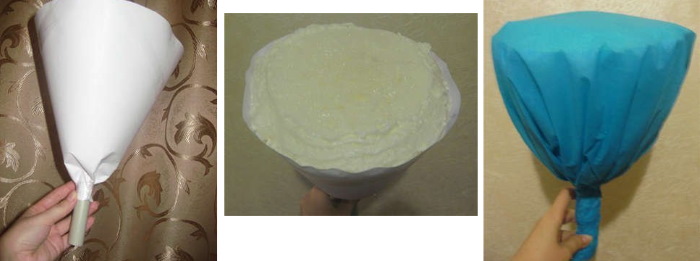
How to wrap a bouquet in corrugated paper:
- Place a square sheet of paper on the table with the corner facing up.
- Place the bouquet in the center of the sheet.
- Fold the bottom corner, covering half of the bouquet.
- Pull the left corner to the right. Wrap the bouquet with it.
- Pull the right corner to the left. Wrap the paper around the bouquet.
Secure the edges of the package with tape.
How to wrap a bouquet in shiny film:
- First, tie the flower stems together with thread.
- Place a square sheet of paper on the table. Place the bouquet so that the flowers are above the top edge of the package.
- Pull the left corner to the right. Cover the bouquet with it.
- Pull the right corner to the left.
- Fold the bottom corner.
Secure the edges of the package with tape.
How to wrap flowers in double-layer paper:
- Place a square sheet of paper on the table so that one corner faces up.
- Place the bouquet in the center of the paper.
- Lift the bottom corner and cover the bouquet.
- Use both hands to crush the packaging, pressing it against the stems.
- Fix the edges of the paper with a flying one.
Use your fingers to straighten the paper, bending the ends back.
In the basket
A bouquet of yarn balls placed in a basket looks original and unusual. You can make the basket yourself.
What you will need for this:
- green fluffy threads "grass";
- PVA glue;
- small plastic flowerpot;
- brown yarn "Iris";
- braided tape;
- a can of polyurethane foam with a gun;
- double-sided adhesive tape;
- 2 safety pins;
- stationery knife;
- scissors;
- crochet hook;
- a bouquet of balls of yarn.
Procedure:
- Fill the flowerpot with foam and leave it until completely dry.
- When the foam dries, remove the excess with a utility knife.
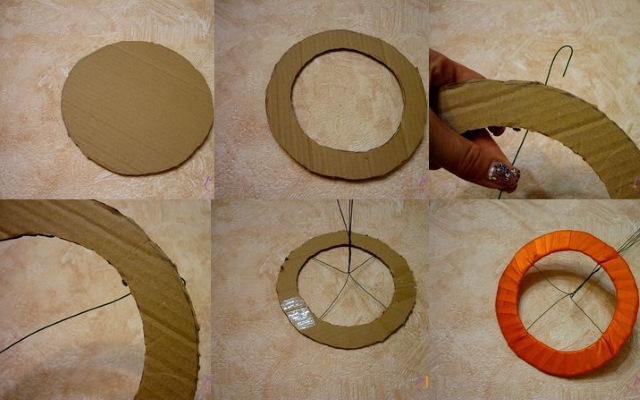
- Cover the outer walls of the flowerpot with double-sided adhesive tape.
- Remove the protective layer from the tape.
- Wrap the flowerpot tightly with brown threads.
- From the "grass" yarn, you need to knit a round napkin equal to the diameter of the flowerpot. You need to knit with single crochets, gradually adding the number of loops. The last 2 rows should be knitted without increases. The edges should curl slightly downwards.
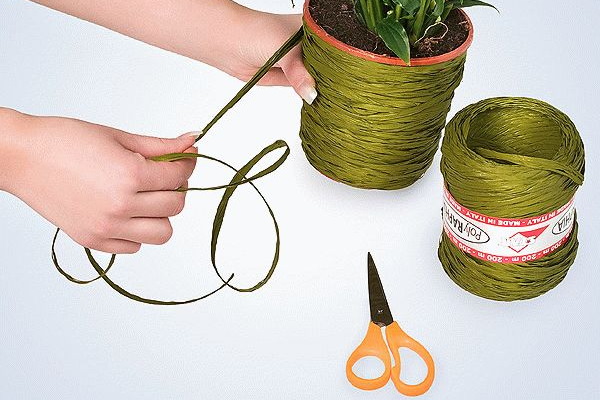
- Pull the knitted piece onto the flowerpot like a lid.
- Wrap the flowerpot with decorative tape.
- Secure the ends of the ribbon with safety pins.
Stick the stems of the “flowers” through the tied grass into the foam.
How to Make Bouquet Stands from Threads
Instead of packaging, you can make stands. They are convenient because you don’t have to look for a vase for the bouquet you gave. You can immediately put it on a shelf or table.
Option No. 1
What you will need:
- plastic bottle 1.5 l;
- stationery knife;
- thin cardboard;
- stapler;
- scissors;
- mounting foam;
- plastic tube;
- organza;
- corrugated paper;
- satin ribbon.
How to do:
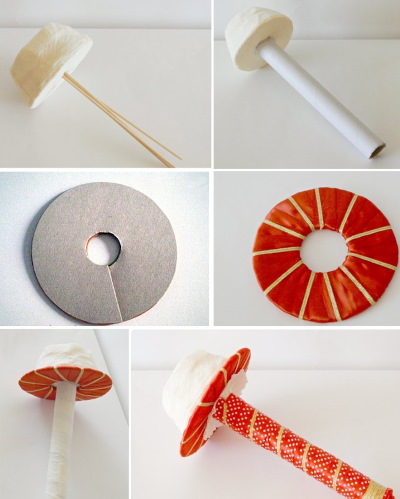
- Cut a square out of cardboard.
- Roll it into a cone. Staple the edges.
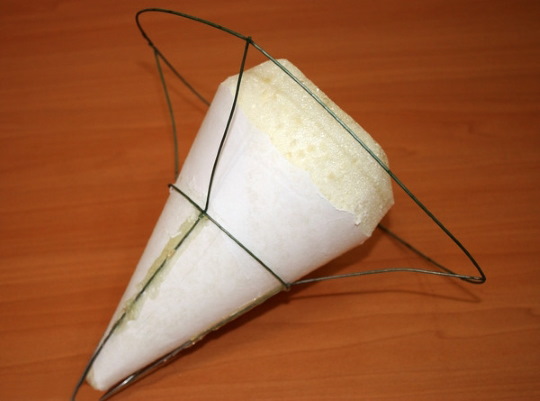
- Cut off the tip and insert the tube into the hole.
- Cut the plastic bottle with a utility knife to create something like a vase.
- Fill the container with foam. Without waiting for it to dry, insert the cone into the bottle.
- Let the structure dry.
- Cut off excess foam.
- Wrap the stand in a layer of organza, then wrap it in paper.
- Wrap with satin ribbon and tie a fluffy bow.
Insert the bouquet into a cardboard cone.
Option #2
What you will need:
- cardboard from a box;
- ruler;
- pencil;
- scissors;
- scotch;
- colored corrugated paper;
- satin ribbon.
How to do:
- Cut a rectangle out of cardboard 20 cm long and 15 cm high.
- Mark the long sides with lines, placing them at an equal distance from each other (5 cm).
- Use the blunt ends of the scissors to press down the lines.
- Bend the cardboard along the markings.
- Secure the edges with tape.
- Wrap the sleeve in paper.
- Wrap with ribbon and tie a bow.
Insert a bouquet inside. This type of stand is suitable for small compositions.
Tips on how to use yarn bouquets
Bouquets made from balls of yarn can be used as room decor. They need to be properly cared for: dust off with a fluffy brush, store in a dry room and avoid prolonged exposure to sunlight. The finished bouquet can be taken apart into individual balls and used for handicrafts.
You can knit lace napkins from thin yarn, and a headband, hat or mittens from thicker yarn. You can use the threads to decorate other crafts, for example, to make pompoms or hair for knitted dolls. Bright and unusual bouquets are suitable for photo sessions. These can be photos on the theme of handicrafts, or romantic shots.
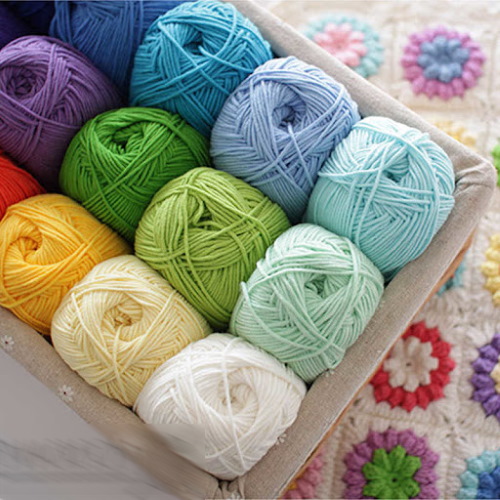
Bouquets can be made from any yarn. The main thing is that the balls match each other in color and look beautiful in 1 composition. From smooth skeins you can collect multi-colored bouquets, complementing them with paper or live leaves. From fluffy yarn you will get voluminous flowers similar to asters or chrysanthemums.
Author: Frolova Ekaterina
Video about making a bouquet
Bouquet of yarn balls: