Paper butterflies are considered an easy craft that children can make in the garden. At the same time, there are a large number of different techniques for creating a composition with your own hands. Adults can make a volumetric insect using the quilling or origami technique, children can use educational applications. For cutting, it is permissible to use a template using bright and thick paper sheets.
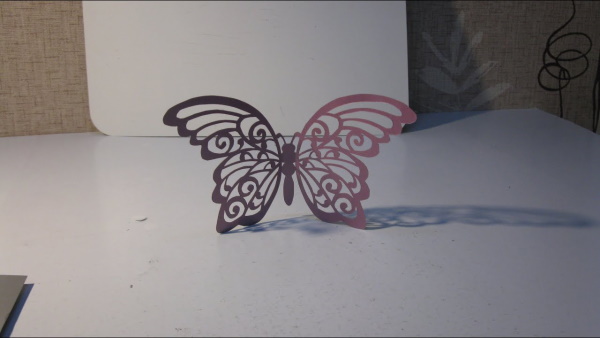
Lace butterfly
Paper butterflies as wall decor have become popular relatively recently. Multi-colored insects can decorate the interior of almost any room, for example, a kindergarten or an apartment.
To achieve the desired result, it is necessary to carry out a number of preparatory works:
| Stage | Peculiarities |
| Selecting a wall | It is recommended to hang the composition on a wall that is completely free of unnecessary objects. This is due to the fact that a high-quality view can enhance the aesthetic pleasure of crafts made by children or with their own hands. |
| Determining the shape and area of the composition | The image can be located on a compact area or spread over a large surface. |
| Preparation of material | Colored sheets of paper are considered a simple way to create insects, so this option is more suitable for children. However, there are many interesting ideas regarding wall decoration. It is recommended to think about the material used in the work and its compatibility with the design of the room in advance. Compositions of various parameters look great. To speed up the work, you can use prepared stencils designed for cutting. When choosing templates, it is necessary to take into account the complexity of cutting out some figures. |
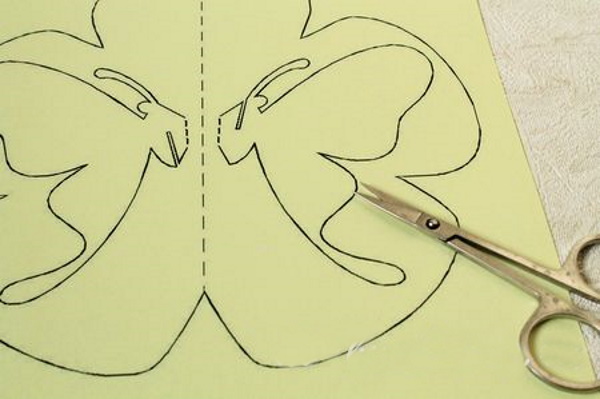
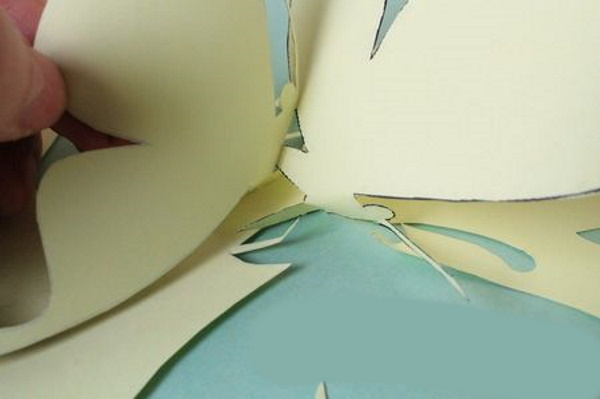
Butterflies made of paper with your own hands can have an openwork appearance. It is recommended to make such a composition from a cardboard sheet. Additionally, it is necessary to use a blade with a sharp knife and a printed template, which has lines for cutting.
This type of work requires perseverance, accuracy and attentiveness, so it is better for adults to cut out the insect so that the child does not get hurt or tired. To do this, you first need to select and print a template, then cut out the required number of parts.
To make the work easier, you first need to cut out small fragments inside, and then start cutting out the outline of the insect.
Using a sharp knife and blade can deform the surface, so it is advisable to cover the table with a sheet of chipboard, plywood or plastic. It is permissible to give the openwork image volume. In this case, the composition needs to be slightly moistened and rounded. The formed bend should be fixed. When the moisture has completely evaporated, the product will be able to retain the required shape.
Step by step description:
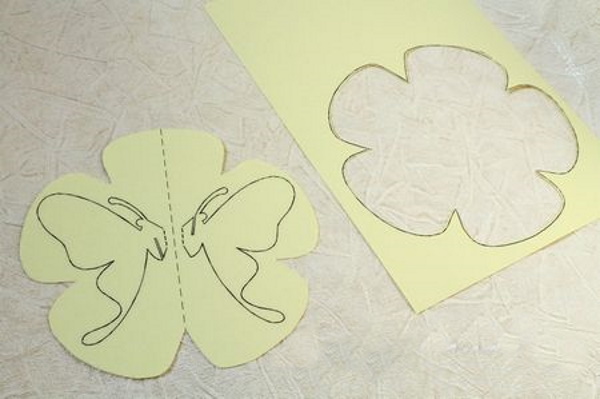
- Fold the paper sheet to form 2 halves and place it on a thick sheet of plywood.
- Secure the sheet with tape or pushpins to prevent the workpiece from shifting.
- Attach a template to highlight the contours of the insect and the ornament on the wings. You can use a pencil.
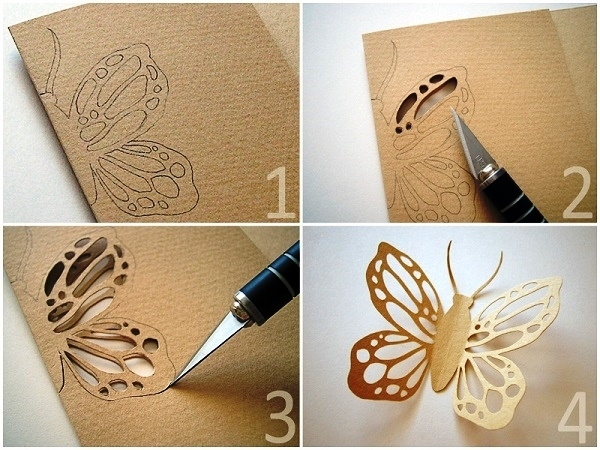
Paper butterflies for the garden can be made openwork, using a template, cut out of cardboard. - First, cut out the pattern on the wings along the marked lines. You can use a craft knife for this.
- Use scissors to cut out the outline of the insect.
- If pencil marks are still visible after the process is completed, they can be removed with an eraser.
From corrugated paper
Butterflies made of paper with your own hands can be made using the clumping technique. To do this, you need to use soft corrugated sheets, which can be easily rolled into small balls. At the same time, crepe paper is considered an excellent material for children's creativity. In stores, there are large rolls that can be used not only for decorating the composition, but also for creating bouquets and wrapping gift boxes.
Materials required:
- pencil with scissors and glue stick;
- wire or black cardboard sheet;
- multi-colored rolls of corrugated paper;
- grey or white cardboard sheet.
The main details of the composition are considered to be a furry body with bright wings. For the base, it is advisable to use a cardboard sheet on which you can make a sketch of the insect, and then cut it out along the contour. Peach, pinkish, reddish and yellowish corrugated paper are suitable for the craft.
Operating algorithm:
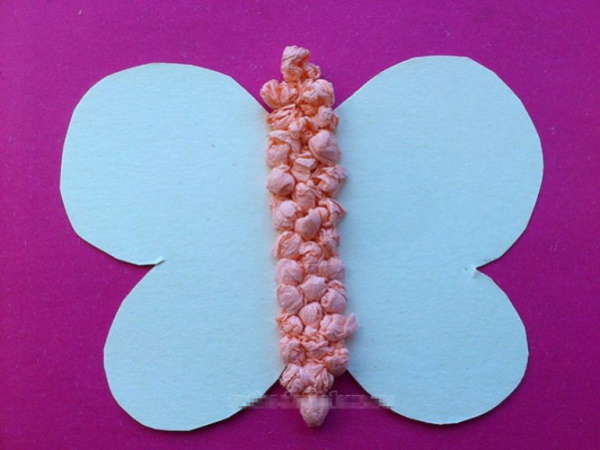
- To design the base of the composition, prepare a thick cardboard sheet. Draw an insect on the blank and cut it out along the contour with small scissors.
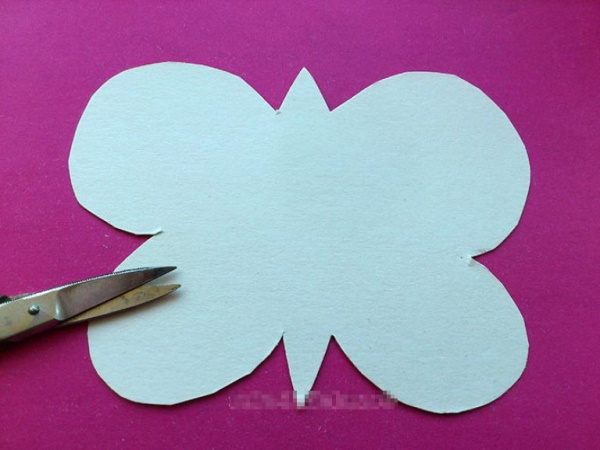
- Cut the corrugated paper into pieces, from which you will need to make small balls later. The fragments can be cut out without using a ruler and pencil. The result should be 4 squares of different shades.
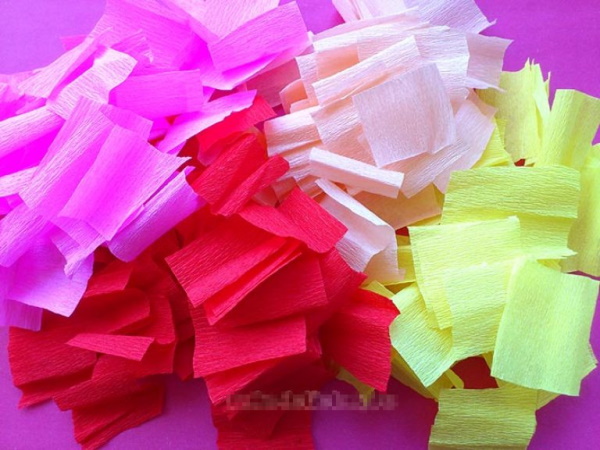
- Crush each square separately to form small balls.
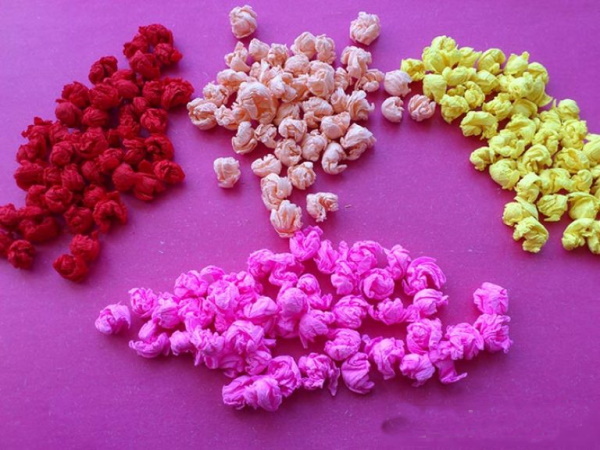
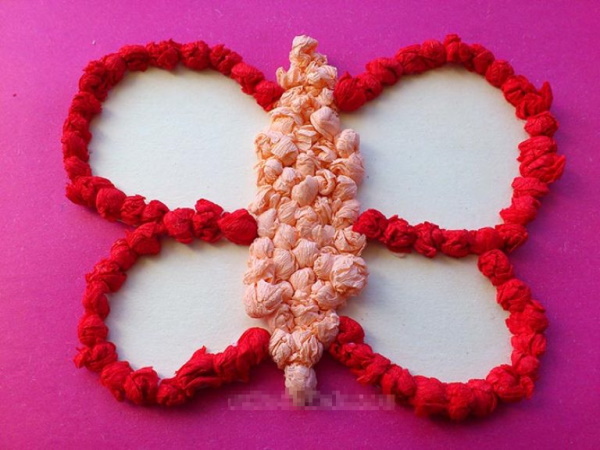
- Fix the peach-colored lumps to the body with glue.
- Fill the wing edging with red balls. Cover the inner area of the wings with yellow and pink blanks.
- Make the eyes from dark corrugated paper in the form of small balls. Make the antennae in the form of thin stripes, cutting them out of a black cardboard sheet.
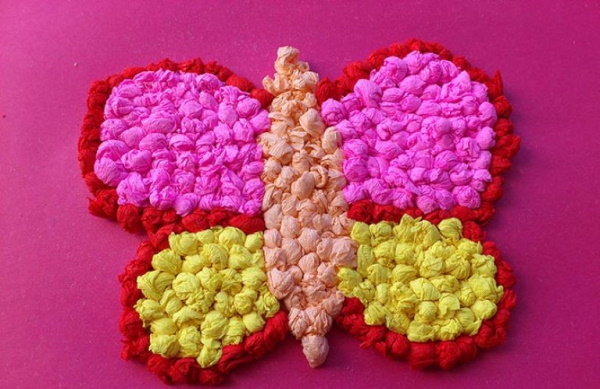
- Fix the finished parts in the required places.
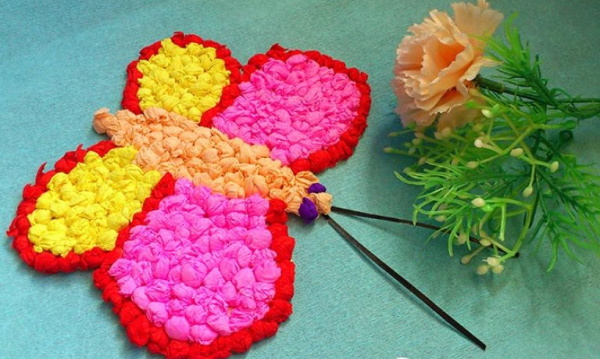
The craft is ready.
Contour butterflies
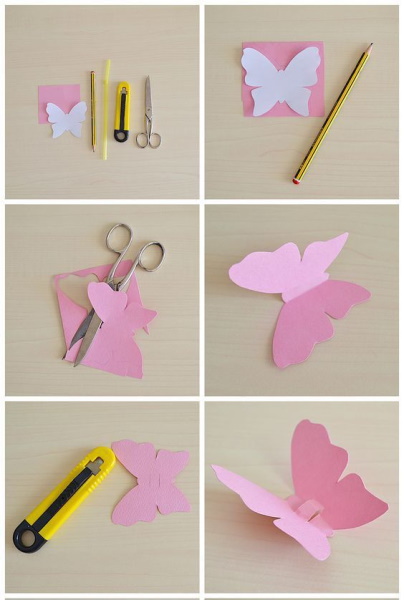
To create outline butterflies, it is acceptable to use colored paper sheets, outline maps or magazine pages. You can also use a colored cardboard sheet or an unnecessary postcard. Additionally, you need to prepare a regular cardboard sheet, which will be needed to cut out the blank.
The cardboard sheet should be thick and not have a cellular structure. When using a ready-made template, which depicts a butterfly with 2 wings, it is recommended to cut off 1 wing to obtain a more symmetrical ornament. The finished template must be applied to the cardboard sheet and traced, then cut out to obtain a rigid base, with the help of which it is permissible to create a large number of insects.
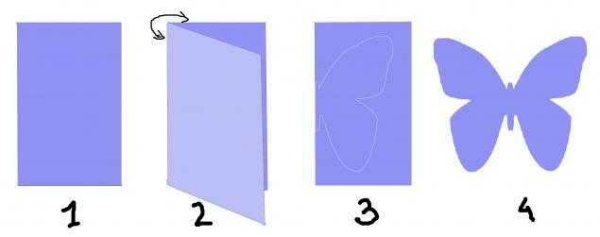
Step by step instructions:
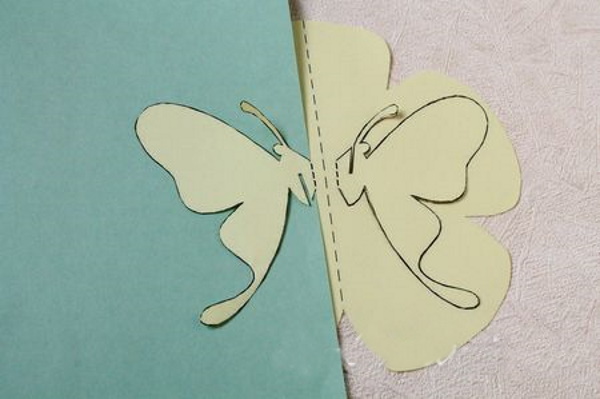
- Transfer the silhouette of the insect onto a piece of cardboard and cut it out.
- Fold the paper sheet in half, attach the template and trace it. Cut out the figure along the outline along the marked lines.
- Bend the wings away from the body to obtain a working piece.
- After cutting out the required number of insects, attach them to a selected location, for example, a piece of cardboard or a wall.
For fastening, it is permissible to use PVA glue or small strips of double-sided tape. It is also permissible to use glue intended for wallpaper. If you are not sure of the result, it is permissible to use sewing pins, which can be fixed to the wall many times without deforming the surface. After placing all the blanks in the required order, you can use glue or tape.
Origami
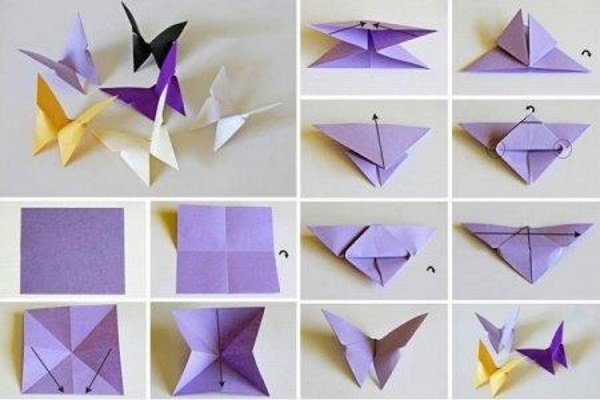
Paper butterflies made using origami technique always look beautiful and are liked by children. Often such crafts are created without using tape or glue. Hand-made figures are suitable for decorating the interior in a kindergarten, at home, decorating gift wrapping and flower arrangements.
List of required materials:
- double-sided square paper of any color;
- ruler;
- scissors.
Step by step description:
- If the paper is rectangular, turn the sheet into a square. The dimensions of the workpiece should be within 7-9 cm.
- Fold the finished workpiece lengthwise, open it and bend it crosswise. Then return the product to its original shape.
- Bend the corners that are opposite. Unfold the square blank again.
- Make a triangle from the square, inserting the border inside on the right and left. Follow the curves formed earlier.
- Bend the bottom corners upwards. As a result, the bends should be at an angle.
- Straighten the workpiece, bend the top. The point located in the upper corner should be larger than the outer outlines of the insect.
- Fix the formed insect in this position. When finished, fold the figure across.
If you have no experience in creating a paper butterfly using the origami technique, it is recommended not to squeeze the paper sheet too much at the folds during work. By ironing it in moderation, it is permissible to give the workpiece a good volume.
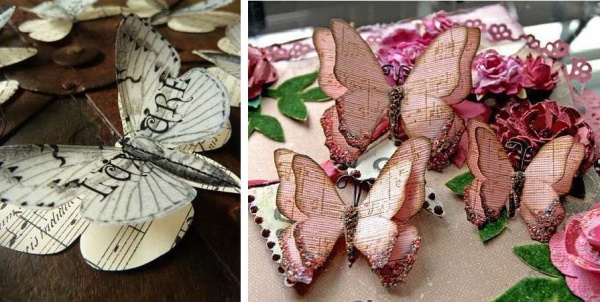
Multilayer
Butterflies made from paper with your own hands can be multi-layered.
The following will work for this:
- newspaper;
- magazine;
- sheet of cardboard;
- music notebook;
- colored paper sheet.
To obtain a three-dimensional composition, it is necessary to draw silhouettes on the selected material and cut out the contours of the insect of different parameters. After the blank, it is necessary to fix it with glue and raise the wings.
Operating algorithm:
- Cut out 2 rectangular blanks from a sheet of paper. The first one should be larger than the second one. This is required to design the insect's wings.
- Fold the corners of the pieces, which are placed diagonally on one and the other side.
- Fold the workpiece inwards twice along the marked diagonal lines. As a result, 2 triangles should be formed, one of which will be larger than the other.
- Turn the product inwards from the left and right sides. Draw any wings on the resulting figures.
- Since the larger wings will be placed at the bottom, the pattern should be on the edges. On small wings, it is acceptable to make the pattern over the entire area.
- Cut out the highlighted part and place the wings inside each other, securing them with glue.
- Draw and cut out the body of the insect with antennae. Fix the cut-out blank in the center.
- Smooth out and lift the upper wings slightly. The result should be a textured multi-layered butterfly.
In the quilling technique
Do-it-yourself paper butterflies created using the quilling technique are suitable for joint creativity with children.
This is due to the fact that it is necessary to twist the strips, giving the blanks various shapes in the form of:
- drops;
- rings;
- oval;
- rhombus;
- triangle.
This work requires perseverance and accuracy, so it is advisable to create the insect in several stages. Each wing is conveniently done separately, fixing the fragments together with a glue stick. When the parts are connected together, you can proceed directly to assembling the craft.
If you want to make the composition in one go, it is recommended that the child choose the easiest quilling option. First, you should glue spiral rings of different parameters onto the depicted wings, then make an outline and glue the body of the insect.
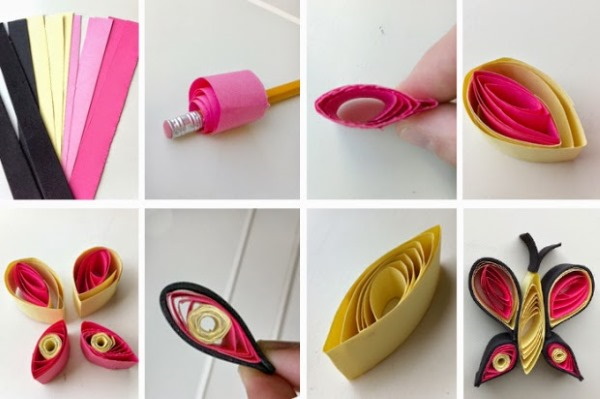
To make a more complex craft, you need to prepare:
- 4 different shades of stripes for wings;
- PVA glue;
- a brownish stripe for the body;
- template ruler;
- a skewer for twisting.
Scheme for creating the craft:
- To decorate the upper wings, cut 2 strips of yellow and red in half and join them together.
- Twist the pieces together using a template with a diameter of 25 cm. Secure the edges with glue to prevent the pieces from unfolding.
- To create the lower wings, cut the brown and pink stripes into 2 parts and fix them together.
- Twist the blanks using a template with a diameter of 20 cm. Glue the edges and give the parts the shape of a drop.
- Fold the black strip in half to create a body with antennae. Wrap the ends of the antennae into rings using a toothpick.
- Assemble the product into one composition.
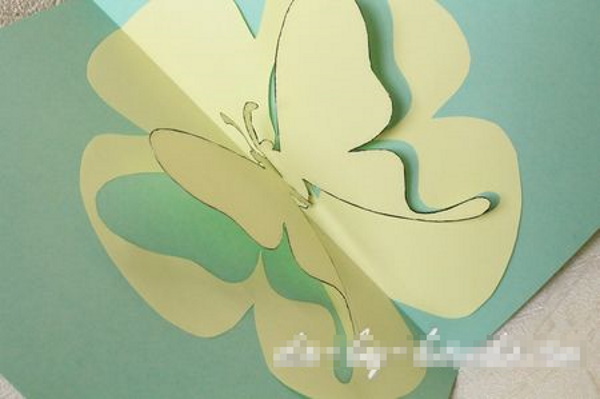
In the kirigami technique
The kirigami technique promotes the development of a sense of spatial imagination, which has a beneficial effect on the formation of children's mental abilities.
List of required materials and tools:
- yellow colored paper sheet;
- glue stick;
- a sheet of green paper;
- scissors.
Step by step instructions:
- Make a printout of a stencil in the form of a butterfly sitting on a clover leaf, from which you can cut out the silhouette of the insect. For cutting, use thin manicure scissors so that there are no roundings on the edges of the blades.
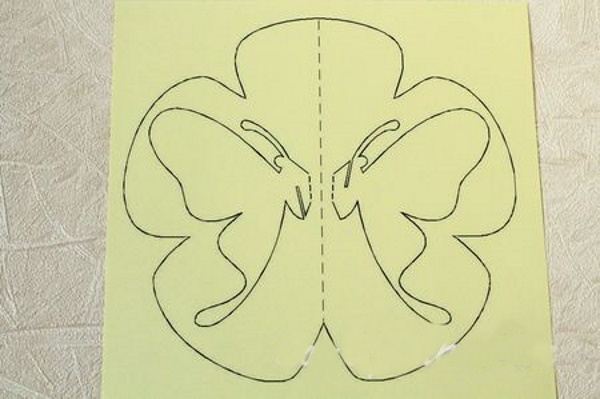
- First, cut out the silhouette of the leaf on which the insect is placed.
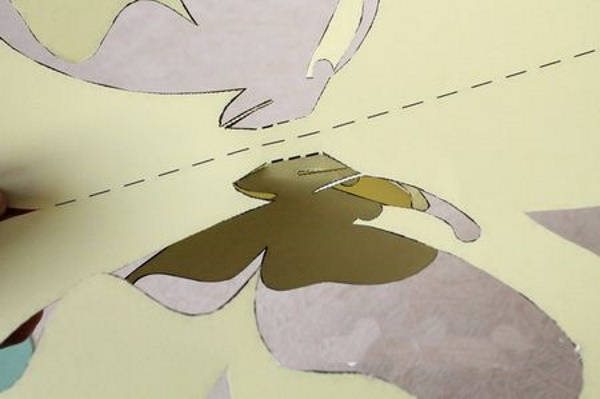
- Without tearing, cut out the head, antennae and wings of the butterfly. Only the abdomen of the insect should remain along the dotted line for bending.
- Having cut out the figure on each side, bend the parts inward along the dotted lines. Turn the workpiece over to the other side.
- Cross the 2 pieces together in the center of the belly to join the 2 cut out sections. One groove should be on the left side of the belly, the other on the right side of the chest.
- Align the workpiece to obtain a three-dimensional craft. To highlight the relief, make a background. To do this, fold a green A4 sheet in half.
- The marked center on the insect's clover is aligned with the line on the green background that runs through the middle.
- Glue only the clover leaf, without using the butterfly. The insect should float in the air.
- When you close the card, the silhouette of the insect will neatly fold; when you open it, the butterfly will hover over the clover.
Accordion shaped
The accordion-shaped butterfly is suitable for wall decoration, hanging from the ceiling, and using as a sticker if you apply double-sided tape to one part.
Operating algorithm:
- Make 2 rectangles of different sizes from the yellow and red sheets.
- Fold one blank in half from left to right, then from bottom to top. As a result, there should be 1 fold on the left side, 2 at the bottom. There should be free edges of the sheet on the right and at the top.
- At the top, draw a strip from the right side to the upper left corner. Do the same with the 2nd rectangle.
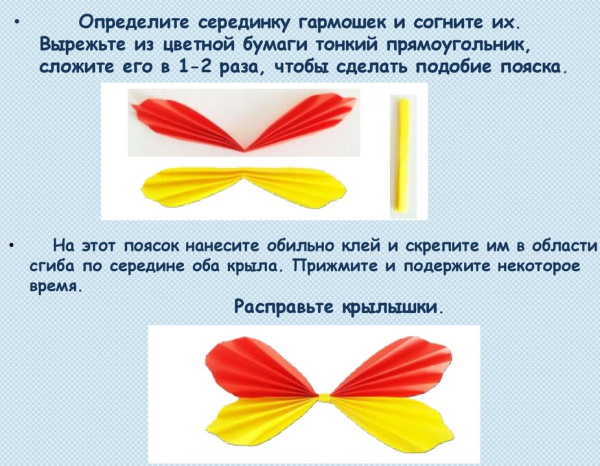
- Fold 2 pieces like an accordion so that the width of the folds is about 5 mm. Mark the center of each accordion and fold in half.
- Cut a thin rectangular strip from a colored sheet and fold it twice. Grease the strip with glue to fix it in the center in the bend area of 2 wings. Press the joint lightly and hold for a few seconds. After that, the wings can be straightened.
- Cut out a body from a piece of cardboard and draw smiling eyes on it. The body can be shaped like an eight or an oval.
- To create the whiskers, cut thin strips from black cardboard, wrapping the edges into rings. Glue the pieces to the body.
- The finished body of the insect is joined with the wings to complete the craft.
An image of a butterfly, which can be cut out of a sheet of paper with your own hands, is suitable for decorating a kindergarten or home. The resulting applique can be hung from the ceiling or glued to the wall. At the same time, cutting out compositions using templates is a good way to train the motor skills of children's hands.
Video about making a butterfly out of paper
How to make a butterfly out of paper: