For many artists and poets, autumn is a special time. The riot of golden colors and heady clean air open up new thematic horizons for creativity. Children also love to do crafts, drawing and modeling. Making pictures from appliques in the preparatory or senior group of the kindergarten will be an interesting experience for them.
Application on the theme "Golden Autumn" in the preparatory group
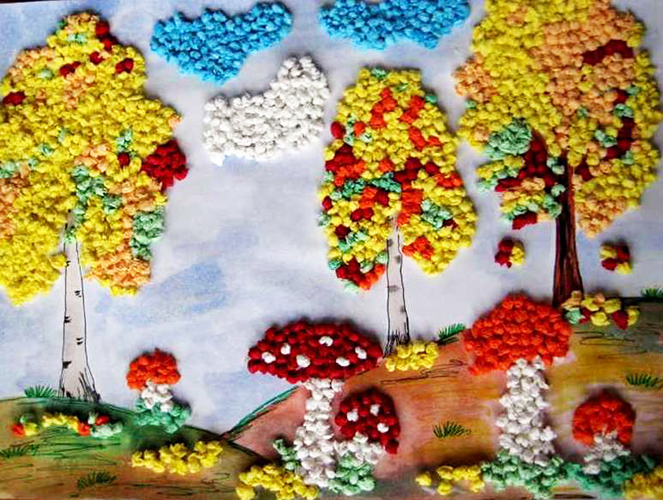
The applique can be made using beautiful candy wrappers. They can be used to create interesting panels, where in addition to multi-colored candy wrappers there will be beautiful autumn leaves. You can also take foil with a gold coating or clippings from glossy magazines.
The panel will look good in the format of a regular album sheet or slightly smaller.
The stages of its creation are as follows:
- Create a background for the future painting. To do this, you can color the base with pencils, paints, or glue colored paper onto it.
- Choose a picture in the form of a beautiful bouquet, a colorful forest, a ripe field of wheat or another object associated with autumn. For example, create an applique, the center of which will be mushrooms. All children know them, and most often mushrooms are picked in the fall. The teacher can suggest that children create a panel of mushrooms growing under a tree.
- Draw grass on the base, and glue beautifully cut out mushrooms between it.
- Glue fallen tree leaves, blades of grass or crawling bugs onto the mushrooms.
- Glue mushroom picker figurines near the composition. These can be pictures from a magazine or photos of family members on vacation.
The following applique options on the theme “Golden Autumn” may be of interest to the preparatory group:
| Application | Description |
| Birds flying away for the winter | The base of the work is blue, on which you can draw clouds or clouds. If this is difficult, then details from thematic photographs are glued. To create a bird wedge flying south, you can cut out each bird separately, draw as check marks those that are behind the clouds and are almost invisible, and highlight only a few birds in more detail. |
| Family autumn landscape | Place a tree at the base of the painting, and use photographs of your favorite family members as leaves. You can use group or individual photographs, funny or sad. |
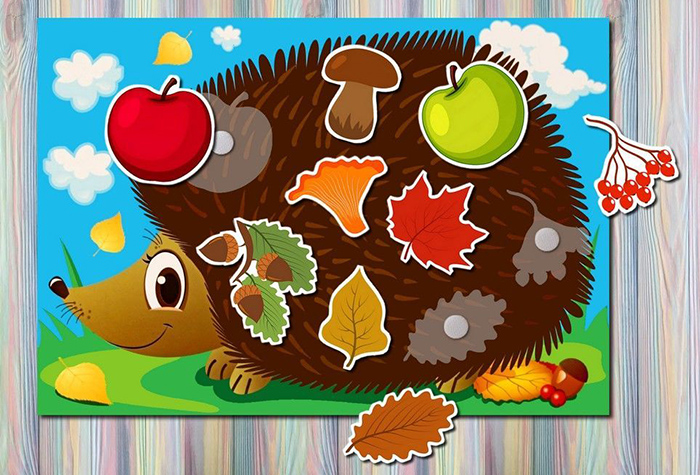
Making crafts in the form of vegetables and fruits can become a teaching material. The teacher invites children to choose the correct version of the guessed vegetable from the available modules and create a single structure. To make it interesting and easy for the children, hints are made on each of them in the form of appliques.
Application in the preparatory group on the theme "Golden Autumn"
To master the creation of the applique "Golden Autumn" you can use materials familiar to children. The work is within the power of not only older children, but also children of the younger group. Tear-off applique develops perseverance in children, develops fine motor skills of hands.
To work you need to prepare:
- thick blue cardboard;
- colored paper;
- PVA glue;
- several brushes;
- a couple of napkins;
- soft pencil.
The work will be completed if you follow these steps:
- Prepare a simple pencil, an eraser and a sheet of cardboard.
- Create a sketch of the canvas. For the ground and grass, take gray or green paper and glue it at the bottom.
- Create a tree trunk from a dark brown sheet, from which a piece of suitable size is torn off. Having created the required shape, glue the trunk to the picture. Also make branches.
- Cut or tear paper segments from yellow and red paper. Stick them on branches or the ground.
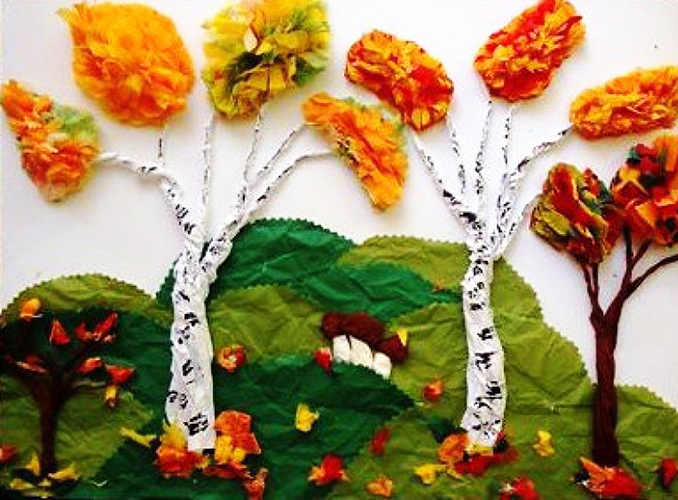
You can choose a craft option using twine. Then the trunk will be voluminous, especially if the twine is laid in several layers. The leaves will look more airy when they are made from a napkin. During such work, children begin to master the rules of working with different materials and the skills of different types of cutting.
The theme for applications can be different, for example:
- seasons;
- different types of transport;
- animals;
- vegetables and fruits.
The main thing is that the child understands what he is doing.
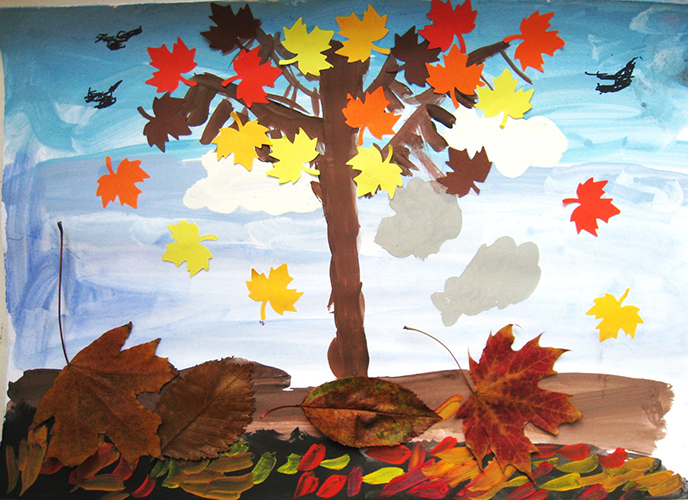
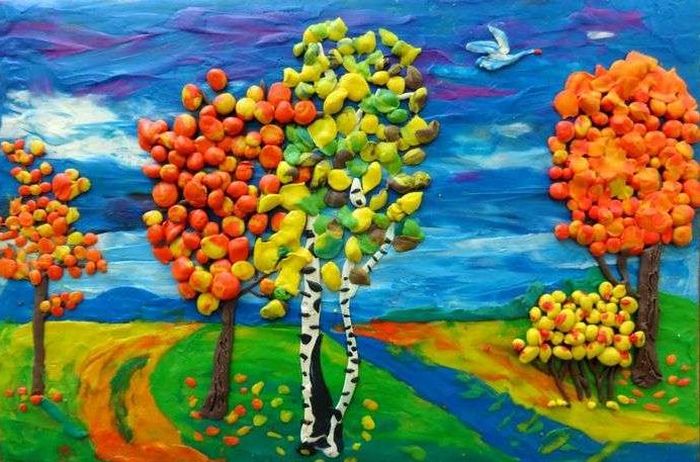
Autumn tree
An applique in the preparatory group on the theme "Golden Autumn" can be a tree with colorful foliage. These can be palms outlined in pencil and painted in the form of a crown. They are created on separate sheets of colored paper and then glued to a common piece of cardboard. The work can be group or individual.
To create a three-dimensional picture from pieces of colored paper, you will need elements of colored paper decoration and the creation of the necessary volume from separate strips of the same colored material.
Children develop and consolidate skills in cutting and gluing strips to create a general picture in the form of an applique. They acquire an aesthetic perception of individual details and the picture as a whole, and develop fine motor skills of the fingers.
The following materials are required for the work:
- paper glue;
- colored cardboard;
- packaging of colored paper;
- pencil;
- cutting scissors;
- a few napkins.
The stages of work are as follows:
- Cut out a previously drawn tree trunk from a sheet of brown colored paper.
- Glue the blank onto the cardboard chosen as the base of the painting.
- Using a pencil, draw the branches that will make up the future crown on cardboard.
- Take red, green and yellow sheets of paper one after the other and fold them in half. Cut them into strips, then glue them into small rings. There should be a lot of them so that the crown looks lush and colorful.
Pumpkin Seed Tree
Pumpkin seeds can be used as a material for creating an autumn tree. For the craft, you need a sheet of cardboard on which a tree with all its branches is drawn. You can take a stencil and transfer the picture more accurately. Pumpkin seeds act as leaves here.
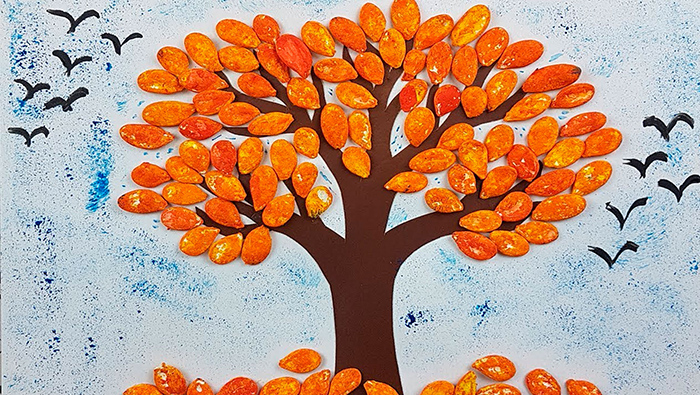
To make them look natural, they are painted in different colors, such as autumn leaves:
- yellow;
- red;
- green;
- scarlet.
You can use any painting method, for example:
- gouache;
- acrylic paints;
- marker.
After they dry, the resulting colorful details are glued to the picture like leaves on a tree. Sometimes double-sided tape is used as a fastener, but it is more convenient to do this with regular glue. The main thing is to press it carefully and wait until it dries.
Tree made of colored paper
Creating a children's applique from simple colored paper can give children a lot of positive emotions.
To work you will need:
- cardboard;
- glue;
- colored paper;
- thick disposable paper plate.
The stages of creating a composition are as follows:
- After choosing the colors for the craft, tear the sheets into small pieces.
- Glue the prepared pieces to a cardboard plate. It is first thickly coated with glue. Ultimately, this will be the crown of the tree.
- Cut a rectangle out of dark paper. It will be the trunk of the future tree.
- Along the trunk, randomly make stripes to make it look more like a real wooden trunk.
- Glue both parts onto a sheet of cardboard. You will get a colorful tree applique.
Tree on the window
An application in the preparatory group on the theme “Golden Autumn” can be presented in the form of a decorative tree or bush on the window.
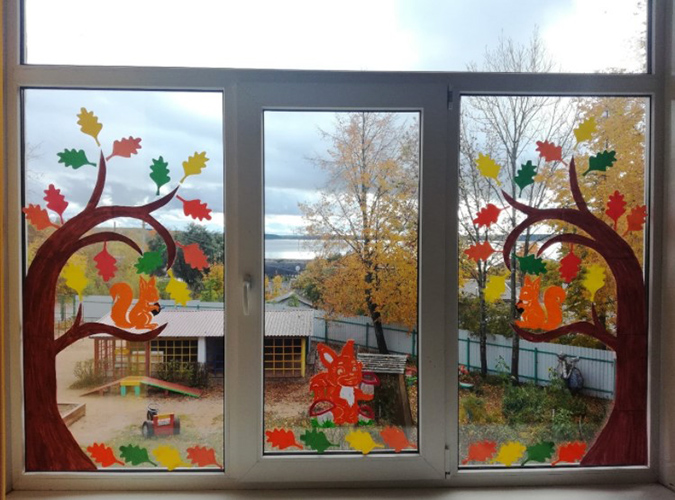
The stages of its creation will be as follows:
- Prepare double-sided colored paper.
- Cut out the trunk and branches from paper.
- Using concentrated soap or paste, they are attached to the window glass.
- Cut out and color the leaves for the tree. Glue them to the window as well.
The image will look equally good from the inside and outside of the room.
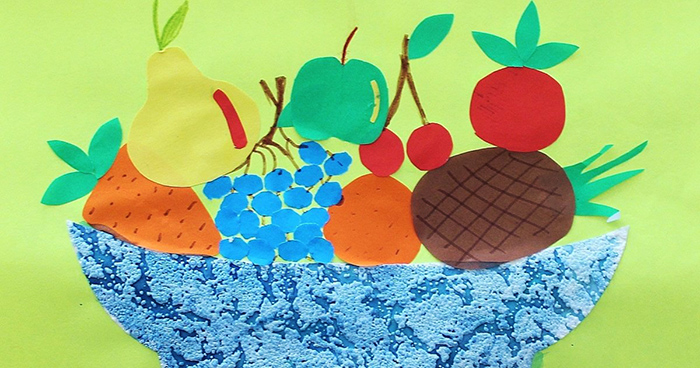
Fruit bowl
Creating an applique on the theme of “Fruit Bowl” allows you to teach your child to cut out objects that are symmetrical to their axis by simply folding a sheet of paper in half.
The child develops:
- attention to detail;
- accuracy in manual work;
- visual reaction.
A child, engaged in such creativity, develops his artistic and aesthetic taste, and learns more about the fruits he is accustomed to.
The following materials and tools are required for the work:
- colored paper;
- cardboard;
- wax crayons;
- scissors;
- stencils.
The teacher can preliminarily tell about the garden, trees and fruits that grow on them. Having given a description, the teacher will ask what kind of fruit it is and the children will have to imagine it in detail. Simple riddles and poems are used in the conversation.
After this, you can move on to composing a general composition from all the fruits. For clarity, you can put a prepared vase on the table, filled with real or toy fruits.
An empty vase is placed nearby. The children will put into it what they have made with their own hands.
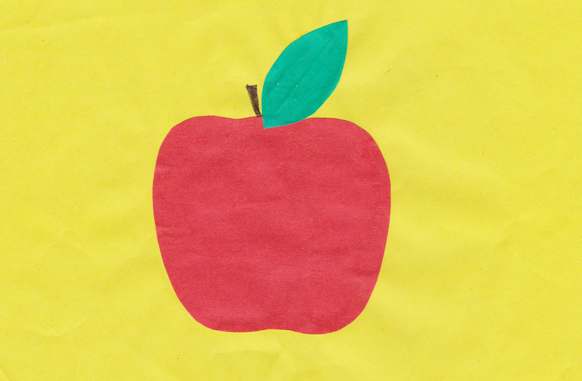
Application "Apple"
The work will appeal to younger children. A brightly colored cardboard craft made with your own hands will allow you to feel proud of your skill. To make the task easier, the teacher cuts out the craft parts in advance. Older children will be able to do it themselves.
To create this craft you will need:
- double-sided colored cardboard;
- glue;
- picture of an apple;
- scissors.
The stages of work on the product are as follows:
- Cut out a square with an apple from a pre-printed picture. Fold it so that the left and right halves match.
- Place the folded part on the cardboard and cut out 2 apple pieces.
- Make a fold in the center of each half of the apple, without defining the line too much.
- After putting the parts together, draw the core. This is done with a regular pencil on a sheet of white paper.
- Cut out a beautiful green leaf and stalk. Inside the leaves, carefully press the scissors to make veins.
- For decoration, make caterpillars. To do this, you need to cut strips no longer than 7 cm and round their ends a little. By running the blunt end of scissors through the center, you can make them convex. Give these parts to children for assembly.
- Glue the apple halves together and attach the core, stem and leaf on top.
- Color the apple seeds with a dark marker.
- Place a caterpillar inside the fruit.
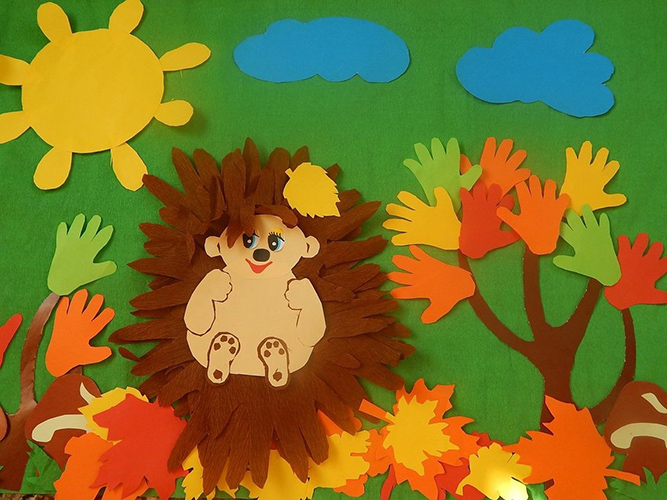
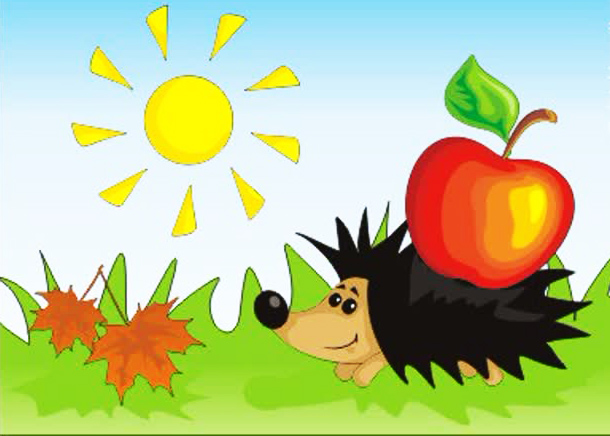
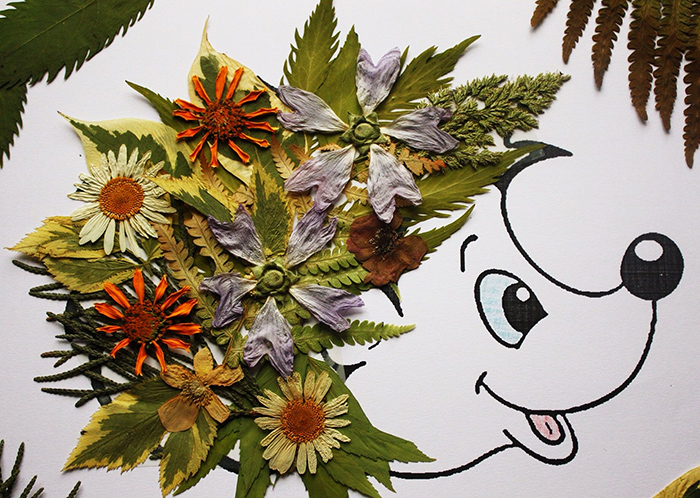
Hedgehog and apple
An applique in the preparatory group on the theme “Golden Autumn” gives the opportunity to show children how to create compositions.
During the work the following is developed:
- logics;
- creative vision;
- skills in working with small parts.
Before creating a composition, you need to prepare the following materials and tools:
- sheets of A4 colored paper;
- simple pencil;
- markers;
- scissors;
- glue.
The stages of work are as follows:
- Fold the beige sheet in half and cut evenly.
- Fold the top corners of each part of the sheet towards the middle.
- Bend the triangle on both sides, and you will end up with a hedgehog's face.
- To make the animal’s body proportional, measure 6-7 cm and cut it off.
- Turn the resulting piece over and bend back 1.5 cm from the long side on both sides.
- Place the piece on a sheet of brown paper right in the center and trace with a pencil where the needles will be. Cut off all excess.
- Make the needles using scissors.
- Cut out and glue the hedgehog's eyes, nose and ears.
- For the apples, make ovals out of red paper and, giving them a semicircular shape, glue them to the side of the animal.
- Make the apple's center out of yellow paper and draw the seeds with a black marker.
- Cut out paws from beige paper, on which toes and nails are depicted. They are glued on the bottom.
- Give the hedgehog's face the desired expression and the craft is ready.
In another version, to create a hedgehog you need to prepare the following:
- paper of yellow, red and green colors;
- scissors;
- glue;
- simple pencil;
- black marker.
The steps to create an applique are as follows:
- Fold the yellow sheet of paper 5 cm on one side.
- Make a hedgehog from an A4 sheet. Lay it horizontally and fold the side by about 5 cm. Then fold it in the other direction exactly in half.
- Make a cut from the bottom to the middle. Bend the cut part and glue it. This will be the hedgehog's muzzle blank. It needs to be drawn with a black marker.
- Use scissors to cut out the picture strictly along the outline, without touching the rectangle on the right side. Fold it like an accordion. Glue the resulting halves together.
- Draw an apple from red paper and leaves from green paper.
- Glue the leaves and the red base together and attach them to the side of the hedgehog.
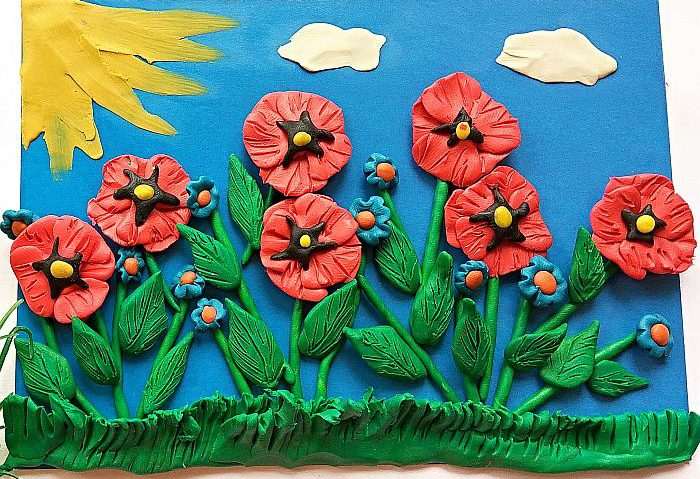
From plasticine
Children love creativity, and this is not only drawing, creating three-dimensional pictures from paper, but also modeling. Plasticine is a material that also allows you to get a three-dimensional applique. Such crafts have many advantages - an interesting texture and the ability to create bizarre shapes.
For example, the applique “Hedgehog in the forest in autumn” will appeal to children because of the opportunity to apply their talents in creating various crafts.
To work, you need cardboard and a box of plasticine. The cardboard is the basis for the placement of the drawing: the plastic material will be applied to it. A very thick sheet is chosen, capable of not bending under a large layer of plasticine. It is also best to choose a sheet of neutral shade, and not white or bright.
The stages of work are as follows:
- Apply the mass softened in your hands to the surface in a layer that barely covers the base. This will make the painting realistic.
- Proceed to the picture itself – an autumn forest. You should not make a large number of trees. 2-3 will be enough to understand the essence of the picture. The trunk and branches of the trees are made of brown material. The leaves will be multi-colored. Above in the sky, blue rain clouds with dark inclusions are made.
- Make at least 5 leaves on each branch. Most of them will be at the bottom, as if they had already fallen. Such a leafy carpet is made multi-colored and dense.
- Stick a grey ball between the leaves. This is the body of the hedgehog. On one side, make a muzzle out of pink plasticine, on the other, stretch out the tail. The muzzle is sharp with small, smart eyes and a black dot on the nose. The back should smoothly flow into the muzzle, and not be separated from it by a gap. It will look natural and beautiful.
- Work on the details with a stack. It is used to make the spines on the hedgehog's back. The eyes and nose can also be corrected with a stack.
You can add other details to the painting that the author likes, for example:
- mushroom;
- apple;
- the face of a person watching an animal.
From plasticine you can sculpt:
- spikelets;
- flowers;
- bird.
If the young artist finds the difficult work beyond his powers, adults can help him with it. After the painting is ready, it can be hung on the wall.
If desired, the canvas can be supplemented with:
- leaves from trees;
- cones;
- acorns.
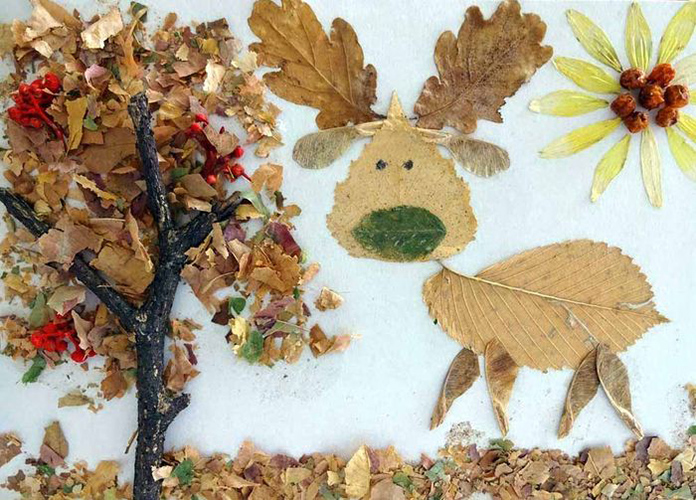
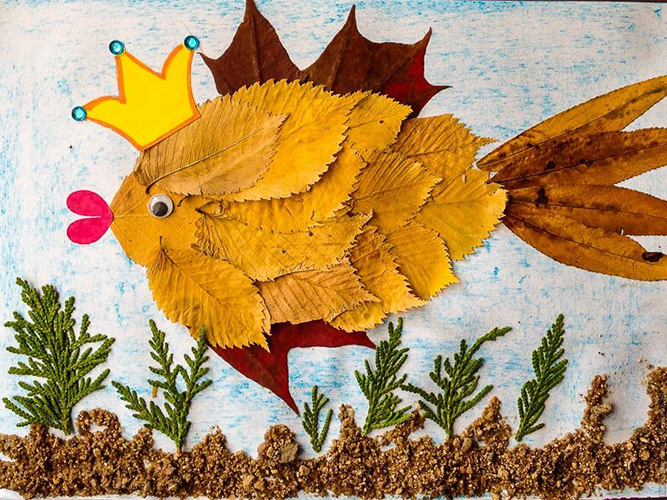
Applications from natural materials
An application in the preparatory group on the theme “Golden Autumn” can be made from natural materials.
For work you can use:
- beautiful branches;
- half-dried flowers;
- juicy fruits;
- bird feathers.
For example, you can create a beautiful swan from scrap materials.
To work you will need:
- a small pumpkin of grey or white colour;
- a handful of feathers;
- some grass;
- a piece of foam.
The stages of creation are as follows:
- Cover the cardboard with a layer of moss.
- Draw grass and place a nest in the center, making it from dried grass.
- Place 2 eggs in the nest. Swans don't have more. They are cut out of foam plastic.
- Place the mother swan next to the nest. The pumpkin for the body is covered with feathers. Which are glued in an even layer along the surface. The head and beak are made of the same foam. The eyes are drawn with a marker, the head is covered with feathers.
Application "Forest Gifts"
It is done simply. The main thing is to collect everything you need and correctly combine them with each other and place them on the sheet. The picture can be inserted into a frame.
For work it is recommended to use:
- berries (dried);
- flowers;
- nuts;
- acorn.
A fairytale family of forest people on the edge of the forest is also considered an interesting picture made from natural materials.
To create it you need:
- common acorns;
- sheet of paper;
- pencil.
A composition of garden fruits will allow you to get an unusual structure and a riot of colors. For example, an eggplant can be made into a terrifying monster, and a zucchini will become a conqueror of evil forces.
He is light and can fight dark forces. A sword for him can be easily made from leek feathers. They are hard and will hold their shape well. Raspberries will become girls who were saved by a zucchini from an evil eggplant.
Creating applications on the theme "Golden Autumn" in the preparatory group of the kindergarten allows the child to develop a creative vision of the process, a logical perception of the picture and imagination.
Such work develops finger motor skills and the ability to create pictures without the help of adults, being proud of yourself. Children get acquainted with the methods and skills of work, the need for consistent implementation of the process. In parallel, they continue to learn about the world through the prism of art.
Video about the application
Master class on making rice applique "Autumn wind":