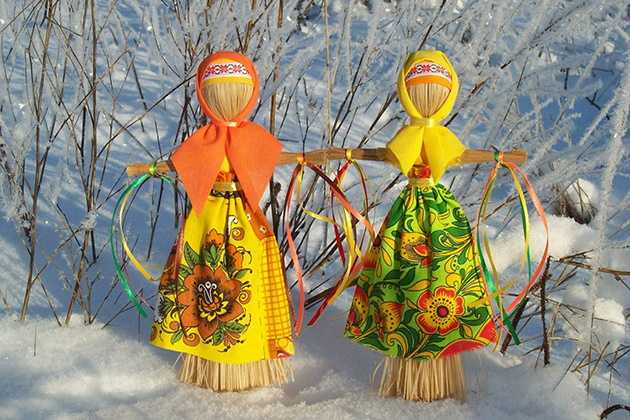
The tradition of celebrating Maslenitsa has ancient roots, connected with the mythological ideas of the Slavs. The doll symbolized the goddess of winter and death.
The scarecrow was made by hand and carried around the streets singing songs. Later, it began to be perceived as a symbol of the holiday. It received a new interpretation and became one of the elements of fun.
The tradition came from pagan culture and was preserved after the adoption of Christianity. Maslenitsa, or Maslenitsa week, is celebrated before Lent. The exact date of the beginning of the celebration varies depending on the lunar calendar.
The word "Maslenitsa" itself is associated with the celebration of "koma" or "skoma" - oil food. During this period, many pancakes were baked, generously poured with butter.
Pancakes were a symbol of the sun: they are round, golden and hot, and these are the signs of the heavenly body. During this period, it was customary to call upon the sun so that spring would come and a new agricultural cycle would begin. It was believed that if you appease the gods, you can get a generous harvest.
At the end of the holiday, the doll was burned. Fire was considered the most powerful means of purification, and also symbolized the end of the winter season and the rebirth of nature. After this ritual, the holiday is considered complete.
Schemes with description of works for beginners
The main thing in creating a doll for Maslenitsa is to reflect the symbolism of the holiday.
To make it, you will need to do:
| Doll parts | Description, comments |
| Frame | It is better to use a light and flexible material that will hold its shape. Wire, wooden slats or thin PVC pipes will do. It is important that the chosen material has sufficient strength and flexibility. |
| Cloth | The easiest option is to take any old unnecessary clothes, tear them into pieces and glue them to the base. This will add volume and texture to your stuffed animal. |
| Head | Usually the head of the stuffed animal is a ball sewn from scrap materials with painted facial features. The structure is assembled from individual elements, wrapped in fabric and attached to the frame. |
| Hair | Hair can be made from tow, thread or a washcloth. You can also use dry grass or straw. They should be attached to the head of the scarecrow. |
| Ribbons and decorations | To give the scarecrow a festive look, you can add ribbons, beads and various decorations made from natural materials: cones, branches, berries. Red and orange are used as traditional colors for this holiday. |
| Stand | To make the figure stable, you can put it on a cross or a stick, securing the effigy to it in several places. Another option could be "legs" - a stick secured in the center of the cross. This way, the effigy will stand on its own. |
It is better to use natural materials. They will symbolize fertility and connection with nature.
| Materials | Description, comments |
| Textile | A classic version of a scarecrow, for which thick fabric and stuffing are used to give it volume. Usually, such a doll is given human features, and also uses bright festive clothes. |
| Straw | Straw of various cereal crops (wheat, rye) can be used for production. The advantage of such a scarecrow is its availability and environmental friendliness. The straw is fastened with twine or string, it can be given any shape. |
| Paper | This option is easy to make, does not require much expense and allows you to show your imagination. Different types of paper can be used to make the scarecrow: colored, corrugated, etc. You can use cardboard elements. |
| Foil | This material allows you to create shiny and light figures. You can make a base from foil and then decorate it with various decorative elements. Such figures look bright and festive. |
| Branches | This kind of scarecrow is a structure based on branches of different lengths and thicknesses. The main advantage of this option is the ease of manufacture and availability of materials. |
| Yarn, threads | It is quite difficult to make such a scarecrow, since threads are not a durable material. However, it can turn out original and unusual. For the base of the structure, it may be necessary to use more durable materials, such as wire or cardboard. |
| Sintepon, cotton wool | Can be used to create rounded and soft shapes. These materials are pliable and easy to work with. If you use only cotton wool or only synthetic padding, the figure will not be strong enough, you need a strong frame. |
| Plastic and glass bottles, containers | They can serve as a basis for the body of a stuffed animal. Such materials produce light and stable figures. They allow you to create original shapes. |
A Maslenitsa doll is made with your own hands according to general principles:
- It is better if it is voluminous, since, as a rule, winters are associated with an abundance of snow, of which there is a lot, and it is not flat.
- The doll should be bright, because at the end of winter it becomes warmer and the sun shines brighter. The doll will be more colorful if you dress it. Bright scraps of unnecessary old things, bows, etc. are suitable for this.
- The shape of the doll can be any. It is important that it is stable, so that you do not have to additionally fasten the parts of the structure.
- The doll-amulet is usually made in the form of a female figure. This is necessary to emphasize the maternal figure of Maslenitsa.
- The scarecrow can be of different sizes.
- In ancient times, people believed that dolls should not have faces painted on them because this could attract evil spirits.
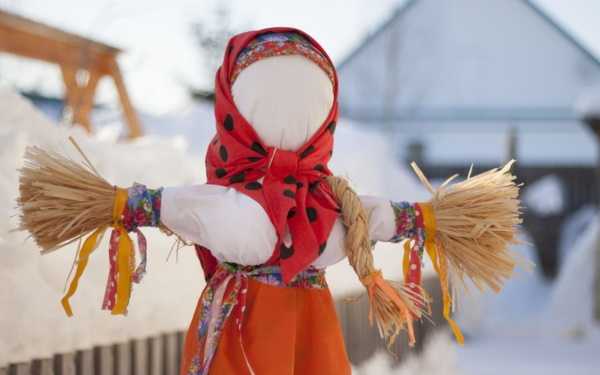
But Maslenitsa effigies were depicted with characteristic features - huge eyes and a wide smile. This symbolized joy and a positive attitude, and all misfortunes and problems burned up along with the doll.
From bast and straw
To work you will need:
- bast (bast brush);
- straw;
- bright and plain fabric;
- thick red threads;
- branch or stick;
- satin ribbons.
A Maslenitsa doll is made with your own hands using the following steps:
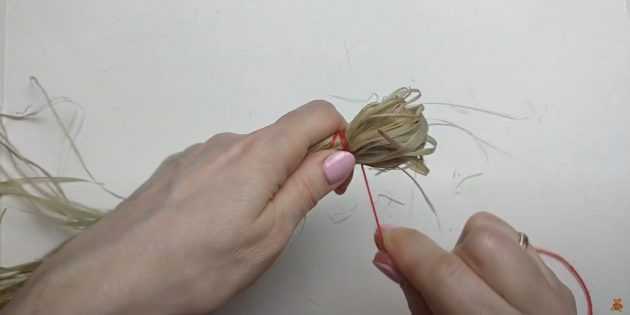
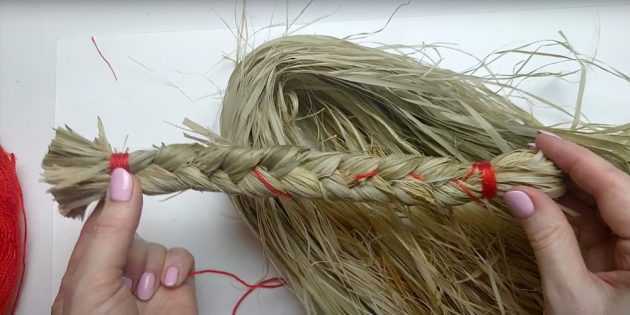
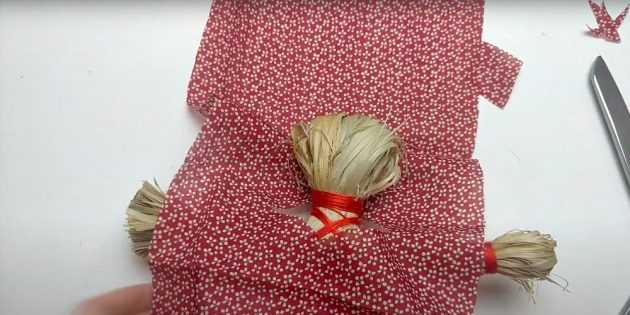
- To make the hands, twist a bunch of straw and tie the ends with red thread to highlight the palms.
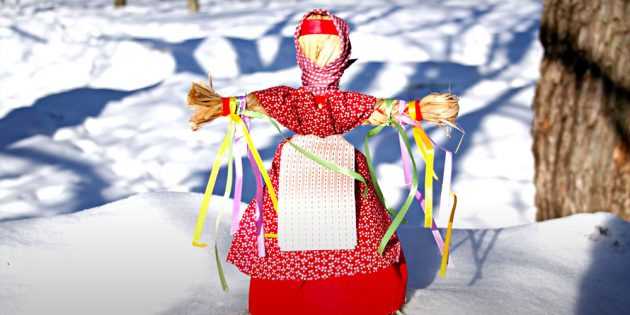
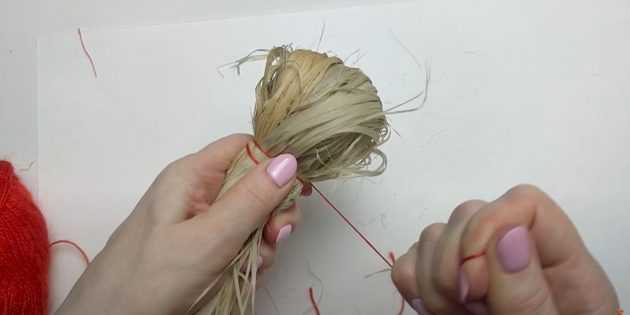
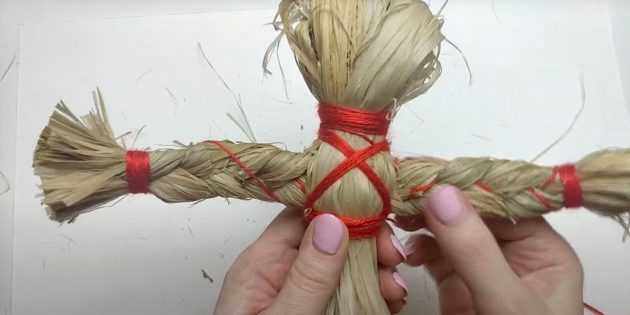
- Start assembling the base of the figure. Bast is suitable for this - the fibrous part of the bark of linden or willow. A figure is formed from it, which is secured with a red thread in the form of a cross on the chest. This will create the main structure.
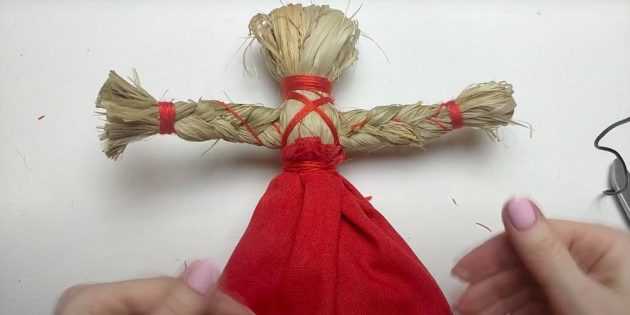
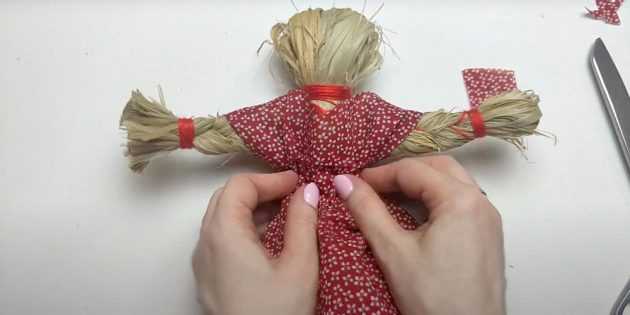
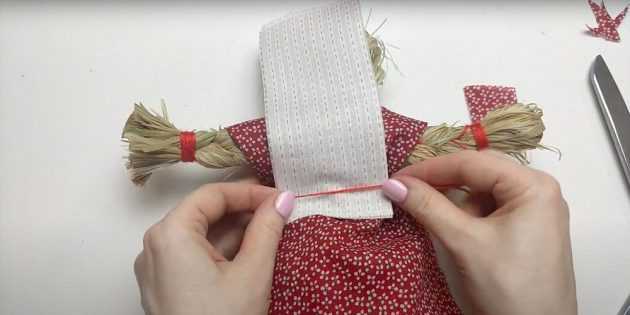
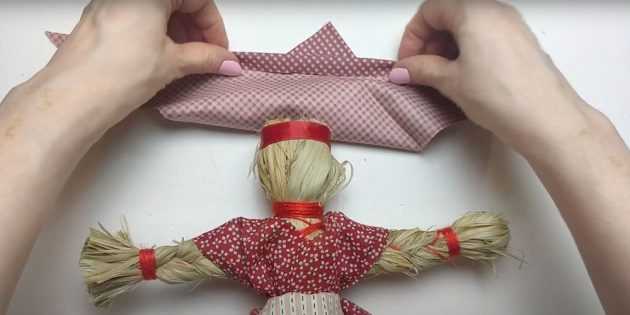
- To give the doll a more expressive and traditional look, you will need to make an apron from 2 aprons: the lower one is a single-color one made of light, thick fabric, the 2nd one is bright, preferably with red and orange flowers. They are secured with a red thread.
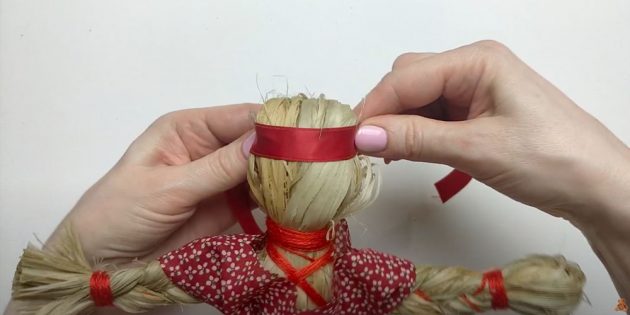
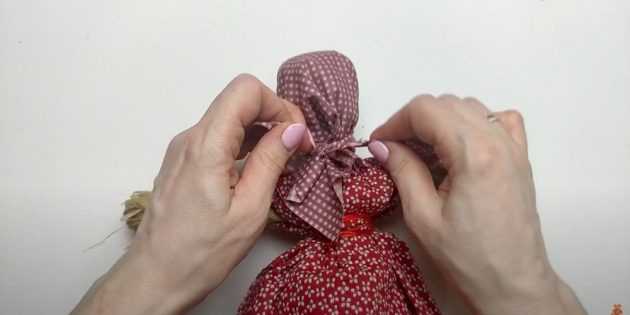
- A scarf is made: a kerchief is cut out of a bright piece of cloth, which is tied on the doll's head and necessarily covers the forehead. The knot of the scarf is tied at the back (this is important, as it is a Slavic tradition).

- A base is needed so that the doll can stand. A stick is inserted into the bast – it should go in deep enough to provide stability to the figure. It will serve as a frame for supporting the doll’s head and skirt.
- The Maslenitsa doll is decorated with ribbons, beads and bells. Both plain yellow, orange and green ribbons and multi-colored variations can be used. Colored beads, bells and other decorative elements can be tied to the ends of the ribbons.
From yarn (threads)
Materials and tools:
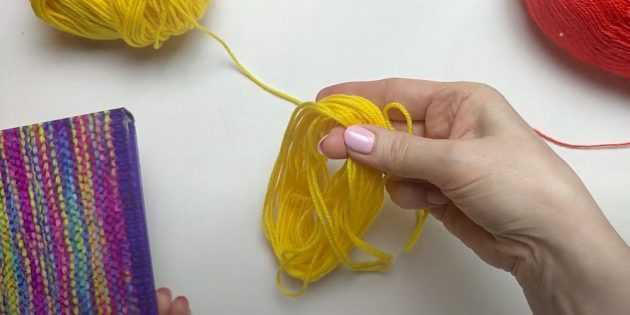
- Yarn of different colors, preferably natural shades. In this master class, yellow and red are used.
- Needle and thread for sewing the pieces together.
- Scissors for cutting threads.
- Wooden skewer.
A Maslenitsa doll is made with your own hands according to step-by-step instructions:
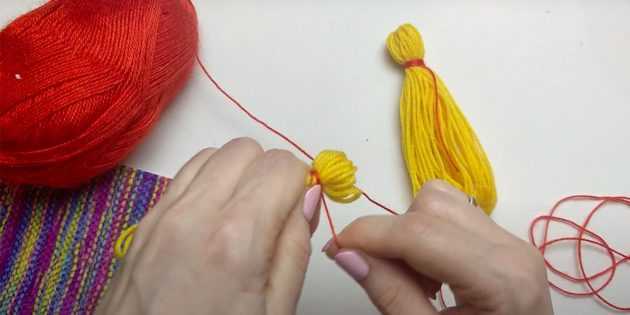
- Cut the required length of threads for each part: head, body, arms. Gather the threads into bundles and tie them together. Separate as many bundles as the number of parts planned, so as not to mix up the colors during the process.
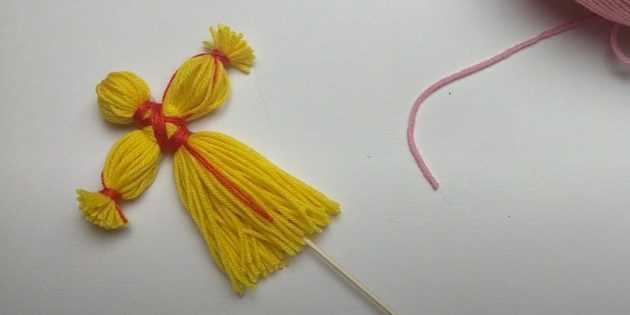
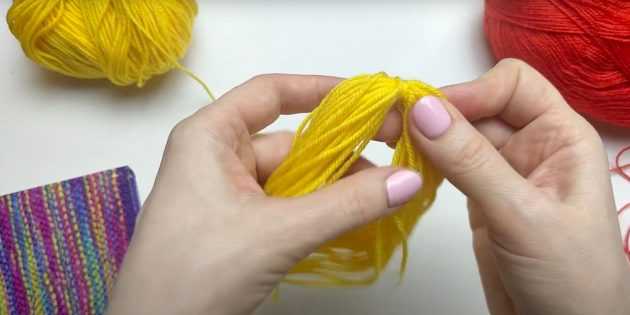
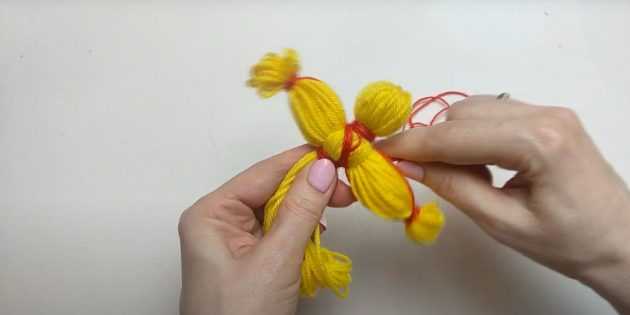
- Tie 2 yellow threads together to form a head. Wind the threads to create a ball shape. Secure the ends of the threads with a knot. Check the shape and density of the winding. The volume should be small.
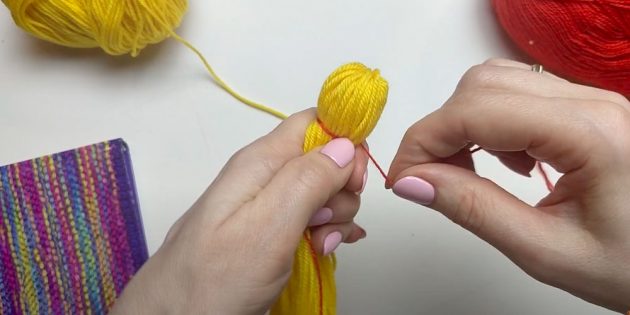
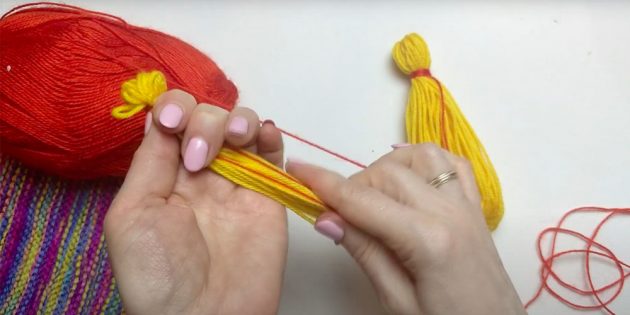
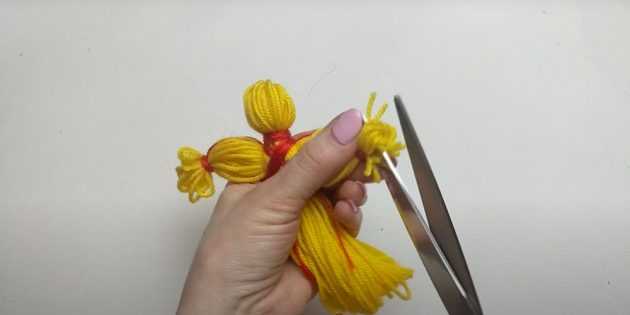
- Divide the remaining workpiece into 2 parts: the upper and lower. The upper part will be the arms, and the lower part will be the body. Tie the ends of the threads with a red thread. Usually, thinner threads are used for the arms, as they should look more graceful. Cut the threads at the ends of the arms.
- The doll's body is formed by creating a loop around the skewer and putting it on the latter. It should be placed in the loop so that the tip remains free. The longer the skewer, the larger the body will be. It is better to use thin and flexible sticks.
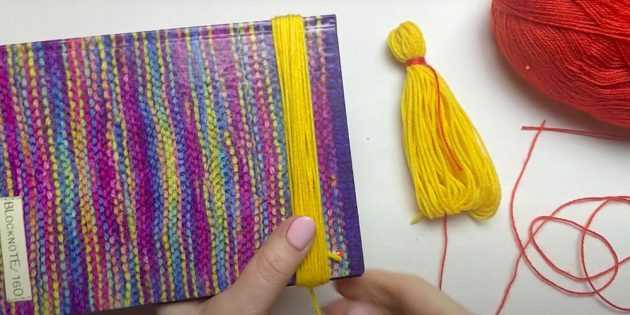
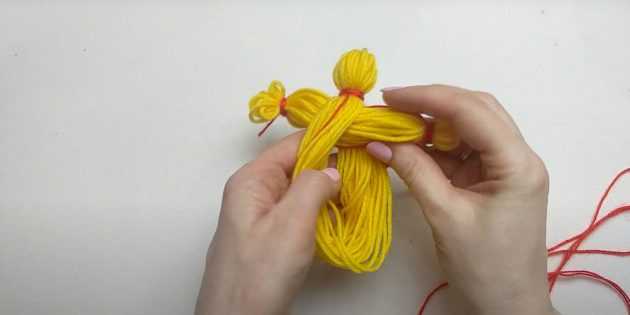
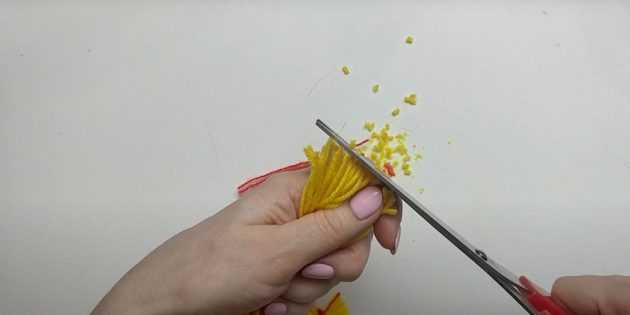
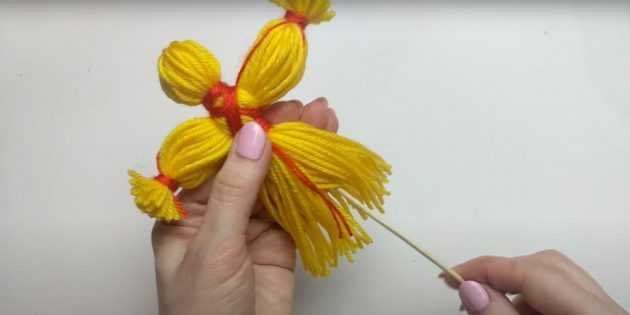
If the size is too small, you can take a longer skewer so that the doll is stable. It is recommended to choose the smoothest sticks possible, without any roughness that can damage the yarn.
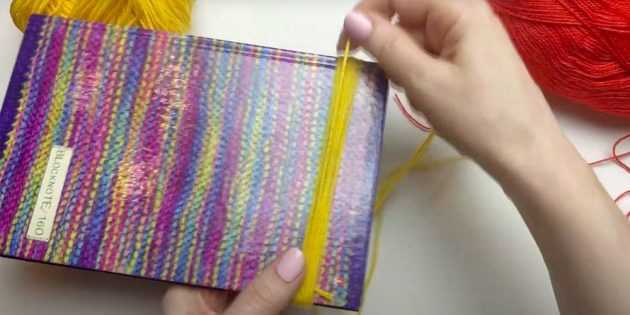
- Separate the threads from the remaining yellow yarn using scissors. They will be used to create the skirt. Place the red thread perpendicular to the base of the doll and fasten it around the skewer on the belt. Repeat the action several times.
You need to make the skirt fluffy by placing the threads on top of each other.
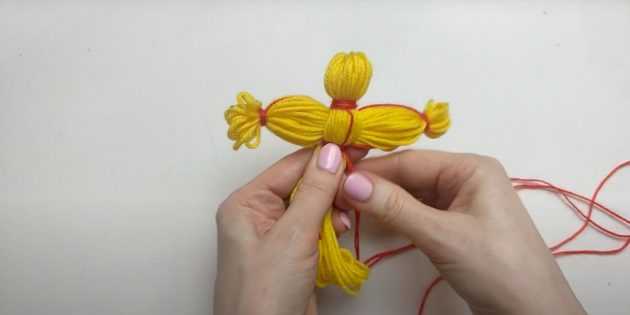
- Tie a red thread crosswise around the waist and chest.
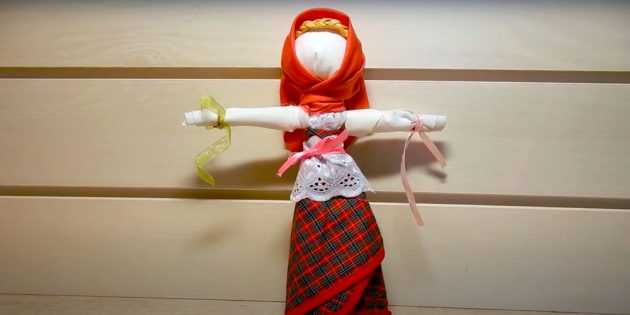
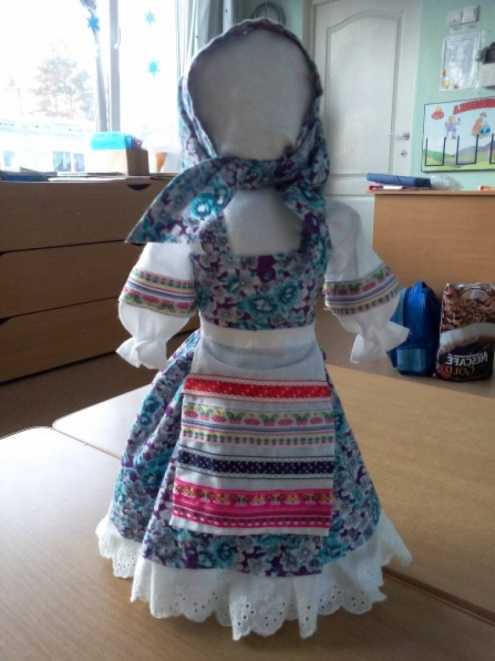
From scraps of fabric
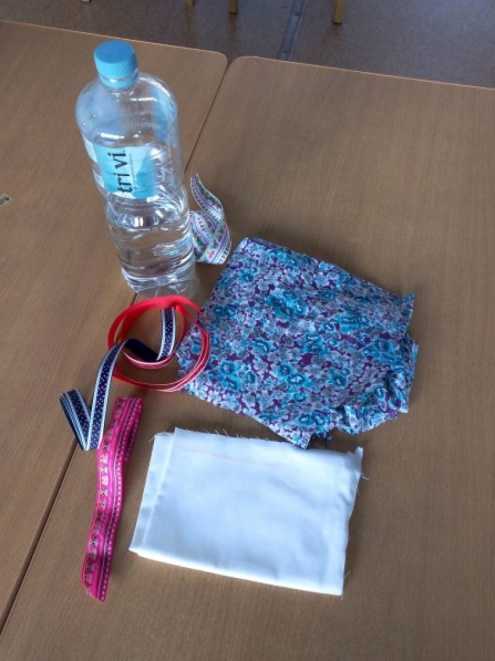
To create a Maslenitsa doll you will need the following materials:
- straw (or thin cocktail tubes);
- scraps of white and colorful fabric;
- multi-colored ribbons;
- lace;
- padding polyester or cotton wool;
- red yarn;
- scissors.
A Maslenitsa doll is made by hand in the following way:
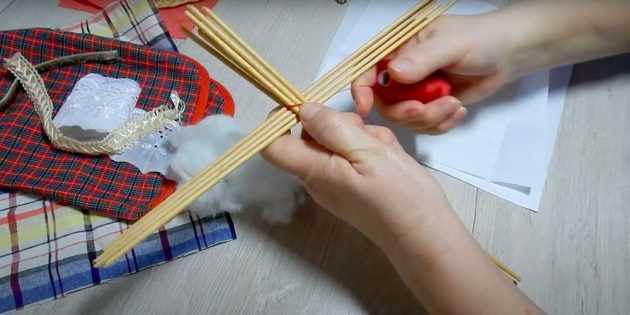
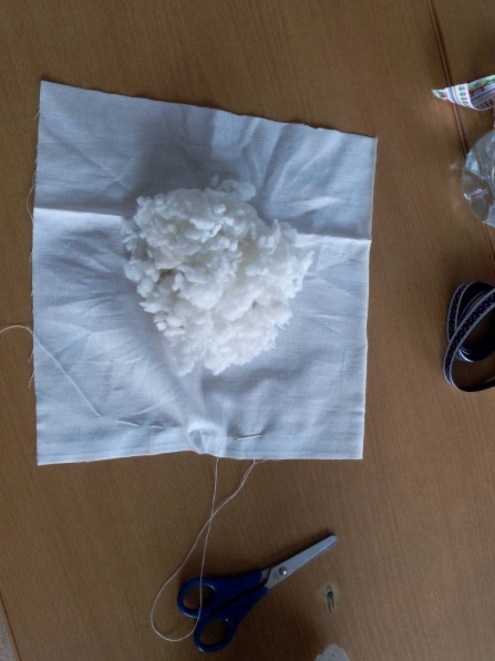
- For the base of the doll, you will need 2 identical rectangular pieces of light fabric. Fold them in the form of a cross, securing them with red yarn. For the stability of the base, use straw as a frame. Cotton wool - for volume.
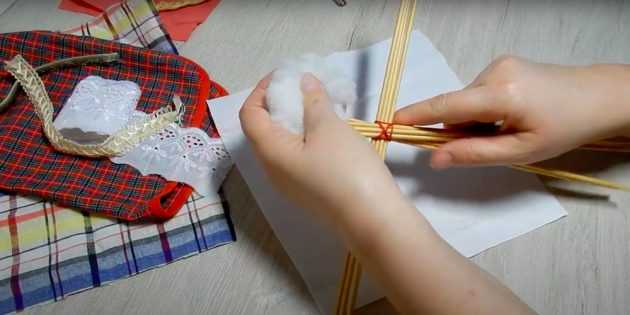
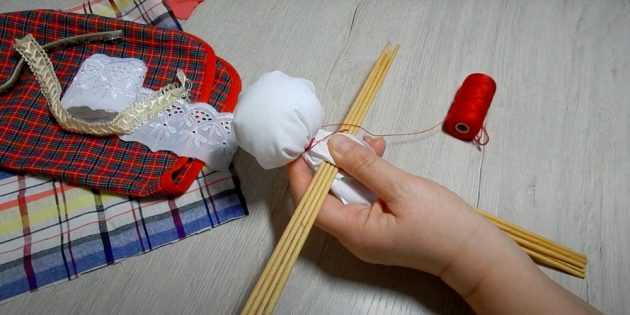
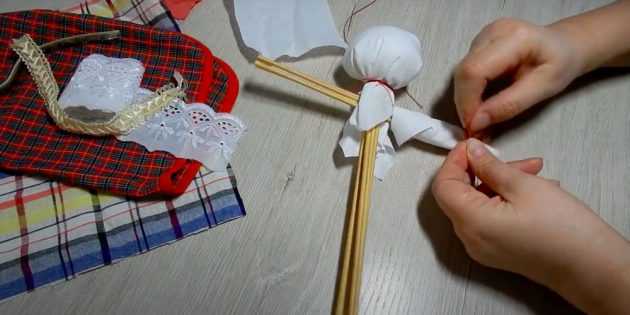
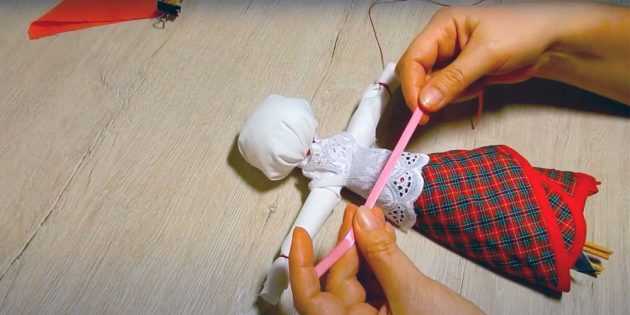
- Form the doll's head from a square piece of white fabric, stuffing it with cotton wool or padding polyester. Wrap it with a red piece of fabric, imitating a scarf.
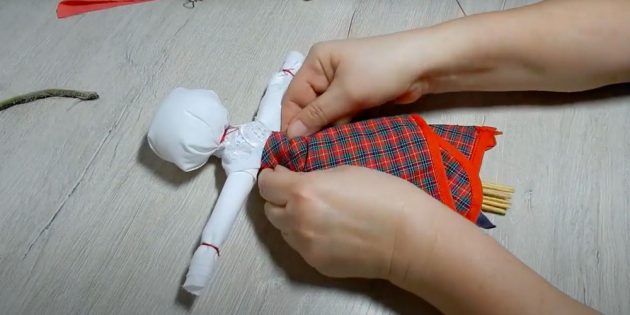
- Place the doll base between 2 rectangular flaps and form the figure. Tie it around the waist with ribbons, making a traditional folk belt.
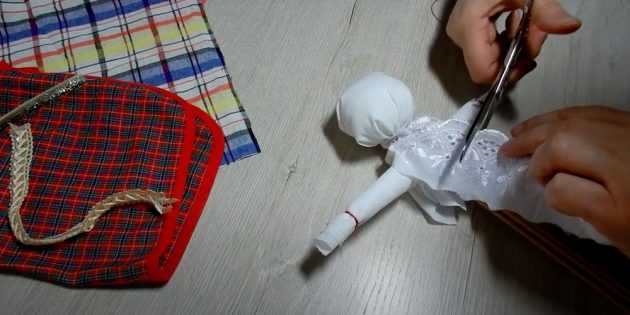
- Make a blouse out of lace, wrapping it around the body.
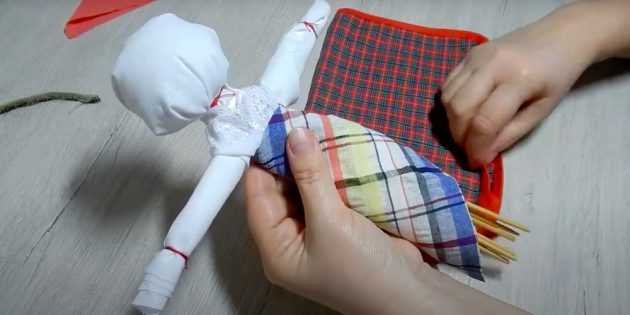
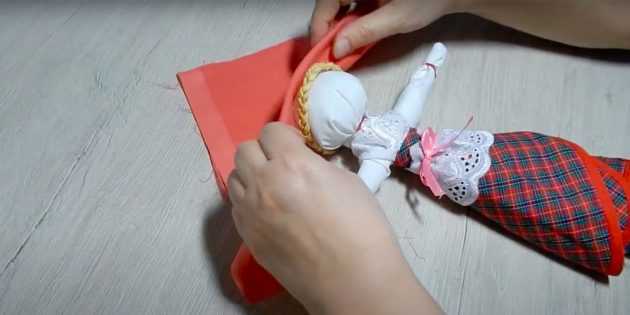
- From a motley, preferably red or orange fabric, form a skirt. To do this, wrap a piece of cloth around the bottom of the doll. If desired, you can decorate the skirt with braid or lace.
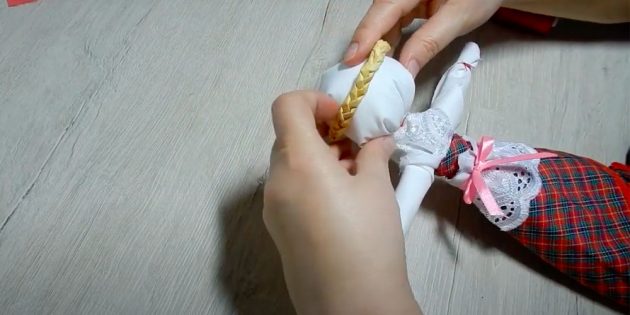
- Make the doll's hair from straw or colored ribbons, securing it to the head under a scarf.
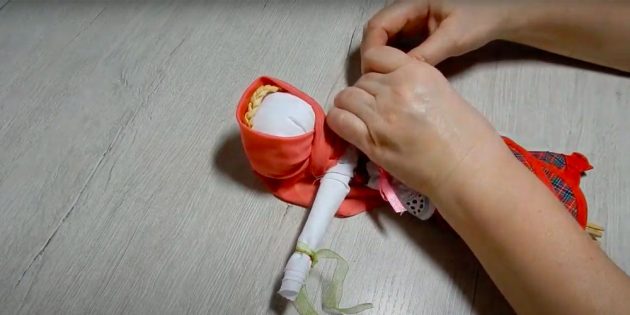
- Add thin ribbons to the doll, tying them at the ends of the arms and around the body in the waist area - this will give it even more expressiveness.
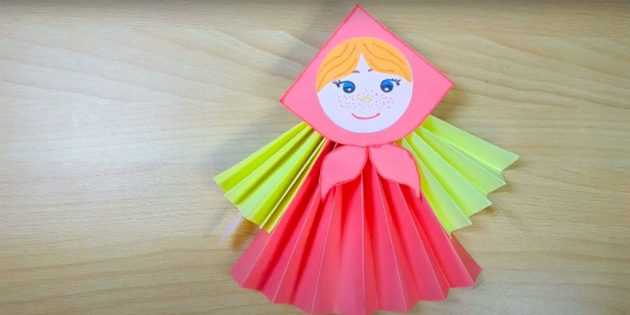
From paper
To make a Maslenitsa doll with your own hands, you will need the following materials:
- colored paper – to create bright and colorful elements;
- white paper - base;
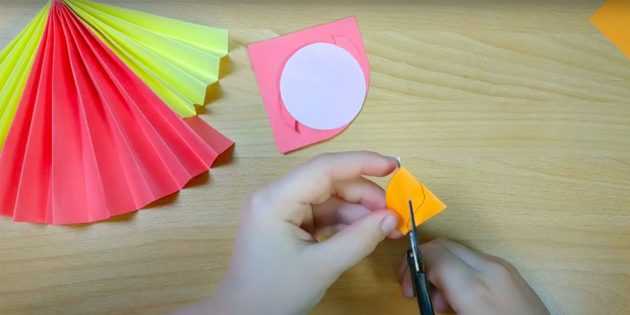
- scissors - used to cut out doll parts;
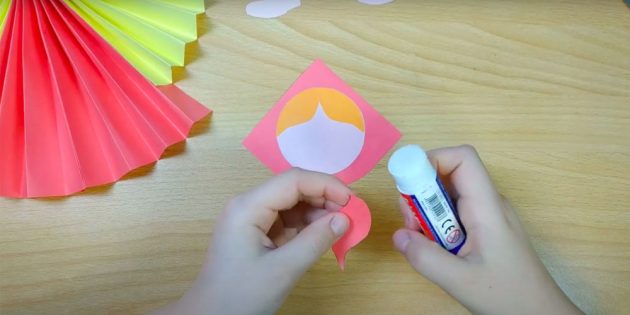
- glue - to glue parts together;
- pencil – with its help you can outline the contours of the doll’s parts;
- ruler – to make measurements more accurate;
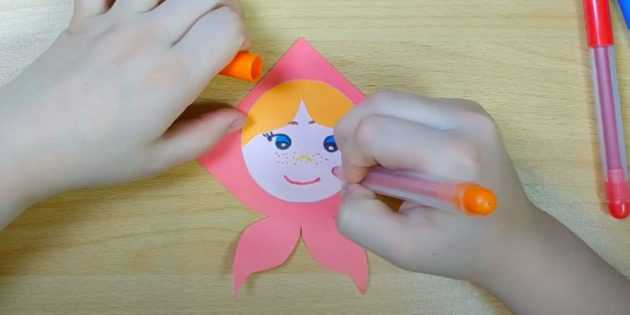
- markers and felt-tip pens – for coloring the finished doll;
- thin yarn - for the braid.
Work with materials should be done carefully and thoughtfully to preserve the integrity of the structure and its overall appearance:
- Take a sheet of white paper and fold it in half. Using a ruler, measure 4 cm from the top and draw a horizontal line with a pencil. Cut out the base of the figure.
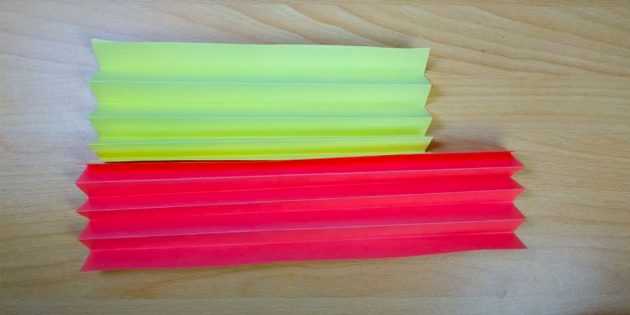
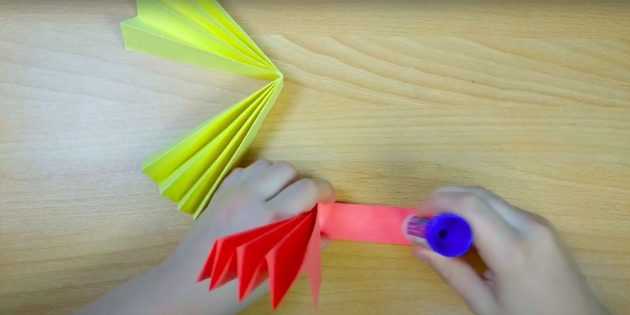
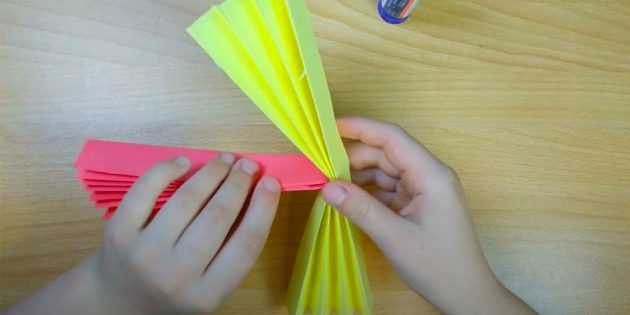
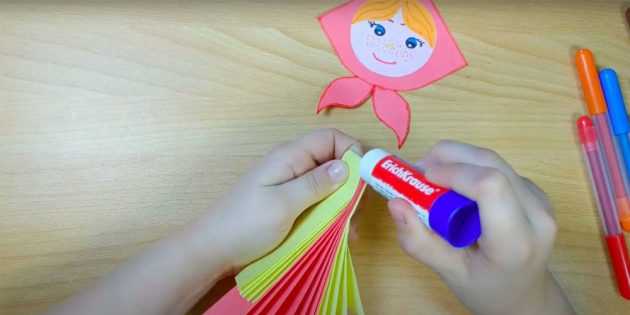
- Choose the color of paper for the top of the doll's figure. Cut a wide strip of paper, the length of which should be longer than the base of the doll. Fold the strip accordion-style, matching the edges of the strip, and glue the resulting cutout to the base of the doll.
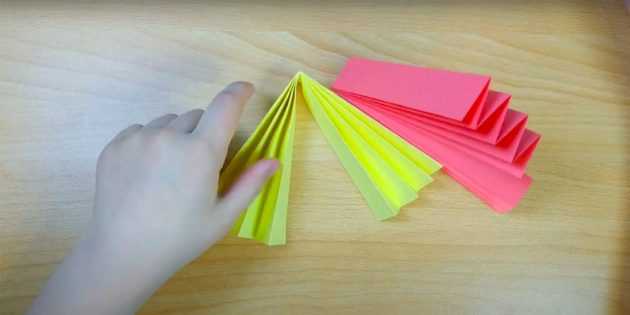
- Similarly, make 2 arms by folding the paper like an accordion and gluing them to the base and body. They should be shorter than the body.
- To shape the doll, straighten the accordion folds with your fingers and smooth them out, then glue the ends of the paper strip together. The top edge of the base should match the wide part of the paper accordion. Leave the top of the skirt open for further decoration.
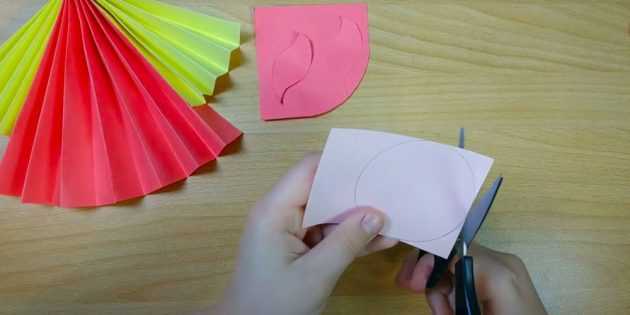
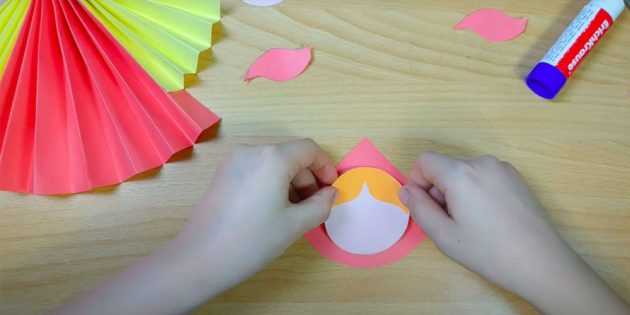
- Using colored paper, cut out a circle for the head.
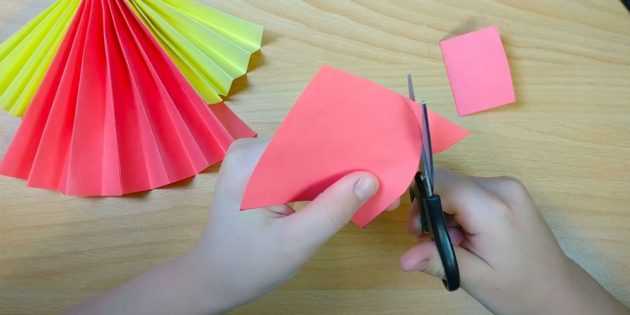
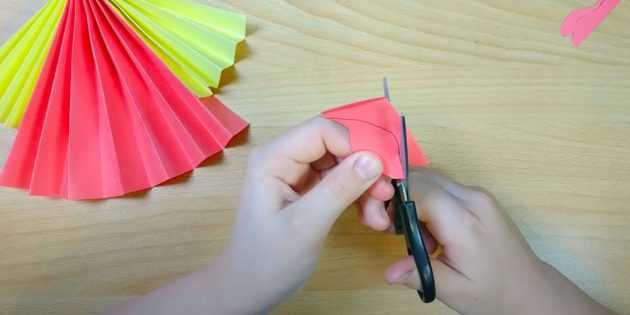
- Use triangles with semi-circular edges to create the shape of a kerchief. Glue the head to them.
- Using a pencil and a ruler, draw the doll's face. It is important not to make the details too big and to keep the proportions. Medium-sized elements will do.

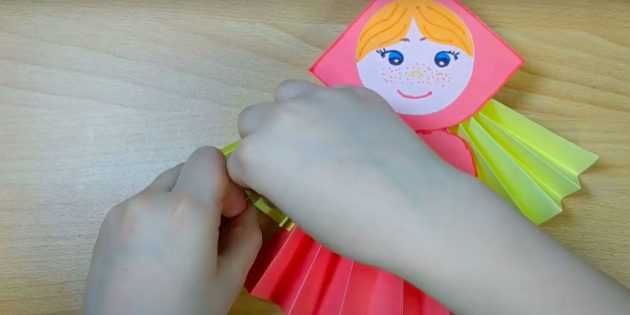
- Make the doll's hair from threads and fix it to the doll's head with glue.
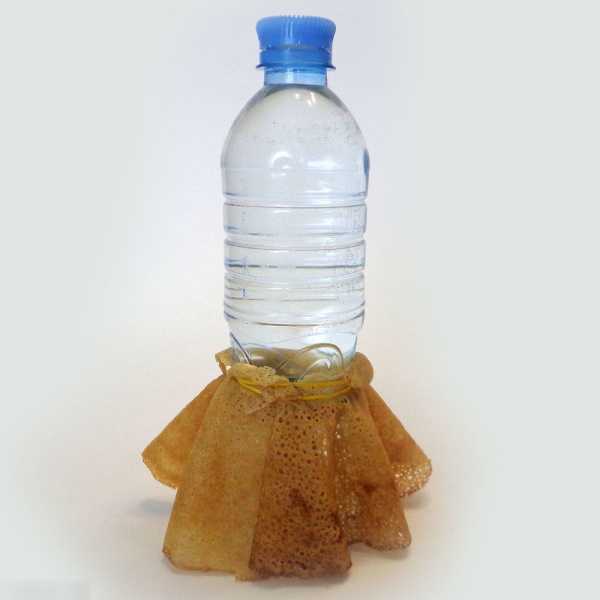
From the bottle
Materials required:
- plastic or glass bottle;
- fabric for decorating a doll;
- material for stuffing the doll (for example, cotton wool, tow or synthetic padding);
- threads, tape or twine to secure the material inside the bottle;
- threads or tape to tightly secure the material to the neck and secure the doll to the bottle.
Step-by-step master class on creating a Maslenitsa doll on a bottle:
- Cut a circle out of the fabric with a diameter of about 2/3 the height of the bottle.
- Fold it in half to form a cone.
- Insert the cone into the neck of the bottle and straighten the material inside. It is important to keep the shape of the cone so that the doll has arms. The formed figure should fill the bottle no more than half - this will make the next stage of decorating the doll easier.
Leave a gap between the bottle and the doll figure to easily attach the figure and the neck of the bottle.
- Stuff the doll. You can use cotton wool or other materials that will give it volume. Distribute the material evenly over the figure, making sure that it maintains the shape of a cone.
- Create the doll's head by adding more materials to the top of the cone.
- Having firmly secured the doll to the neck of the bottle, close it. Fix the figure on the bottle so that the doll becomes part of the bottle without the possibility of removal by gluing or sewing. Check how tightly the seams or gluing are made.
If the top of the doll is uneven, it can be additionally trimmed with scissors or other suitable tools.
- To make the doll unique, you can decorate it with elements using threads, ribbons or strings. This will help it acquire a complete and festive look.
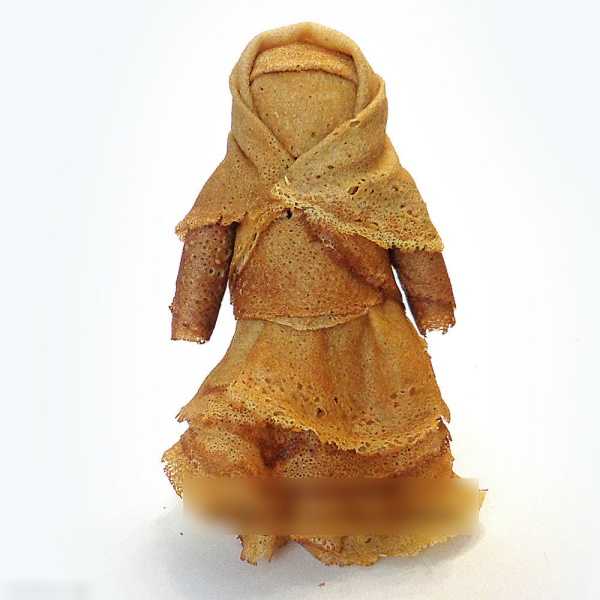
From pancakes
Materials required:
- pancakes;
- an inverted glass or a plastic water funnel – the base;
- toothpicks to hold pancakes together;
- a small egg – for the head;
- cloves - for the eyes;
- jam to draw the mouth and nose.
First you need to prepare the dough.
For this you will need the following ingredients:
- flour - 1 cup (130-150 g);
- milk - 2 tbsp. (400-450 ml);
- eggs - 2 pcs.;
- vegetable oil - 1 tbsp;
- sugar - 1-2 tbsp;
- salt - a pinch.
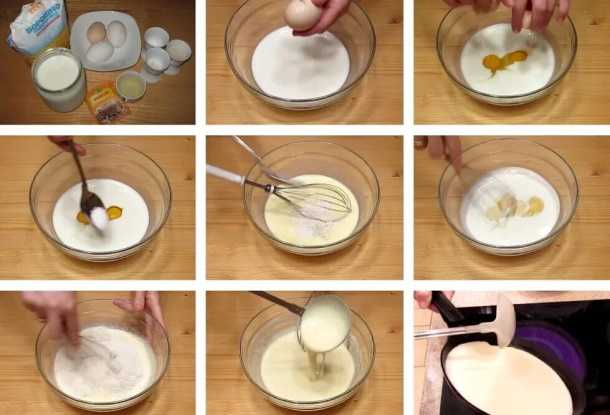
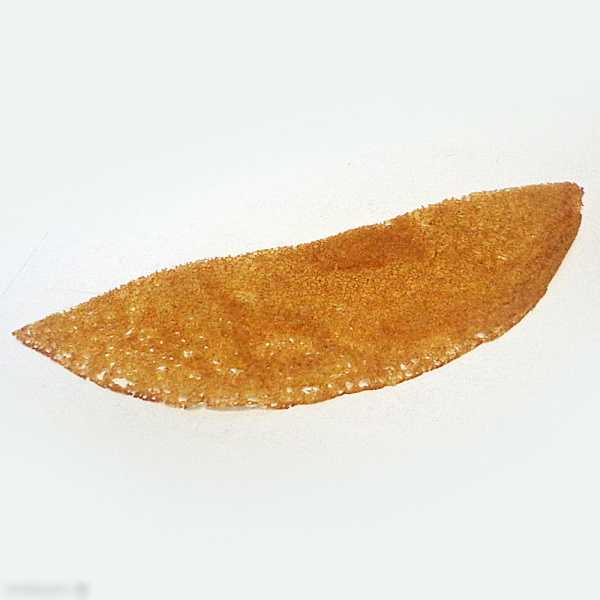
How to make pancakes suitable for making a doll:
- Separate the egg whites from the yolks - this will help make the dough more airy.
- Add salt and sugar to the bowl with the yolks and mix thoroughly.
- Gradually add the sifted flour, stirring to avoid lumps.
- Add milk and stir until smooth.
- Pour in some vegetable oil - this will prevent the dough from sticking to the pan.
- Beat the chilled egg whites into a stiff foam and combine with the dough. Stir.
- Heat a frying pan over medium-low heat. Grease with oil just before the first pancake.
- Immediately pour butter over the finished pancake - this will make it soft and shiny.

Step-by-step instructions for making a Maslenitsa doll:
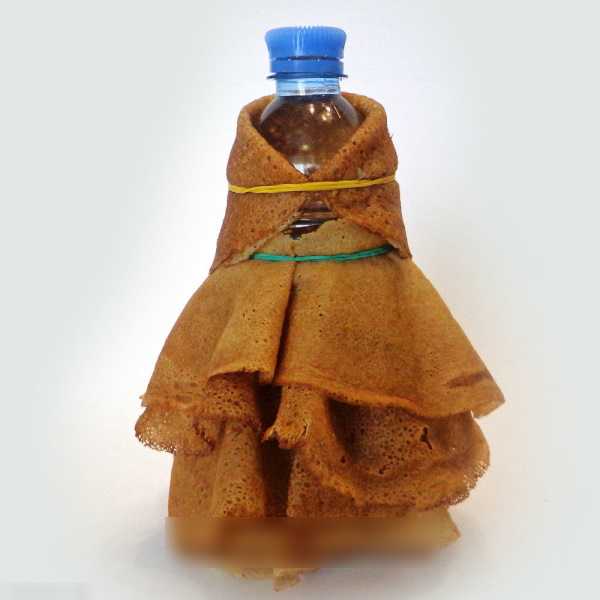
- Take an inverted clear glass or a plastic water funnel and use it as a base for the doll. This will give the structure the necessary strength and stability.
- Place the egg on top in the center of the base - this will be the head of the figure. It can also be made from a smaller pancake, which needs to be folded into a hemisphere and securely attached to the body.
- Place the pancake on top of an inverted glass or plastic water funnel. Secure with toothpicks.
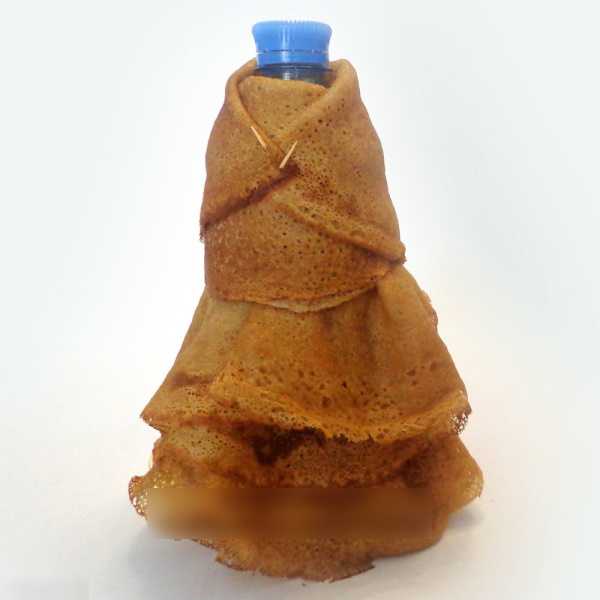
- Fold 2 pancakes of the same size in half. Place them on top of the glass to form a doll's skirt. Gather the edges of the pancakes that should face the edges of the glass together and secure with a toothpick so that they do not bend and do not interfere with subsequent actions.
- Fold the 3rd pancake twice. It will be the base of the doll's body, place it on top of the skirt. Secure the edges of the pancake with toothpicks. It is important that the folds on all 3 layers are visible and create volume - this way the doll will look more realistic and festive.
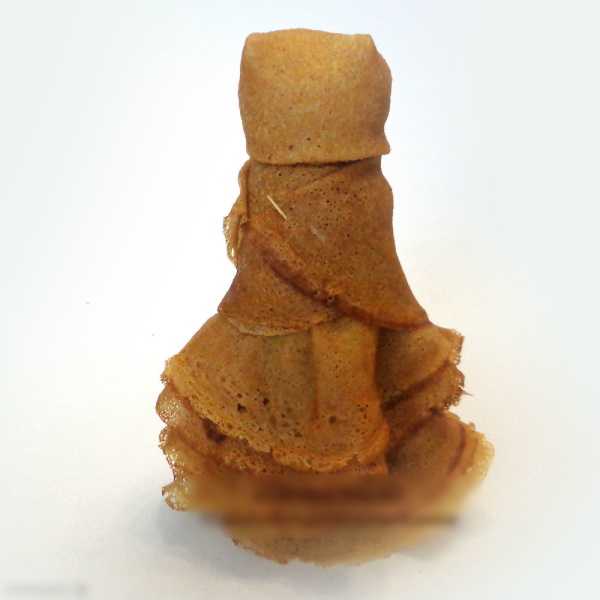
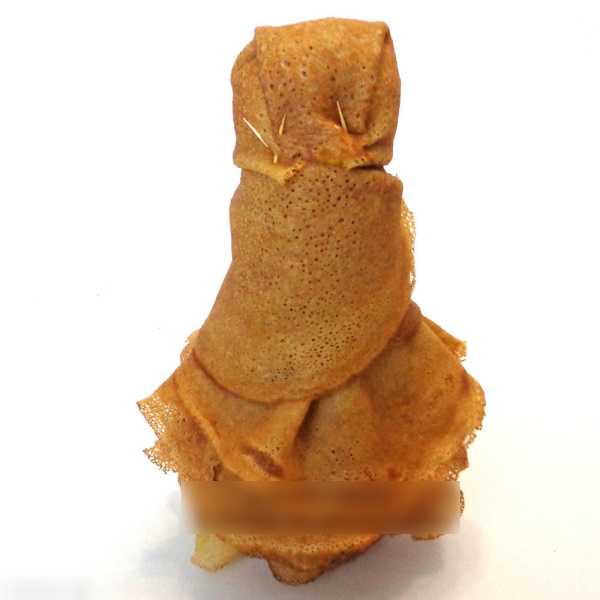
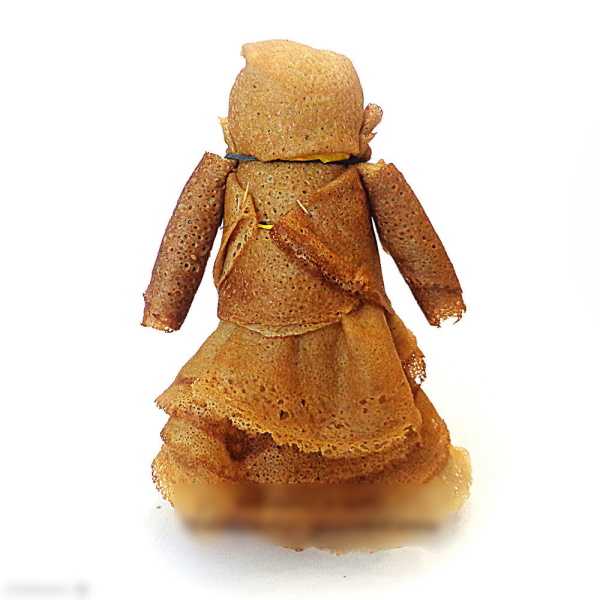
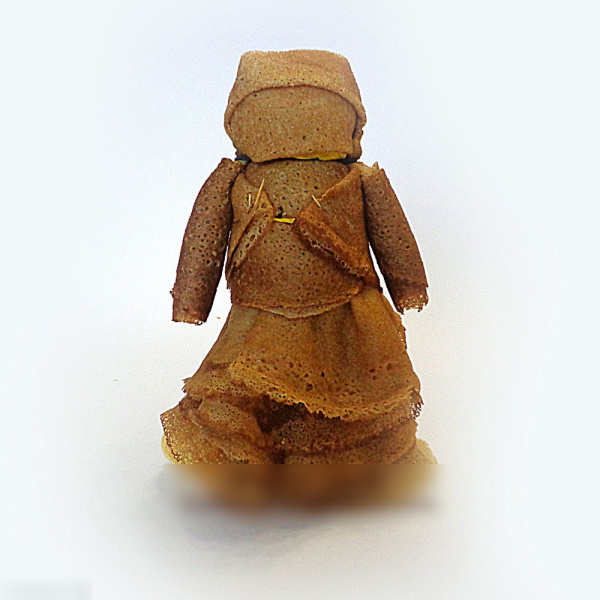
- To create the arms, take 2 small pancakes and roll them into tubes, which are secured to the upper part of the body, but just below the base of the neck, using toothpicks.
- Insert cloves into the egg for eyes. Use 2 for each eye and make sure they are securely fastened. Raisins can be used instead of cloves.
- Draw the mouth and nose with jam. It can be any color you like, but it should not run.
- Add details to the doll's image to make it more expressive and memorable. You can add spaghetti hair or granola freckles.
You shouldn't be stingy with materials and time for the Maslenitsa doll. After all, it is made specifically to be destroyed in a fun and colorful way. Nowadays, the ritual of burning the effigy is not often performed.
However, a doll made with your own hands is still a significant element of the festive atmosphere.
Video about the craft
DIY Maslenitsa doll: