A box with photos is an interesting option for a surprise for a loved one. It is relevant to give it to a friend or acquaintance, as well as to your other half, relative. You can make such a surprise yourself with your own hands.
What is the box, features
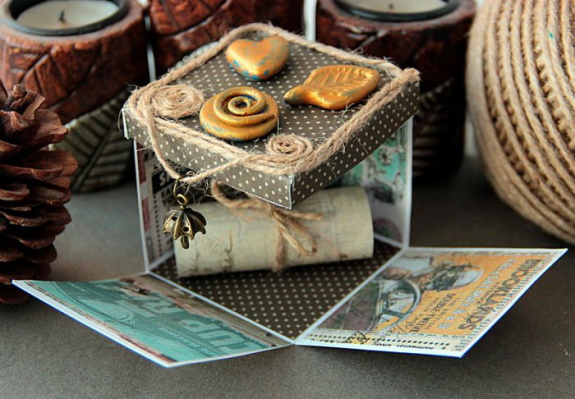
At first glance, this gift option is an ordinary box. But the most important thing is hidden inside the product. The contents of the box and its interior are always a pleasant surprise. Manufacturers try to connect it with the holiday and the person to whom the gift is given.
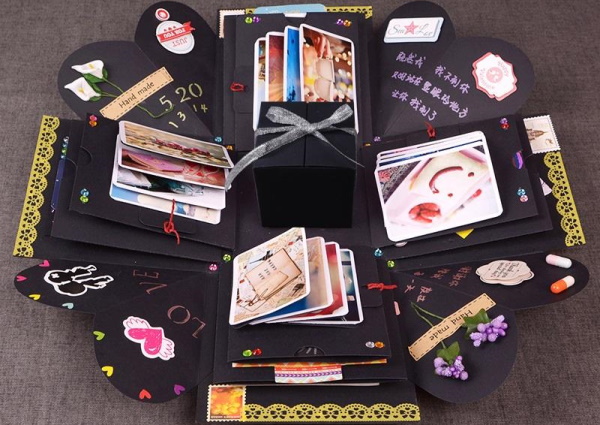
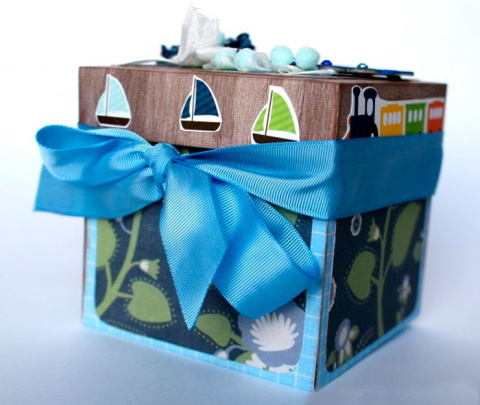
There are always photos inside the box. Symbolic inscriptions, small surprises, sweets, even thematic pictures can also be hidden there. When making such a box, you can give your imagination free rein.
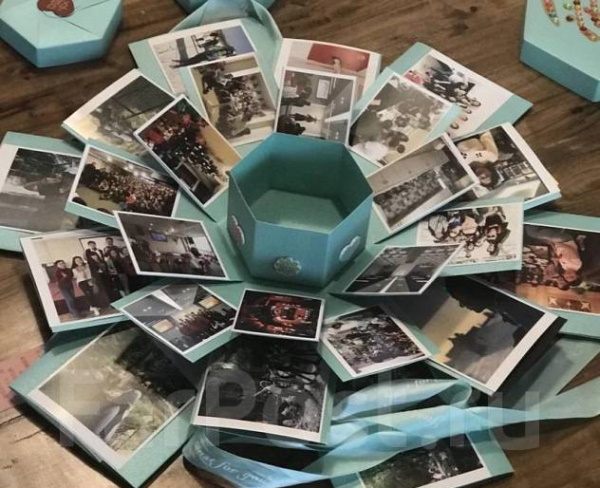
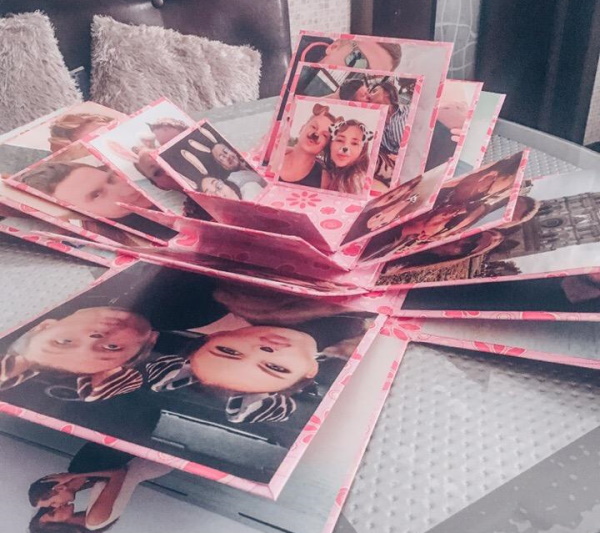
The surprise box with photos comes in different sizes. It can be very large or miniature. When a person opens such a box, it opens up in front of him and shows his unusual walls, which consist of photos, postcards, and are also decorated with miniature gifts.
The easiest option to make is single-layer. But sometimes you can find multi-layer boxes. Then, when opening the surprise, the hero of the occasion will see several “floors” with pleasant inscriptions, drawings, and various little things.
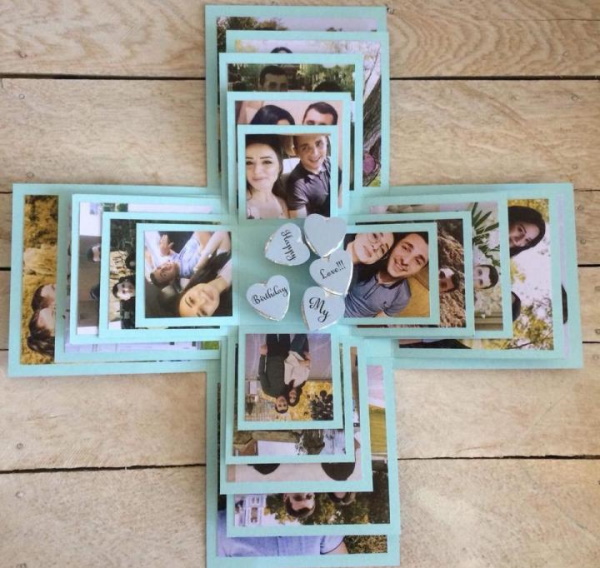
If desired, you can also put the main gift in the center of the box itself. Even a box with a ring. This option will be ideal for proposing to your beloved girl.
On the inside of the box you can place joint photos - a full-fledged love story. It is important that the surprise box for the bride will be made entirely with your own hands. No other girl will definitely receive such an offer.
The discussed box with photos can be called a universal gift option. Any person will be happy with it, regardless of their age, gender, social status.

In addition to its versatility, the surprise box will also have other features:
- the gift will be designer and unique, no one else will have the same;
- the box looks much more impressive than a banal postcard even without a gift inside;
- you can put money inside the product, and it will be more interesting and memorable than the usual envelope with a banknote;
- If you use photographs, touching wishes, miniature memorable items, the box will become a real keeper of memories - this is much more valuable than any other gift option.
When making the discussed box, it is very important to make it as individual as possible. The recipient of the surprise should feel that the giver tried and constantly thought about him during the process of making the original product.
In the box, you can mention various funny or touching stories from life, use pictures that refer a person to pleasant memories, important or simply relevant phrases for him. For those with a sweet tooth, it is worth filling the product with original delicacies that he has never tried.
For book lovers – use quotes from their favorite books in the design. For fashionistas – put small stylish details of the image inside. Such options can be thought out in advance and find the ideal one for any person, regardless of their tastes and hobbies.
Materials needed for work
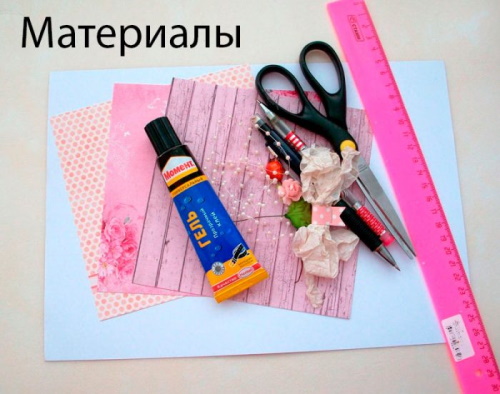
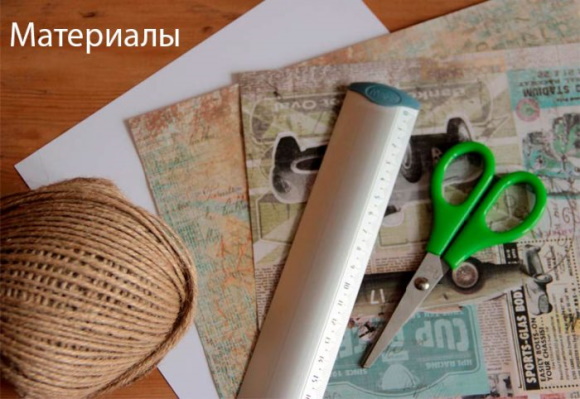
A surprise box with photos is made using the simplest and most accessible materials and tools.
The table below will help you understand the main ones. These are 8 main materials and tools. The master himself will select additional ones, taking into account his own needs and the features of the future product.
| Materials and tools | Peculiarities |
| Cardboard | It is best to take not ordinary paper, but corrugated or bookbinding paper. |
| Scotch | Definitely double-sided (it’s worth stocking up on both thin and foamed ones). |
| Wrapping paper | Different textures, thicknesses, colors and sizes – at the master’s choice. |
| Paper glue | PVA or Moment Crystal will work well. But you can also use any other that is convenient to work with. |
| Scissors | It is best to take both large and miniature ones. |
| Ruler | A long one would work well. |
| Decorative elements | This will be everything that is planned to decorate the box: beads, rhinestones, small toys. Decorative elements can be made of wood, glitter, paper, foam. |
How much time will be spent on the box depends on the complexity of the master's idea, the convenience of all the prepared tools, materials, and also the size of the surprise.
Usually, the work takes about 5-6 hours. Therefore, you should not plan the creation and assembly of a gift at the very last moment, a couple of hours before the congratulations. Otherwise, it is unlikely that you will be able to carry out your plans.
If you want to end up with a perfect complex product, it is better to set aside several days for it. Then you can calmly pay attention to each individual detail.
First, you need to decide on the size of the future product. If you plan to put a gift inside, the base should be at least 3-4 cm larger than it. It is better to surround a very miniature surprise with shiny soft tinsel so that it does not move around the entire product.
Corrugated cardboard is recommended for the discussed box, as it is very light. As a result, the total weight of the surprise folding box will be small. You can take such cardboard from old boxes or buy special new sheets.
Bookbinding cardboard is somewhat heavier, but also convenient to work with. It is smooth, perfectly glued to the right places and holds the paper, thinner. Therefore, the product in the end turns out neat, beautiful.
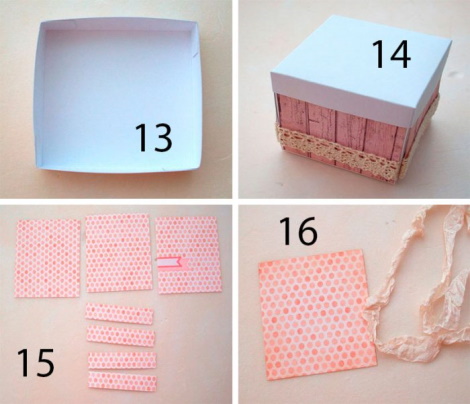
To make the basis of the surprise, you will need 5 sheets of the selected cardboard at once. They should be the same size. It is even more convenient to use one large sheet and then fold and cut out the product from it.
How to Make a Surprise Pop-Up Box
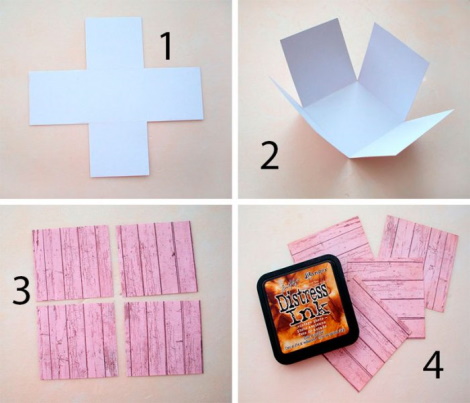
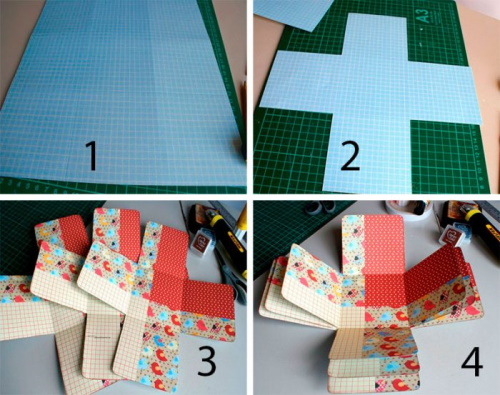
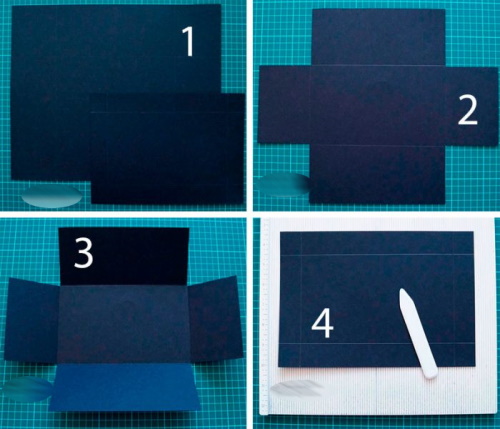
The easiest way to make a surprise box decorated with photos inside is to use a special pattern. Today, you can find it on the Internet in any size. Typically the diagram consists of 5 squares drawn on paper.
The first of them should be placed in the middle, the second and third to the right and left of the central one. The fourth and fifth are located above and below the central one. All squares should be even, neat and identical to the millimeter.
It is convenient to use a ready-made diagram from someone else. But if the manufacturer plans individual dimensions, for which it was not possible to find a drawing, then you can draw your own. For this you will need a convenient large ruler. It is allowed to draw the diagram directly on the cardboard from which the box will be folded.
If you have one large sheet of the base in stock, this is especially convenient. But you can also glue them separately. In this case, special attention will need to be paid to the seams so that the entire structure does not fall apart at the most crucial moment.
If you draw the diagram yourself, then each side of all five squares should be measured several times and try to make them the same to the millimeter. Otherwise, you will not be able to glue a neat box.
Manufacturing technique
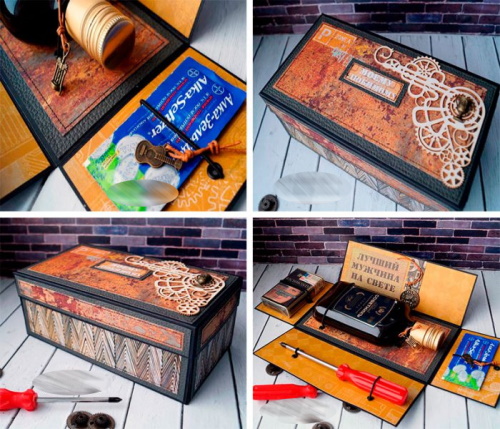
A surprise box with photos is created using a simple and clear scheme. It is advisable to take a base of thin cardboard at once, as well as additions to the walls from scrapbook paper. Today, there is a huge selection of the latter in stores. The cover of the product is also created from the same materials. The technique for making a miniature box will be described below.
Its height and width will be 7 cm. This is, for example, a great option for an engagement ring, a miniature sweet gift or another small surprise.
But if you want, you can increase the parameters of the product and make it any size you need - even 70 cm in height and width. Of course, in this case, you will need to find a very large sheet of cardboard or glue several separate ones at once.
Box
First of all, you need to lay out a sheet of cardboard for the base of the product on a comfortable, hard horizontal surface. It is convenient to do this both on a table and on the floor.
Next comes:
- Draw a cross of five identical squares on the base, as described above in the diagram. The workpiece should be such that when all the parts are folded, they fold into a neat base box.
There should be no holes between the walls. Be sure to check that the height of the parts is the same to the millimeter. Otherwise, it will be inconvenient to close the box. To get a product measuring 7 cm, each of its parts should have the same width and length.
- It is recommended to draw the folds on the workpiece with a non-writing pen or other similar accessory. After that, it will be convenient to lift the resulting squares up and form a box.
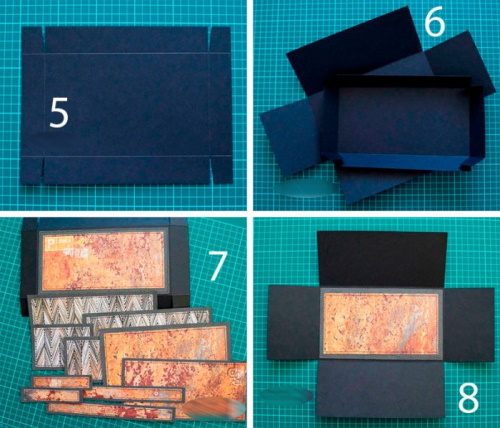
- From the decoration sheets, you should cut out 4 separate squares. The length of each of their sides should be 6.8 cm. These will be the details for decorating the walls of the surprise box.
It is especially convenient to make them from scrapbook paper. It is allowed to take a sheet of one color, or use 4 different ones at once to make the edges thematic. These blanks will be for the front side of the surprise.
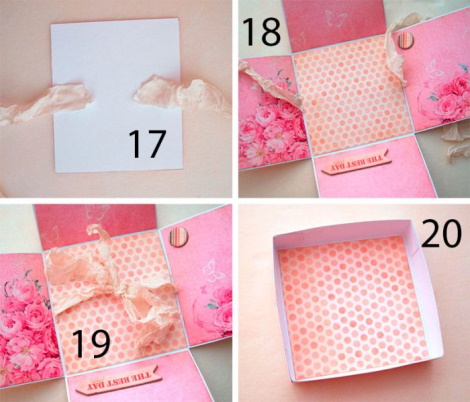
- The edges of the base squares and cut out parts need to be tinted with a dark color. Black ink works well for this. For example, you can take a marker or a regular gel pen.
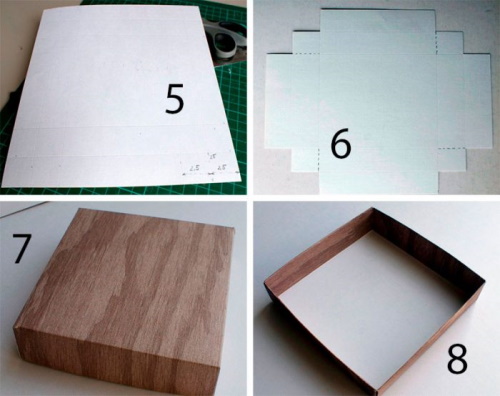
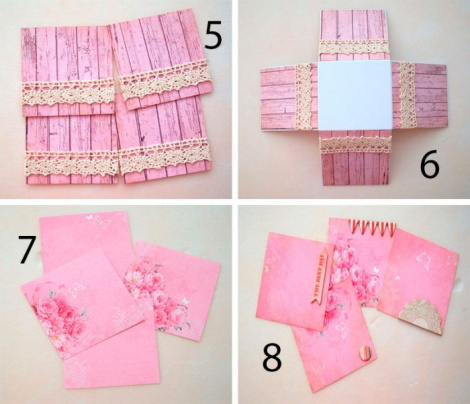
- The resulting four squares of scrapbook paper should be glued to the walls of the box from the front side. It is convenient to do this with high-quality glue. It is better to leave the scotch tape for decorative details.
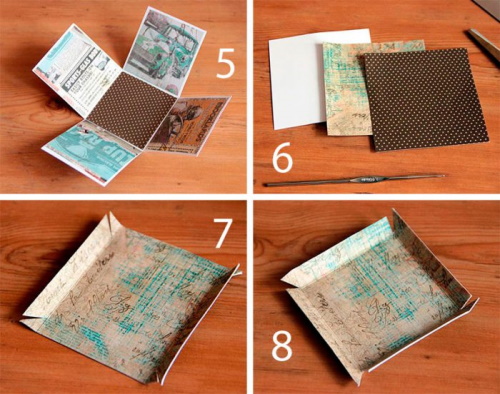
- Afterwards, you can work on the inside of the product. In this case, you will need 5 identical squares for decoration. After all, you will also need to fill the bottom of the workpiece. You can cut out squares from any other scrap paper. Again, they can be made both identical and different for each part. The size of each side is 6.8 cm.
- All that remains is to tint the edges of the squares and then cover the inner walls of the surprise box.
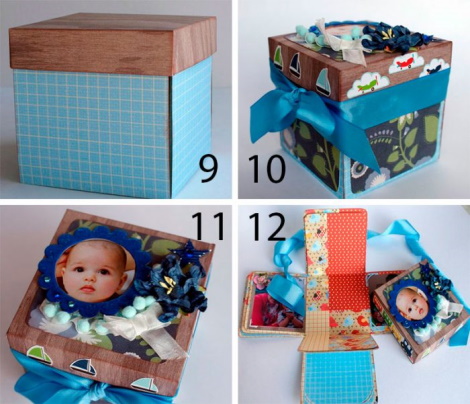
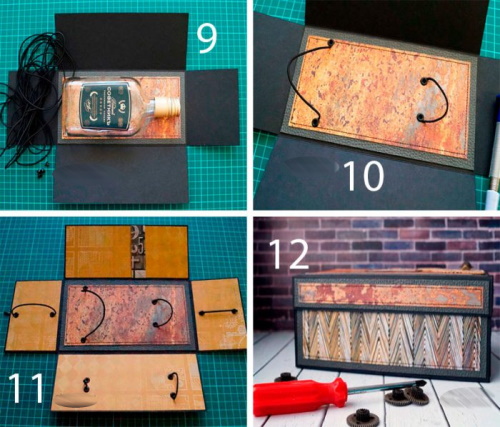
- Miniature photographs will be attached to the walls with scrapbook paper. They should be smaller in size than the background.
If the box is being prepared for a friend, you can choose joint photos, reminders of some funny events from life. A daughter or son will certainly be pleased to receive a box from their parents, decorated with their photos from different years of life.
- To make the photos on the walls look neater, it is worth using special bright corners. Both color and black and white photos will look equally good in the box.
To tone the edges, you can use not only dark colors, but also those that match the scrapbook paper used. For example, pink, lilac. The main thing is that there are no light parts left and it is not visible that cardboard was used underneath. Otherwise, the product will not look very neat.
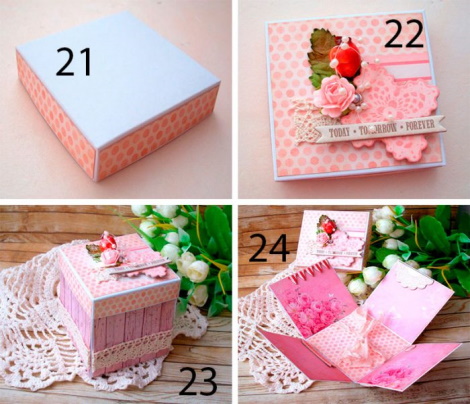
Lid
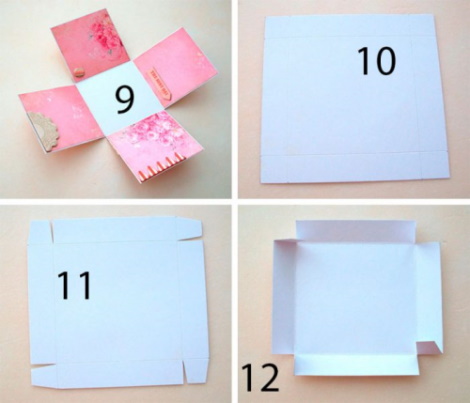
The lid for the surprise box can also be made very quickly and easily. You will need a separate sheet of thin cardboard for it. If desired, you can also use corrugated cardboard for all parts.
The first thing you need to do is cut out a square, each side of which will be 10.1 cm long. Then you can draw the sides of the future lid. It will be put on top of the box and held in place thanks to the resulting folds. Each side of the lid will be 7.1 cm. And the height is 1.5 cm.

Afterwards, you can cut out the workpiece, but you need to do it in a special way:
- The first movement of the scissors should be to make a line from the base of the future lid to the end of the part that will bend downwards. Here you need to cut the cardboard not evenly, but to create a trapezoid at the end of the side strip.
On the reverse side, the end of the bend should be smooth and straight. Each part that is planned to be bent is processed in this way - on one side, a smooth line, on the other - a trapezoid. This will allow you to securely fasten the sides of the future cover.
- Once the second piece has been cut out, you should draw the fold lines with a non-writing pen, fold and glue the lid.
- It remains to cut out the details for decoration. It is best to decorate the lid with scrapbook paper as well. You will need to prepare the bases from it - three squares with sides of 6.9 cm. And also - ends - 4 pcs. with dimensions of 6.9 by 1.3 cm.
You can use scrapbook paper to decorate only the front part of the lid or also the inside. In the second case, you will need more parts. You need to glue them all onto the lid and let the blanks dry completely.
Decorating ideas
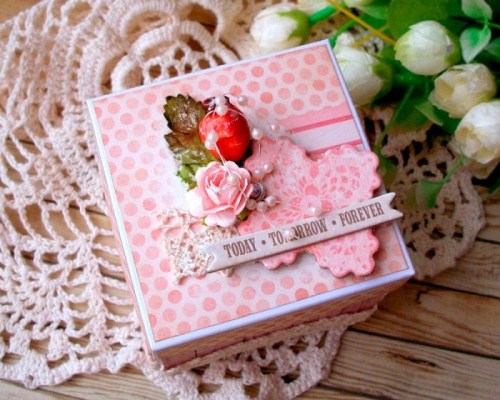
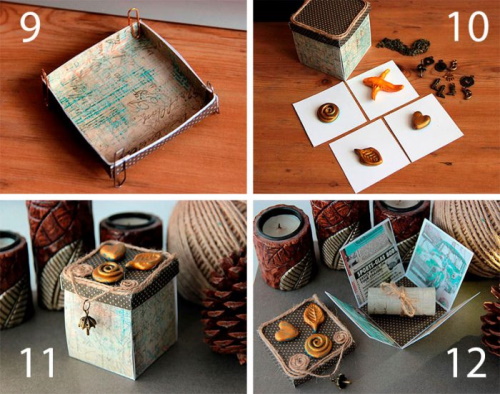
A surprise box with photos will be especially bright and interesting if you carefully take care of its decor. In general, beautiful and correctly selected scrapbook paper already solves the problem halfway. But you can additionally take care of the external and internal decor.
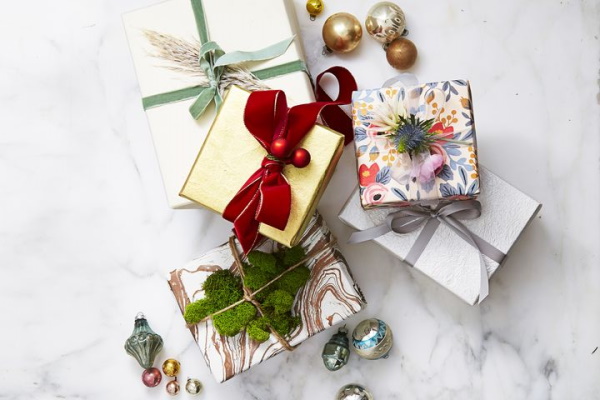
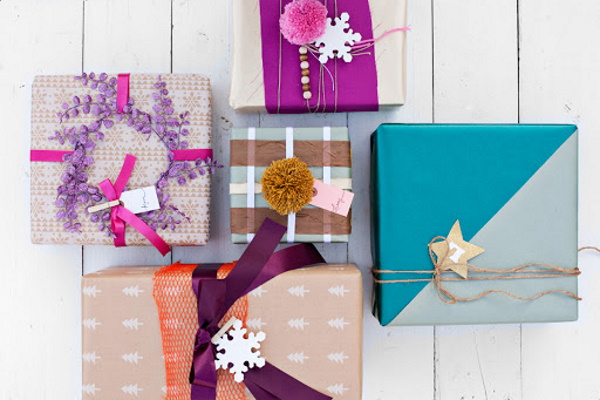
Pieces of lace, ribbons of a suitable shade, dried flowers and berries are perfect for decoration. Any cardboard figures and even miniature toys are allowed. It is convenient to glue all the selected items with double-sided tape.
You can even attach small sweets to the walls of the box next to the photographs. Let these be miniature chocolates, boxes of dragees, or the hero of the occasion’s favorite candies.
The sweet gift can be placed even in the middle of the box, if it is planned to be the basis of the present. Then, upon opening the product, the birthday boy will see a dessert-gift in the middle, as well as cute touching photos around.
Instead of sweets, you can use inscriptions to decorate the surprise. They should be printed on photo paper in advance. Inscriptions are beautifully made on backgrounds in the form of hearts, arrows, ribbons.
To make your task much easier at this stage, you can use stationery stickers. Today, they are sold with a very interesting design. Such stickers will be located next to the photos on the walls of the box. You can write congratulations, warm words, declarations of love on them.
If you plan to give money in the box, then the same theme will be relevant to use in the external design of the product. For example, choose scrapbook paper with dollars or use bills from a joke shop.
It is always appropriate to use ribbons when decorating a surprise box. You can tie the box at the top with a wide and long piece of it. Then the recipient of the gift will first untie the beautiful ribbon, and only then open the product with a surprise.
A surprise box decorated with photographs inside will be a wonderful gift for any occasion. You can give it to a loved one or just to lift their spirits.
Video about the gift
Surprise box with photos: