Scrapbooking allows you to create and design original photo albums with your own hands. This technique appeared around the 16th century, when notebooks for recording recipes, useful tips, and important events were in high demand.
At the end of the 17th century, books with additional blank pages began to be published so that notes could be added or pictures pasted in. This period is considered to be the birth of scrapbooking.
Necessary materials and tools
After choosing the design style and theme of the album, it is recommended to prepare the necessary tools with materials. It is permissible to purchase a set for designing a composition in the store. However, the product will be more original and not very expensive if you use improvised means.
Required materials and tools:
- thick white cardboard with sheets of paper;
- rings or ribbons for binding;
- paints with pencils;
- small scissors with a hole punch;
- Scotch tape with glue and a ruler;
- stapler with a stationery knife;
- cover material and soft lining.
When decorating a photo album, it is recommended to use additional decorative elements in the form of locks, beads, chains, leather or fur details, and lace. Each detail should match the style in which the composition will be designed.
Design style
Album scrapbooking hand-made must correspond to a certain design style. At the same time, such style must be displayed on each page of the product.
American style
The American style is considered a classic way of decorating a composition using scrapbooking technique. Each page of the product should be made in the form of a collage and contain photos that will correspond to the theme of the album.
In this case, inscriptions, paper cutouts with illustrations of clocks, buildings or other details that match the theme of the composition are suitable.
Each page of the product should have a certain color, reflecting the mood of the event being described.
It is permissible to additionally place tickets in the album, with the help of which a person could go on a trip, from which he brought back many impressions and emotions.
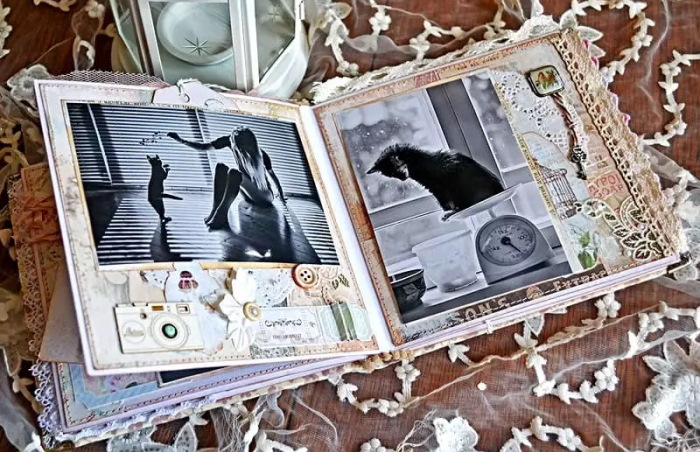
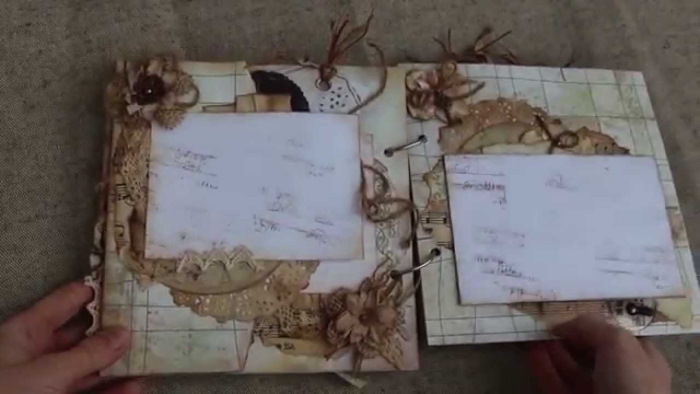
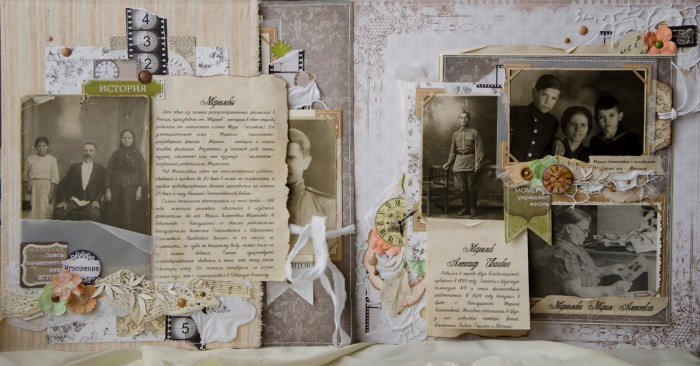
Vintage
The vintage style of design has several features that you should be familiar with before designing your album:
- The pages need to be artificially aged to make them look very old. To achieve this effect, it is acceptable to stain the sheets of paper with strong tea or coffee.
- Each decorative element must match the chosen style.
- To create pages, it is acceptable to use textured wallpaper in beige tones. The edges of the paper can be cut unevenly, bending or crumpling the corners. In this case, the edges can be painted in a darker shade than the main field.
- For decoration, you can use paper embroidery, paper or fabric flowers, lace, and bows.
- When creating a vintage style product, it is advisable to take photos in black and white, creating distressed edges.
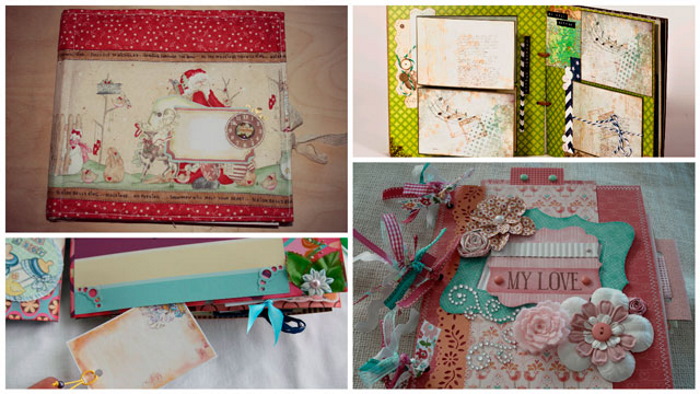
European style
The European style, unlike the American one, will be minimal and more strict. Often, such stylistics is used when designing small compositions. When planning each page, a small number of decorative details are used.
In the European style, much attention is paid to illustrations that were made with a pen or pencil. Graphic drawings must be pasted into the album to give visual volume to the composition.
Individual sections of the pages need to be decorated with a shaped hole punch or an ornament that needs to be cut out along the paper border.
Often, the European style is used when decorating a New Year's gift, where you can combine decorative accessories with voluminous details of winter nature.
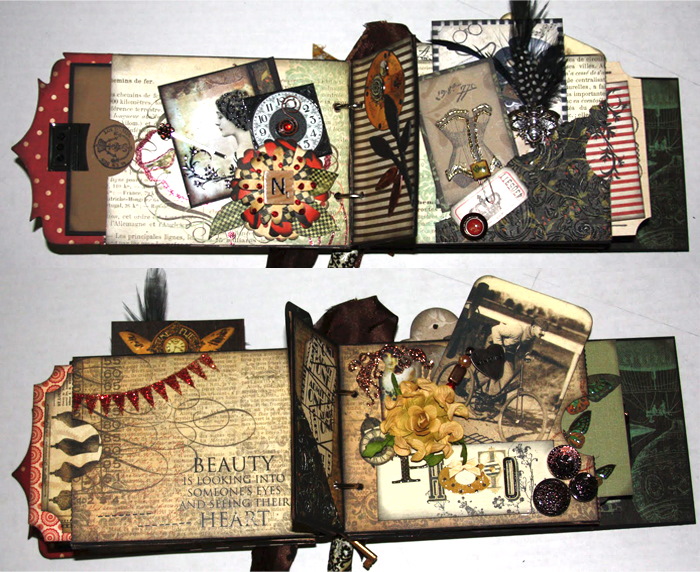
Steampunk
It is acceptable to design a DIY scrapbook album in the steampunk style if the product is to be given to a man. This is explained by the fact that lace with ribbons, beads and flowers are not used in the design of the composition.
Steampunk is characterized by brutal design, so drawings, small mechanisms from old things, and gear-shaped parts are used for decoration.
Most of the decorations should be placed on the cover. The album pages should be minimally decorated.
The album should be designed in brownish and greyish tones.
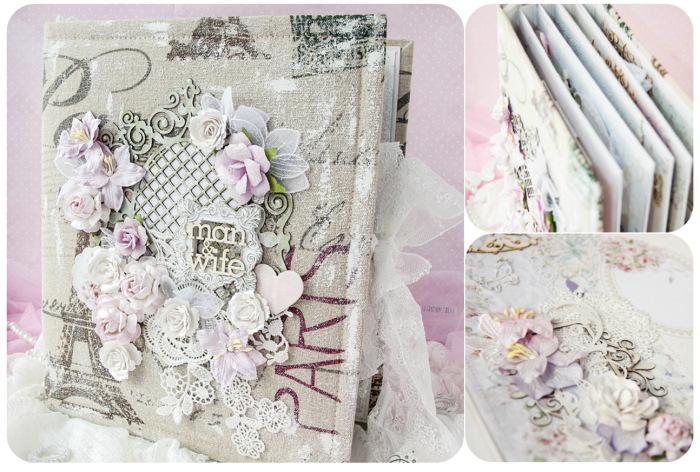
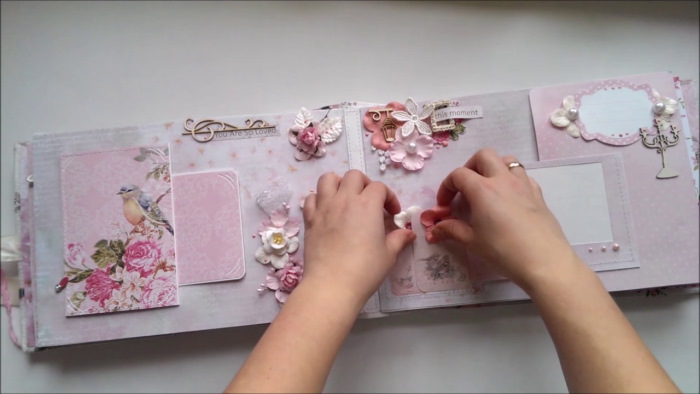
Shabby chic
When choosing this style of decoration, it is necessary to use a variety of decorative details with a pattern of stripes or polka dots.
This style is characterized by a simple base background with layering, which can be patterns with beads, illustrations and lace of various parameters.
To create an album, it is necessary to use light pigments.
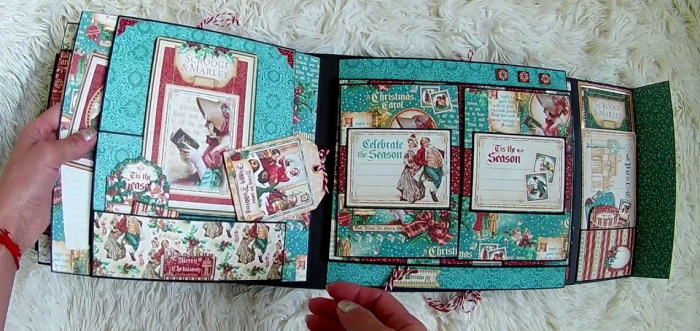
Pop-up
The Pop-up style is in great demand among the masters who are engaged in scrapbooking technique. The idea of this style is to design a three-dimensional composition on each album page.
To decorate a craft in this style, it is acceptable to use a variety of pigments.
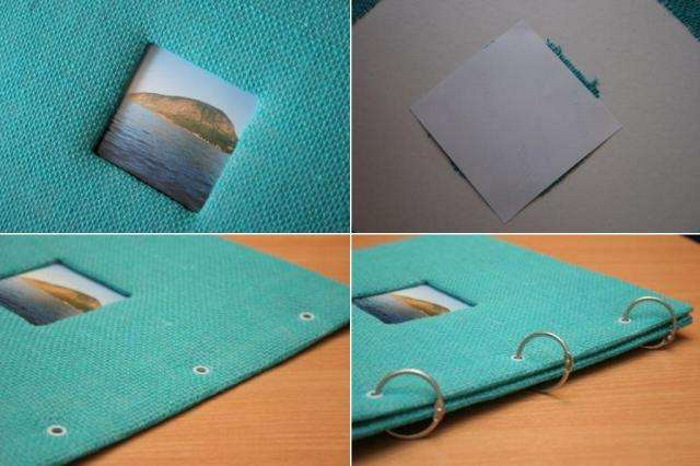
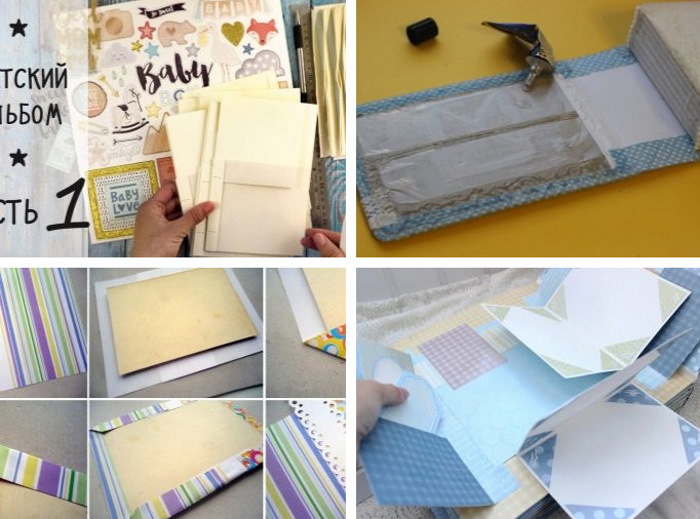
With binding
A DIY scrapbooking album needs to be designed with binding. In this case, you will need to prepare a thick paper sheet with gauze material and piping. Additionally, you will need to use scissors with glue, pages and a ready-made cover.
For easy assembly of the composition, it is recommended to use rings, but for this you will need to prepare a hole punch with the appropriate parts. If you do not want to make the base yourself, you can buy a ready-made set of various parameters in the store.
The rings can be replaced with a satin ribbon or a book binding can be created. In this case, it is necessary to prepare beer cardboard, which will serve as the basis for the pages.
Step-by-step instructions for binding will allow you to create a dense, even and beautiful album:
- To create the base, cut the prepared sheet of paper to the size of the pages, for example, 20x20 cm. To connect the paper bases, make 11 strips of similar paper, 3.5 cm wide and 20 cm long.
- Create a center on the lower and upper sections of the strip, leaving 1.5 cm on the sides. The central area should be 5 mm.
- Using a knitting needle or sharp needle, draw a fold line along the pencil marks. Using a pointed object with a ruler, draw a slit line along the pencil marks.
- Cut the ends of the strips at the bottom and top at a 45° angle and bend along the outlined edging.
- Grease the side area from the inside of the strip with glue and join it to the first page. Glue a similar strip to the second sheet of paper.
- Glue the next strip on top of the 2nd sheet, and fix a new paper sheet to it. Design the entire composition according to this scheme. After gluing, the structure should dry well.
- Cut out a piece of gauze, leaving a 1.5 cm margin on each side of the material. Grease the binding with glue, leaving 1 cm from the bottom and top. Glue the gauze piece on top.
- Cut 2 small pieces of binding. Glue the lower and upper sections of the fabric binding that extend beyond the composition inside. To originally design the edging, cover the material on top with binding, processing the lower area of the binding in the same way.
- When creating a paper spine, its width should be 3 cm larger than the binding, and its length should be 0.5 cm. Make marks on the blank at the top and bottom, stepping back 1.5 cm, as well as a slit for the bend. Line the central part by 0.5 cm, pressing each line to obtain a smooth bend.
- Place the finished spine on the fly and cover it with the cover. Grease the gauze piece with glue and apply it to the product. Perform similar manipulations with the spine, fixing it to the gauze piece.
- Fix the cardboard sheet over the area of the cover from the inside, where the material is visible. Treat the back area in the same way.
Once the base is prepared, it is permissible to move on to decorating the pages.
Design ideas and themes
It is very easy to create an unusual photo album with an existing idea for decoration and the availability of materials and tools.
A DIY scrapbook album should correspond to a specific theme or memorable event, for example:
- graduation from school or kindergarten;
- birthday;
- vacation;
- birth or first year of a child;
- wedding.
The topic can be anything. The main thing is that it is acceptable to convey impressions or events that could be remembered for a long period of time.
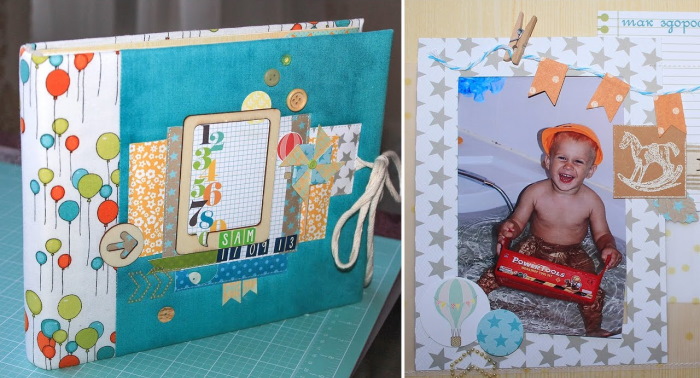
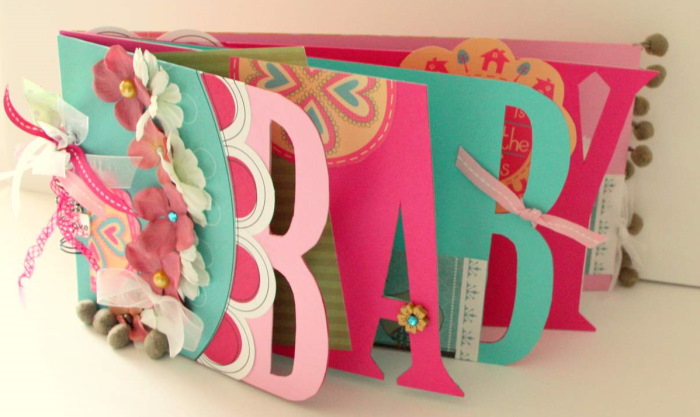
Album for a newborn
To design a newborn album, it is recommended to use soft materials with beautiful decorative elements. To create a cover, it is advisable to use velvet or velour material in pastel shades.
Recommendations for creating a composition:
- For decoration, it is permissible to use any technique, drawing ornaments, cutting or crushing corners or gluing appliqués. However, it is necessary to include headings in the form of weight, height, date of birth of the child, shots of discharge from the maternity hospital, first steps, as well as pictures with parents. It is also recommended to add shots of the first birthday with a footprint with a palm.
- To prepare the pages, it is advisable to choose thin cardboard or thick sheets. To paint them, it is recommended to use gouache. However, it is necessary to take into account that after drying, the tone of the paint will become lighter. It is permissible to add a few drops of PVA glue to the gouache so that the pigment does not smear from the paper after drying.
- It is acceptable to paint the sheets of paper in one tone or divide the first 12 months of life into stages using different pigments.
- If desired, it is permissible to include in the composition an ultrasound image with a pregnancy test with a positive result.
Photos with drawings must be signed and commented on. This must be done by parents.
Wedding album
Beginners are advised to familiarize themselves with simple instructions for designing a wedding photo album:
| Details | Design Features |
| Decorative design | If photos alone are not enough, it is acceptable to use various details in the form of pieces of veils, napkins, parts of festive decorations with lace, sequins, beads and ribbons. |
| Name | The cover must include the names of the spouses and the date of the wedding event. It is also acceptable to use famous quotes to design the title. |
| Cover | For decoration, it is acceptable to use any elements, for example, butterflies with flowers, white doves or wedding rings that are connected together. Additionally, you can add photos of the newlyweds. Thanks to such recommendations, you can plan the theme of the album in advance. |
| Photo captions | To caption the photos, you can use poems, quotes, or lyrics from songs that match the wedding theme. |
| Pages | It is better to arrange the photos in chronological order. It is also acceptable to include a detailed story and unusual fairy-tale plots in the illustrations. However, there should not be many small photos on one page, as this will distract the viewers' attention. One page should be blank so that guests can leave wishes for the spouses on the day of the celebration. |
When creating a wedding composition, you do not need to use a lot of decor with auxiliary elements, because the main emphasis should remain on the photos.
Family Album
To create an album by hand, it is not necessary to use a specific event, it is acceptable to tell about family life. In this case, several sections will do:
- Acquaintance. Photographs can be used to tell about where and under what circumstances the newlyweds met, how their relationship developed and how their first joint events took place.
- Family life. This story can be started from the wedding date. Such photos should tell in general terms about the wedding, the newlyweds and the guests who were invited.
- Pastime. You can make a separate section for photos of family traditions with holidays and shared trips.
- Stage of pregnancy and children. It is important to talk about children, their birth, further growth and development. The composition must necessarily include many general shots.
- Cohabitation. With the help of photographs, it is possible to tell about everyday family life, how repairs were carried out or preparations for a festive dinner took place.
For my birthday
A scrapbooking photo album is considered a good birthday present. In this case, the decoration of the cover with pages will be based on the birthday boy's hobbies and interests.
Additionally, it is necessary to pay attention to the family status and profession of the person. When designing the composition with your own hands, it is necessary to make envelopes or pockets for photos of different sizes so that the person can add photos to the album themselves.
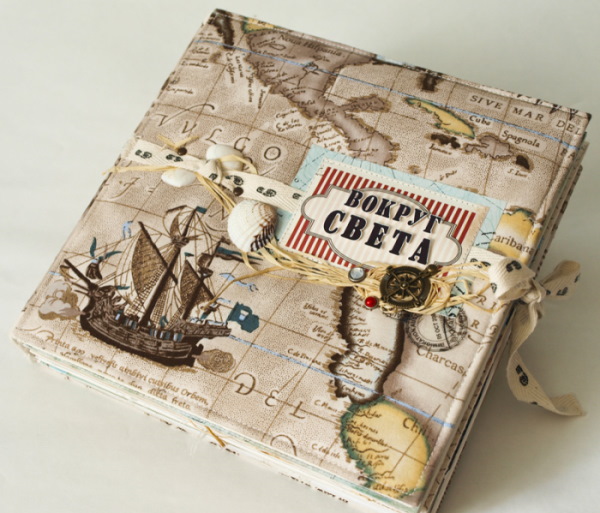
Journey
After a trip or vacation, you are left with many great photographs that can be used to create a collage or a chronicle of impressions with new places you have explored.
To decorate the album, you can use small flat souvenirs, branches of unusual plants, dried flowers or shells that were brought back from vacation.
School
An album with school photos gives the opportunity to refresh the memory of the faces of teachers and classmates. Such a composition must necessarily include general classic photos, where the students are all together in the assembly hall, in the school yard and in the classroom.
The album may contain personal photos of the child. To complete the school version of the composition, you can add pictures from the graduation party, indicating the year of graduation with the school and class number on the cover.

To other events
Thematic albums of handicrafts, culinary recipes, student, athlete or about the end of military service can be attributed to other events. It is also acceptable to design a New Year's chronology of different years, so that there is a chance to trace how a person changed with the New Year's entourage around.
Beginners are recommended to use ready-made page templates to decorate an album using scrapbooking technique. In this case, sketches with a ready-made sample of the arrangement of illustrations, advice on design, material and shade will be suitable.
With the mastery of this technique and the acquisition of experience, it is permissible to create various compositions with your own hands, acting not on prompts, but relying on your own style and taste.
Video on how to make a scrapbook album with your own hands
In the video you will learn where to start for a beginner, about the choice of scrapbook paper and cardstock. About glue and tools, as well as small tips on where to buy all this.